

This website may contain links as part of the Amazon Affiliate program, which means when you click a link and make a purchase through my website I may earn a small commission at no additional cost to you
We’ve all heard the term “easy as pie”?
Yeah well to many people pie may not be so easy after all!
Here are some tips on how to bake the best vegan pie crust.
Let’s master some of the areas that cause the most problems when making a homemade pie crust!
There are 2 kinds of pies, 1 that we call “cold preparation” and one that we call “baked preparation”
What I mean by “cold prep” it is basically a pie filling that is not going to be baked in the crust but rather poured into the baked crust
For example: Chocolate Cream, Banana Cream, Coconut Cream or Summer Fruit Pies just to name a few.
For this style pie, you will have to pre-bake the crust first
Also known as Blind Baking the pie shell
I use dried beans or rice as my pie weights and a piece of parchment paper to make sure my dough doesn’t go flopping!
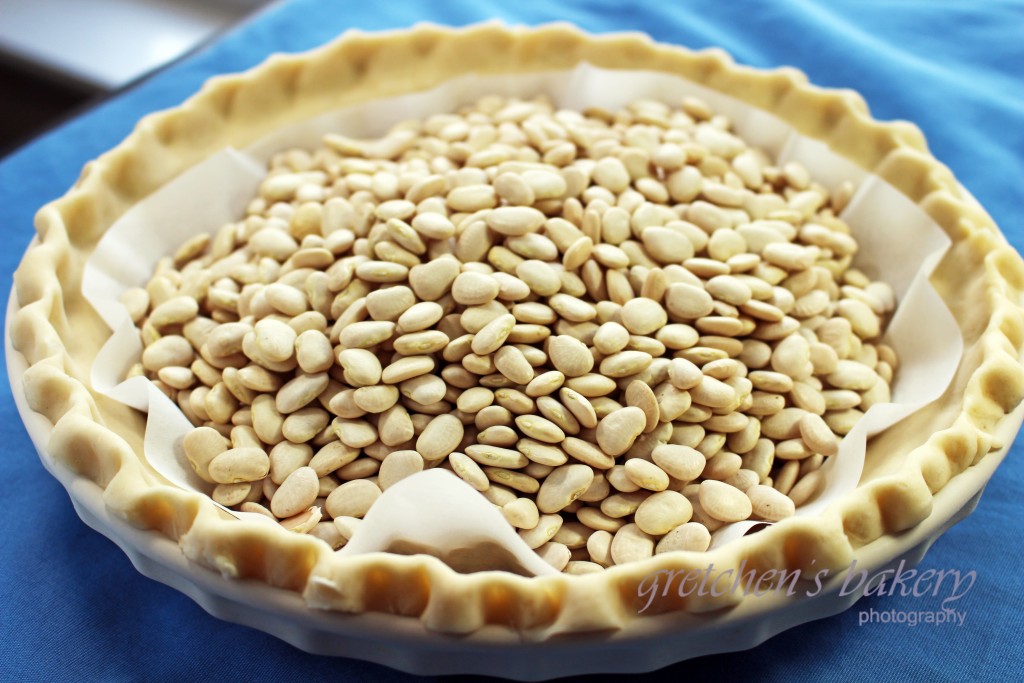
To fully blind bake a pie crust it will usually take about 20 minutes on 350°F
Then I will remove the parchment paper and beans or weights and bake it for another 10 minutes longer depending on how brown I want my crust to be.
For a semi blind baked crust I will only bake it for about 15 minutes just enough to set the crust and get a good head start on some bottom browning before I pour in my filling to bake the rest of the way.
In my opinion, pouring filling into a raw pie shell and baking it altogether will often times leave you with a soggy bottom crust.
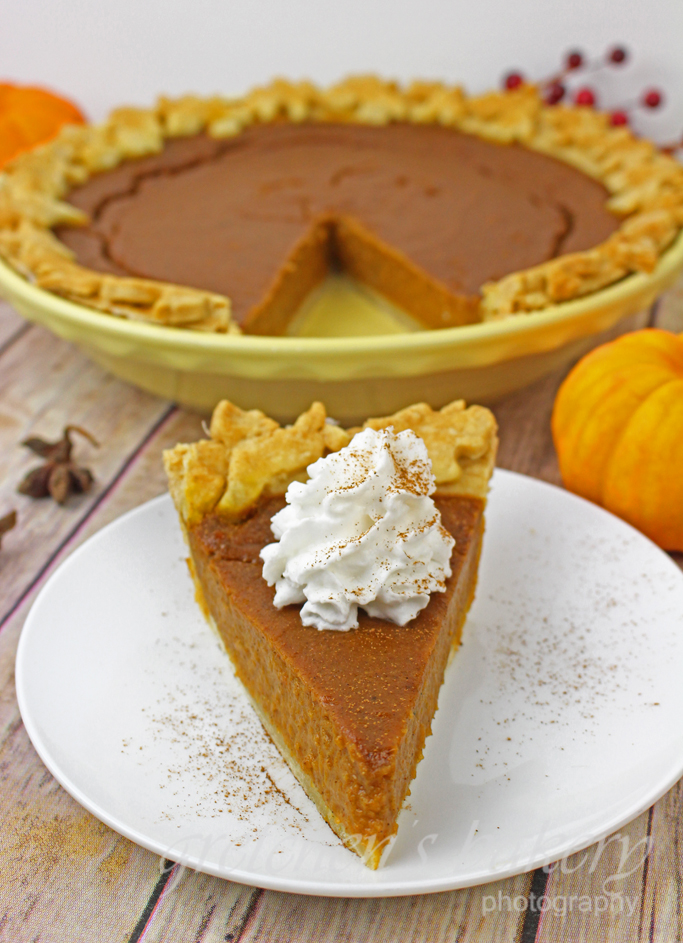
Especially in the case of liquid fillings like pumpkin pie.
That liquid filling makes it near impossible to ever bake the bottom crust properly.
When I owned my bakery many moons ago, I had what is called a “deck oven” more commonly referred to as a pizza oven.
You know, the kind the guys at the pizzeria use everyday and bake your pizza directly on the”deck” giving your pizza a nice browned crispy crust on the bottom.
Well, that kind of oven is superior for not just Pizza Pies, but bakery pies too!
Now of course we don’t have deck ovens in our homes
So I recently came up with an idea to simulate the professional bakery oven and that is: baking your pie on a pizza stone.
Simply get your oven preheated to whatever the recipe calls for WITH THE STONE IN THE OVEN to get it nice and hot!
Then bake your pie directly on the stone and you will have a nicely browned NON-soggy crust for all your pies!
Alternatively, for those who do not have a pizza stone, you can go the method of blind baking the crust first, but not all the way- just until it is starting to turn pale not even golden
Then add the filling, top with your other pie crust if you are using one, and that’s it!
*Note:
In the case of an apple pie though or a 2 crust pie (where there is a top and bottom crust) I don’t typically do a blind bake at all.
These types of pies will almost always take close to 45 minutes or more to fully bake so it is not necessary to do a blind bake and the pizza stone method really does a great job!
CLICK HERE FOR THE FULL VIDEO TUTORIAL FOR HOW TO MAKE THE PERFECT PIE CRUST
In the video tutorial I make the dough in a food processor but you can do this all entirely by hand

The Best Vegan Pie Crust
Ingredients
- 2 cup All Purpose Flour (250g)
- 2 Tbs Sugar (28g)
- ¼ teaspoon Salt
- 6 Tbs Vegan Butter Cold ~frozen (85g)
- 4 Tbs Solid Coconut Oil~frozen (56g)
- 2 Tbs Liquid Vegetable (30ml)
- 3 Tbs Cold Water (45ml)
Instructions
-
First get the vegan butter & shortening or coconut oil to the freezer while you measure the rest of the ingredients.
-
Combine the flour, salt, sugar in a food processor (or you can mix the entire recipe by hand with a pastry cutter or fork) process to distribute the ingredients evenly.
-
Dice or shred the cold vegan butter & the shortening or coconut oil & add to the flour in the food processor, pulse until it is mealy & course crumbly texture.
-
Add the cold water & the liquid oil through the feed tube while pulsing then process until a soft crumbly dough forms. *see video visual
-
It will be very crumbly & seem very dry this is good! Turn it out onto a lightly floured surface & gather the dough together to a soft ball that stays together. (If you have to use wet hands or a Tbs of water this is ok!)
-
Wrap in plastic & refrigerate for an hour to relax the dough & to allow the flour to absorb through.
-
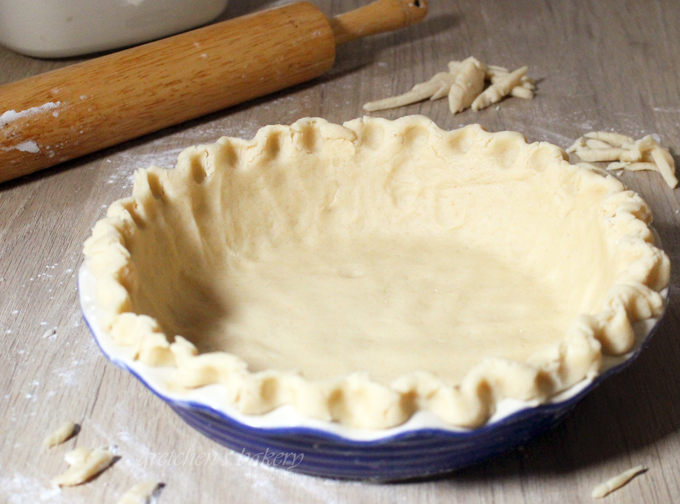
Once chilled, roll the dough on a lightly floured surface (this dough is much easier to roll between 2 pieces of parchment or wax paper) to about 12″ diameter (¼” thick) and line your pie plate. Trim the excess & re-roll to cut out the optional leave shapes to adorn the rim of the pie.
Notes
Storage: Pie dough is best rolled out and formed into a pie shell, then frozen or used right away