

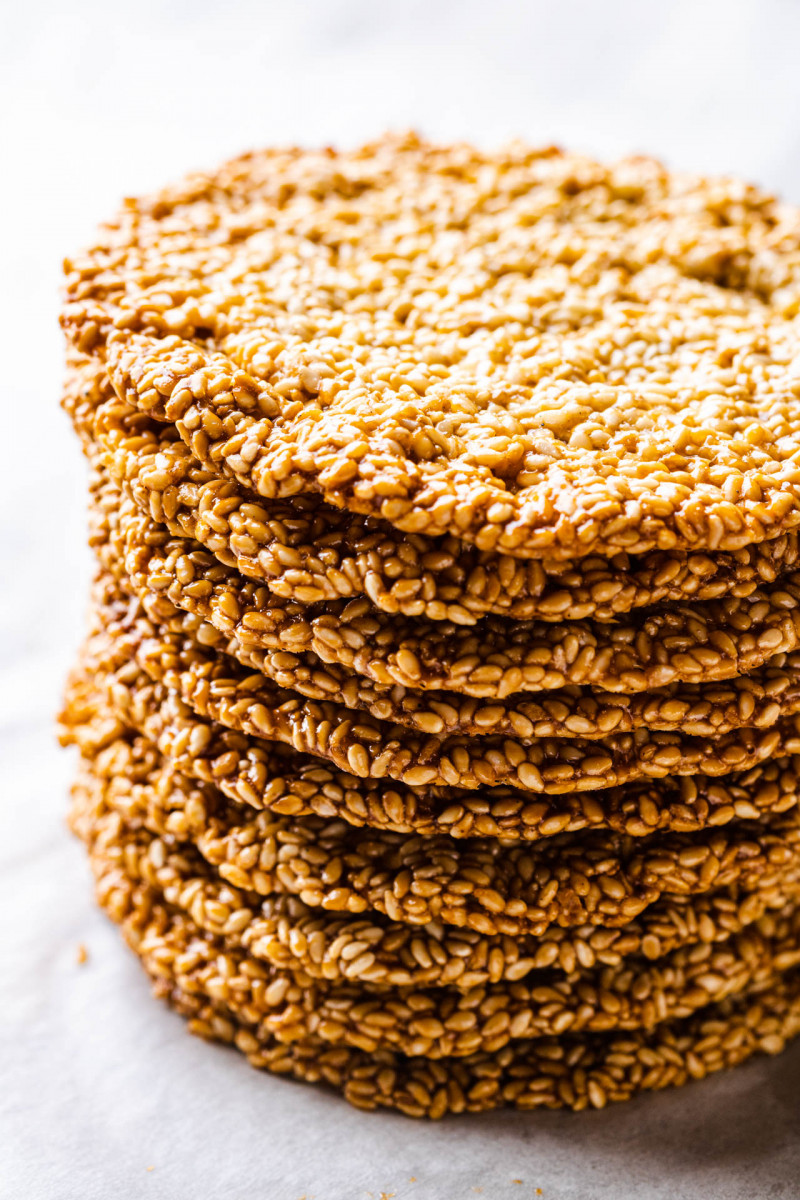
My today’s recipe is an emergency sweet treat – crispy sesame snaps that are quick and easy to make and really satisfying to nibble on thanks to that iconic crunch.
These sesame snaps contain very few ingredients and the ingredients you probably already have in your cupboards, which is why I referred to them as an emergency treat. You know when it pouring down outside yet you have an unrelenting craving for something a little sweet?
You check the cupboards and you have a jar of tahini, a bottle of maple syrup and a bag of sesame seeds begging to be used up…that’s when you whip these up. You can make half of the recipe if you just want to get a little taste, but you’ll soon be wishing you
had made the lot as they are mighty addictive – on my third as I type this. Anyway, I hope you’ll enjoy these as much as we have!
MORE ABOUT THE INGREDIENTS
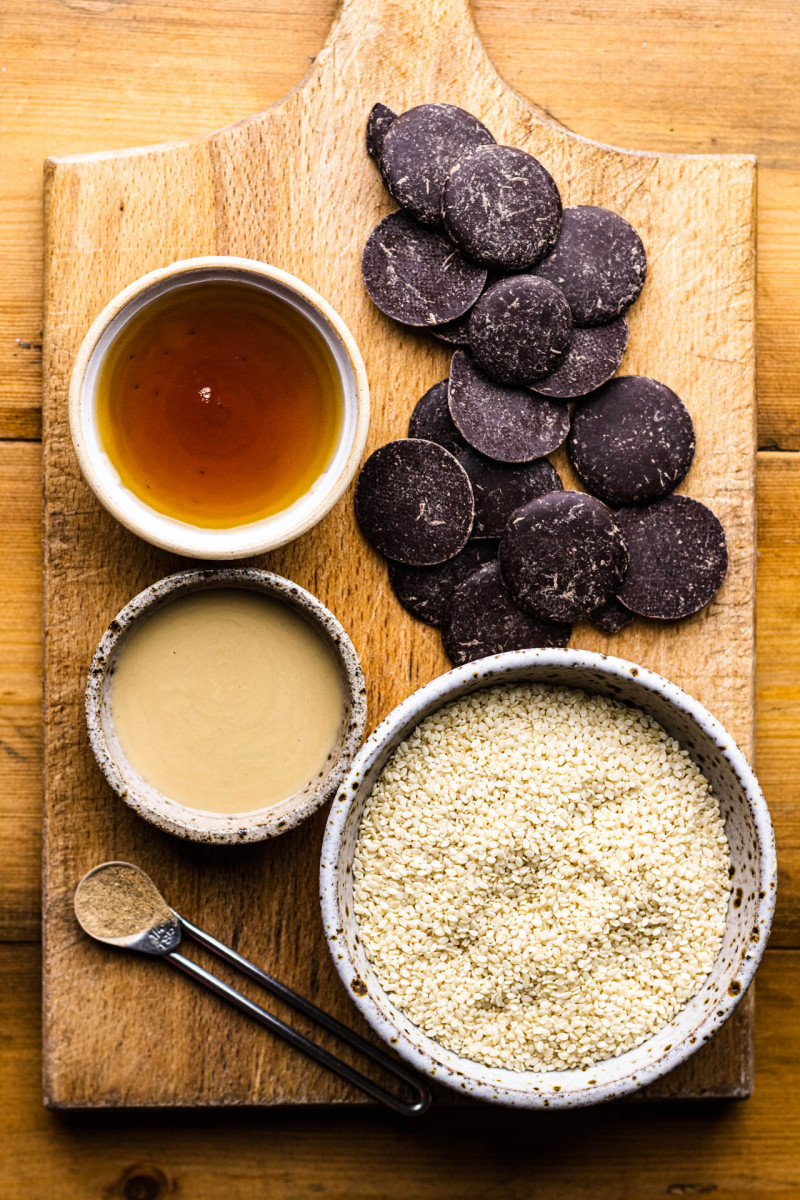
SESAME SEEDS: Sesame seeds are the key ingredient in these sesame snaps. Ideally you want them toasted lightly for a better flavour. You can probably buy them already toasted, but I recommend toasting them yourself. It’s easy and quick and you have full control over the level of doneness.
MAPLE SYRUP: I used maple syrup to provide sweetness to these sesame snaps and to bind them into crispy discs. Other liquid sweeteners should work equally well but as they viscosity may be different, you may need to adjust the amount of sesame seeds you use.
TAHINI: I added a couple of tablespoons of tahini, which is made from sesame seeds too, for better flavour and better, more tender texture.
CARDAMOM: Cardamom is an optional addition, but it really works here in my opinion. If you like it add, otherwise skip.
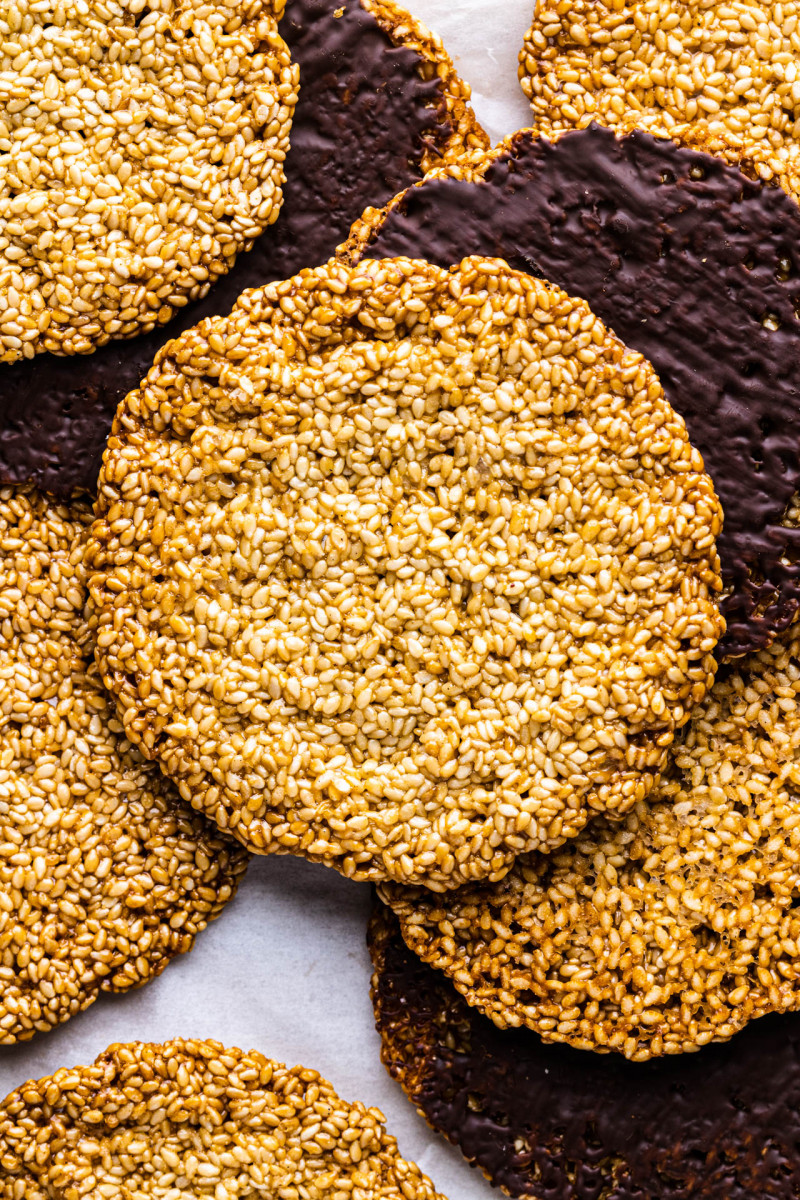
CHOCOLATE: While traditional sesame snaps aren’t coated in chocolate, I like a think coating of dark chocolate on these. Feel free to try it and see how you get on.
HOW TO MAKE IT?
1) TOAST SESAME SEEDS
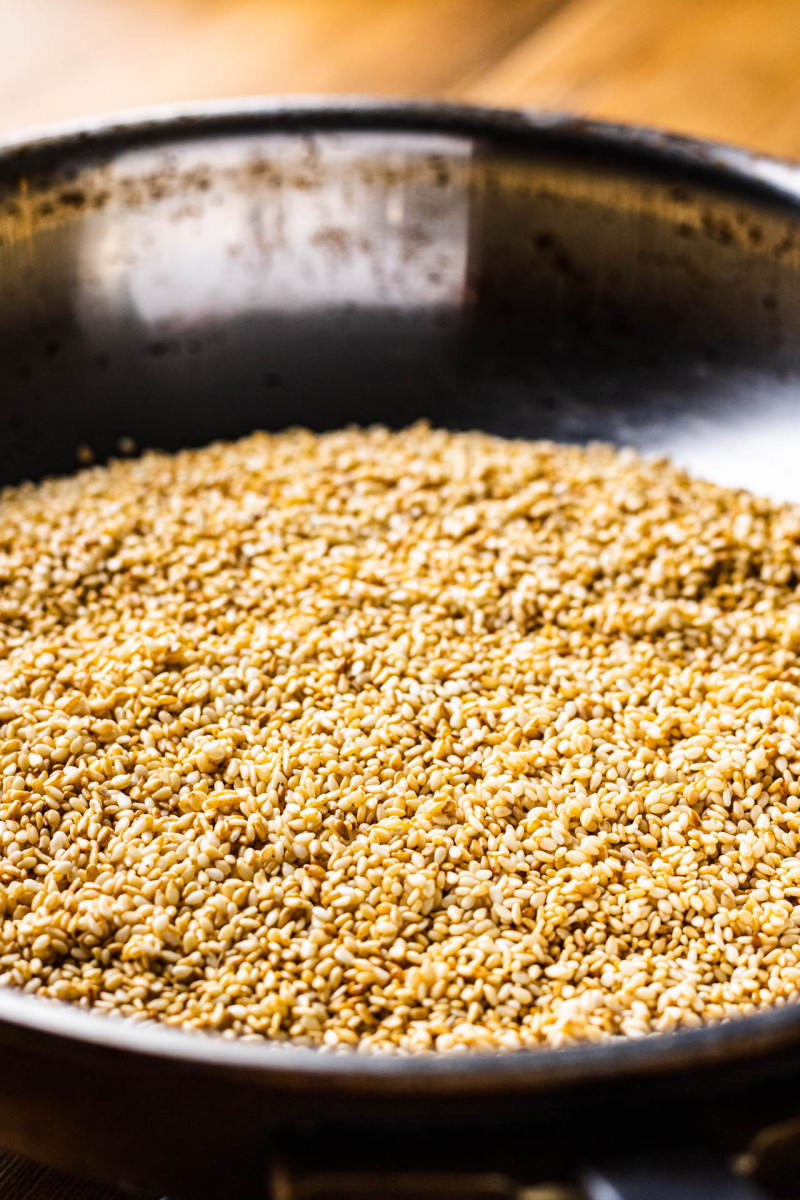
The first step is super easy. All you need to do it to put all of the sesame seeds in a dry frying pan and toast them until just golden. Be sure to use low heat and to stir them often, especially after they have been in a pan for a while, so that they don’t get too brown / burn.
2) MIX ALL OF THE INGREDIENTS
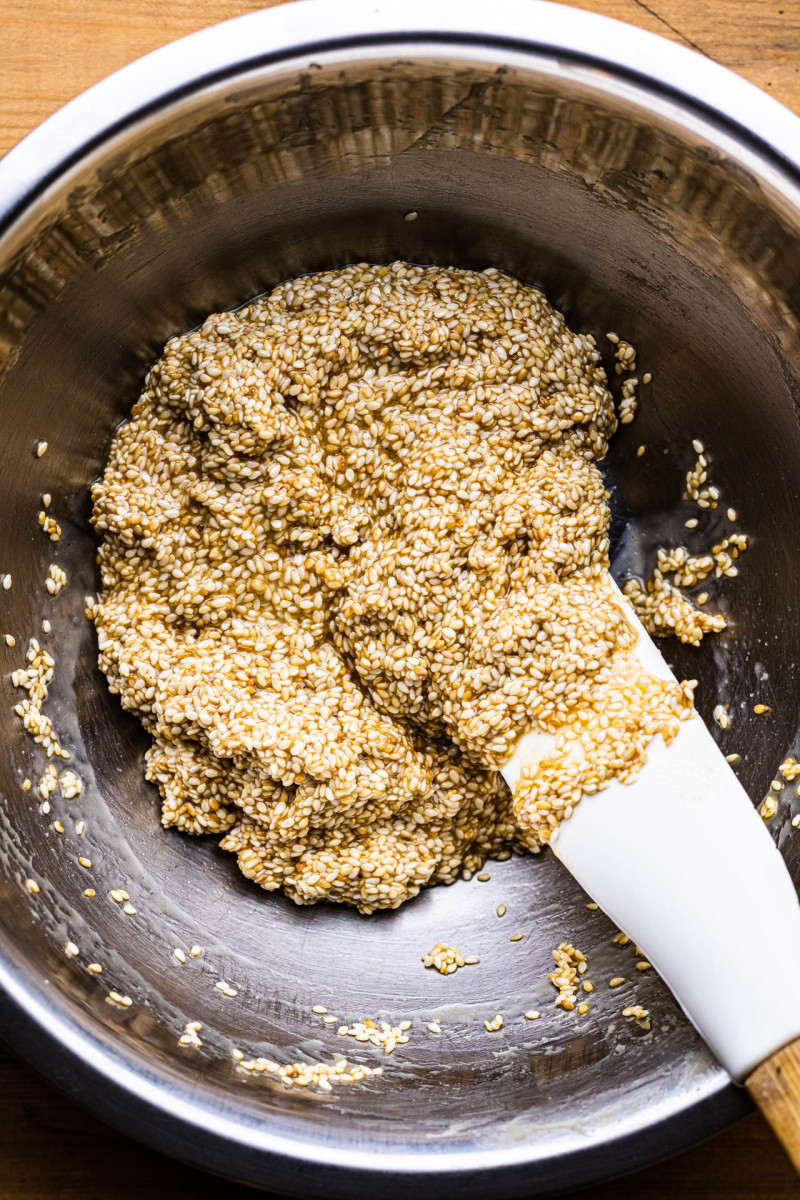
Combine all of the ingredients, including toasted and cooled sesame seeds, in a mixing bowl. Start off by mixing maple syrup with tahini, then add salt and sesame seeds. Stir well to coat and you should end up with sticky and thick mixture. It should be spreadable but not runny, barely falling off a spoon. If it’s too runny add a bit more sesame and mix again.
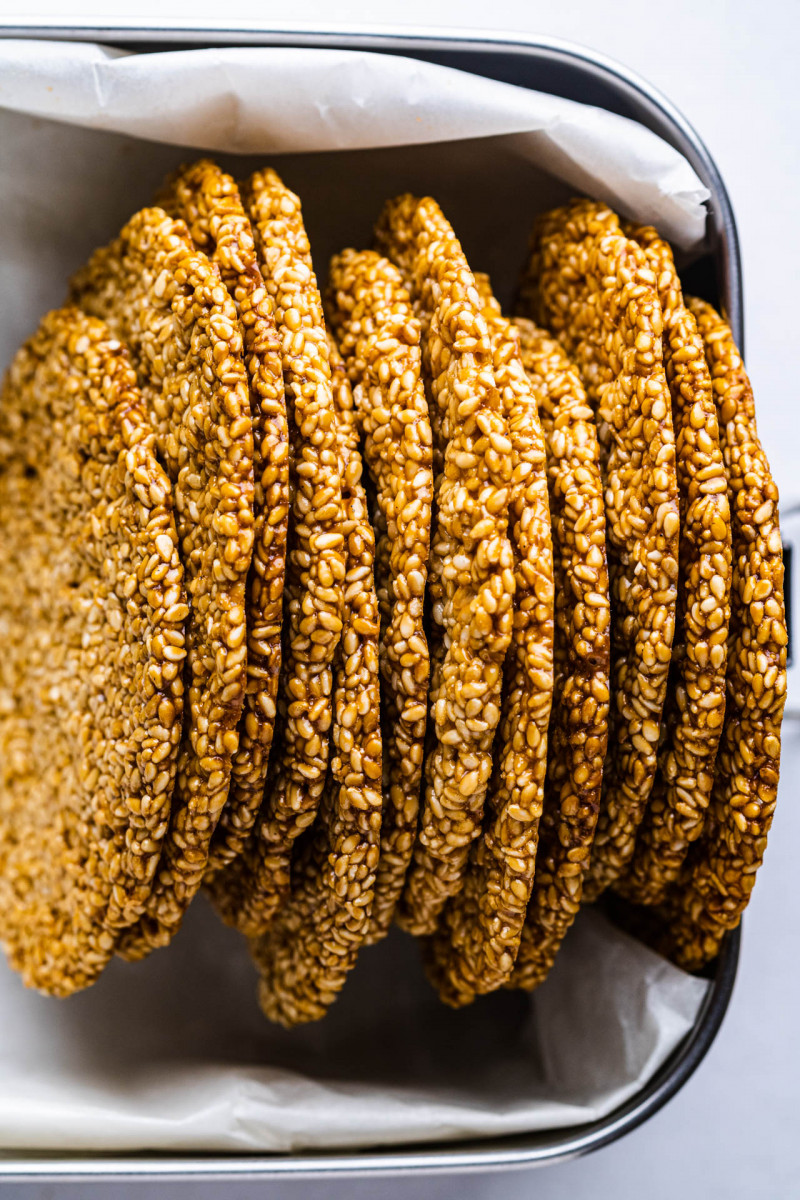
3) SHAPE
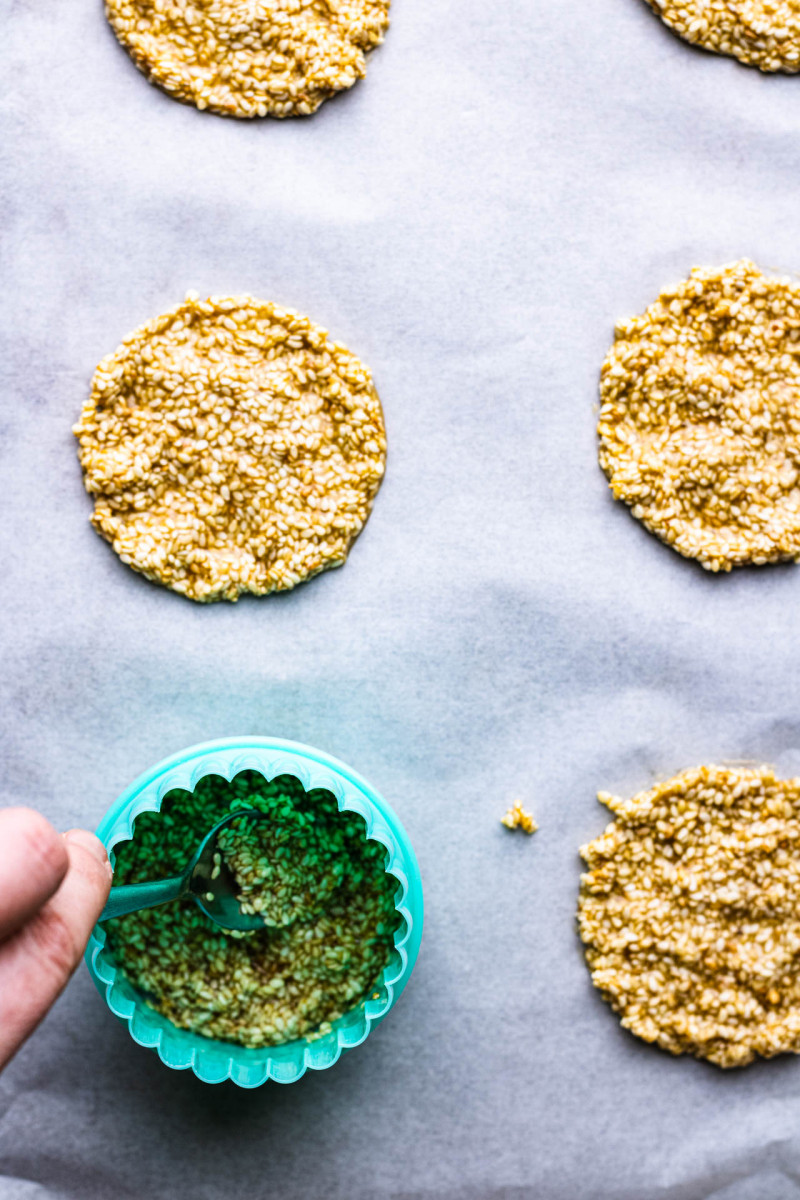
Shape the mixture into discs / circles. You can use a cookie cutter, for example, to shape the mixture inside of it or you could spoon the mixture onto the tray using a spoon, flatten and shape into a rough circle with a knife. Either way works. Because these sesame snaps expand as they bake, I recommend baking 6 per tray and leaving plenty of room around each ‘cookie’.
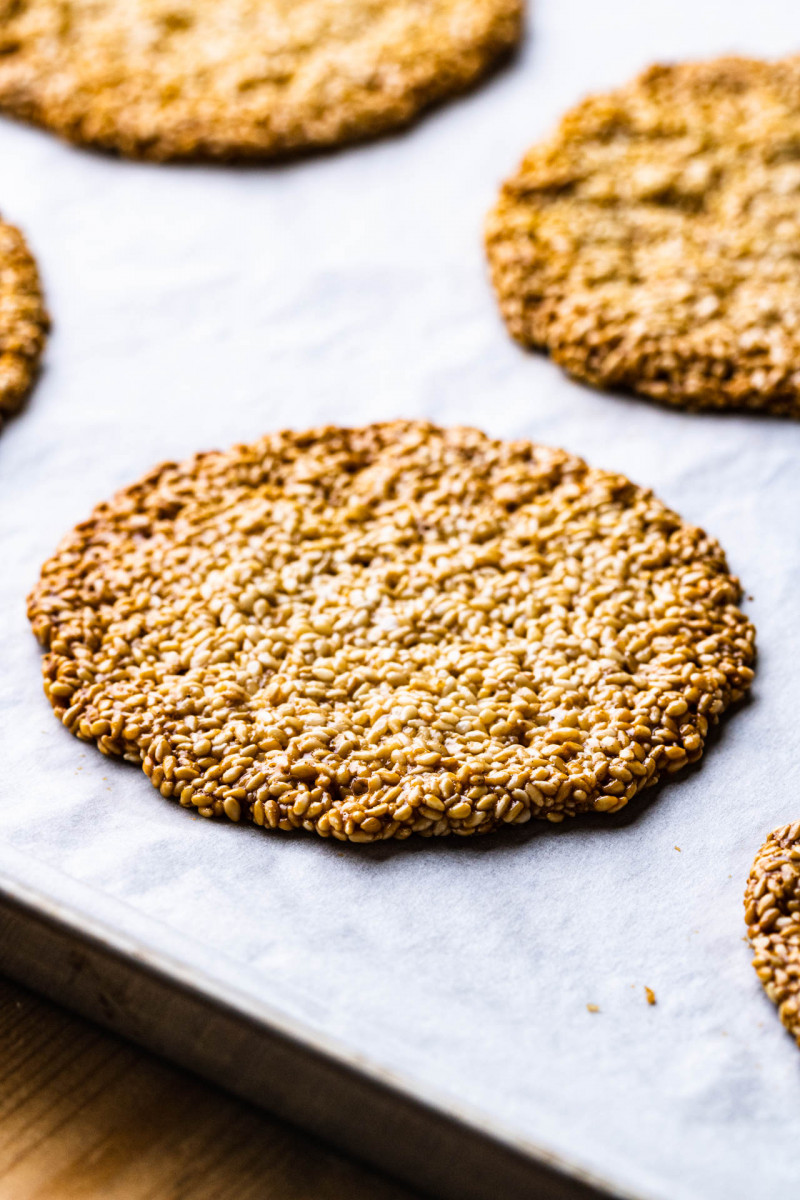
3) BAKE
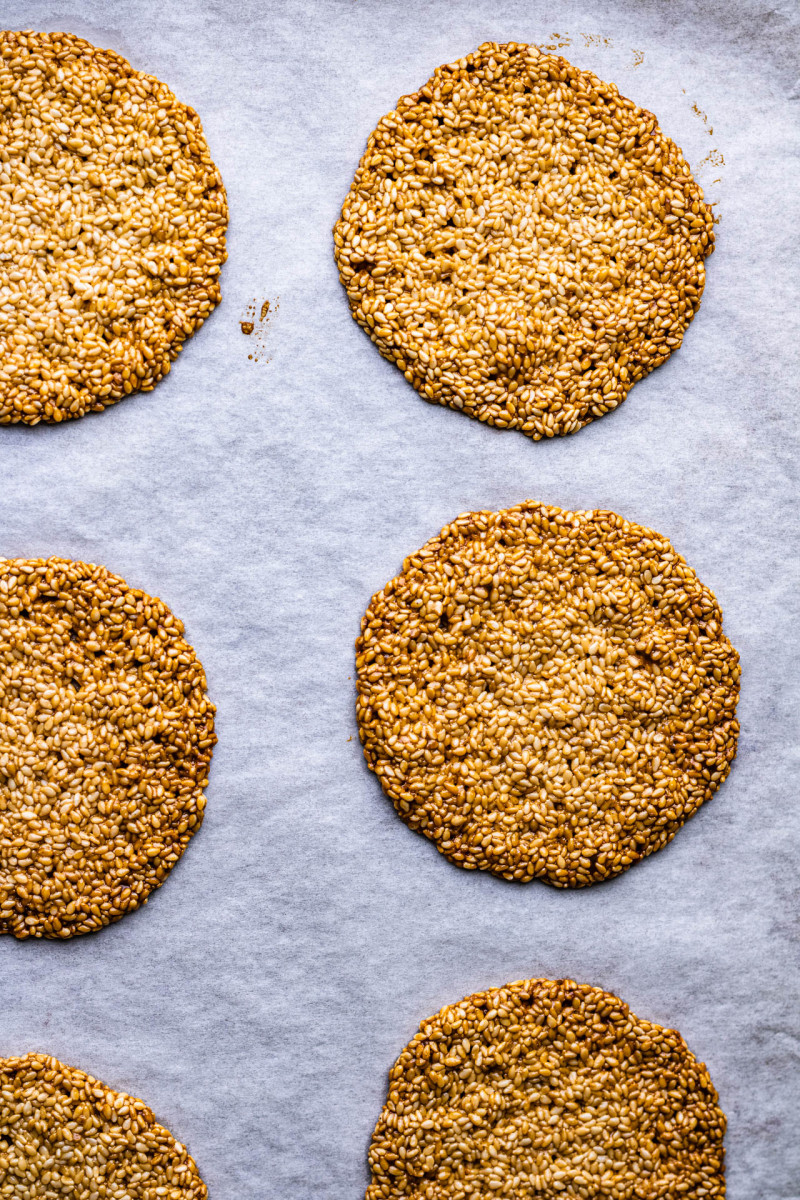
Bake the sesame snaps in a well pre-heated oven until the edges are just starting to get golden brown. Allow them to cook down completely before brushing the undersides with melted dark chocolate if using. Once the chocolate has had a chance to set, lock sesame snaps away in an air-tight container to keep them from losing their crispness.
- 100 g / 3.5 oz (about ¾ cup) hulled sesame seeds
- 75 ml / 5 tbsp maple syrup (or other liquid sweetener)
- 30 tbsp / 2 tbsp runny tahini
- ¼ tsp fine salt
OPTIONAL EXTRAS
- ¼ tsp ground cardamom
- 100 g / 3.5 oz 70% dark chocolate
METHOD
- Preheat the oven to 170° C / 340° F (or 150° C fan / 300° F fan) and line a couple of baking trays with baking paper.
- OPTIONAL, but recommended – toast sesame seeds until golden in a dry frying pan on low-medium heat. Stir often to ensure that they do not get too dark. Allow them to cool off completely.
- In a mixing bowl, whisk tahini and maple syrup together. Mix in salt and cardamom, if using. Next, add sesame seeds. Stir until they are all coated and you get a thick sticky mixture.
- Using a cookie cutter (mine was cm / ” in diameter), shape about a tablespoon of the mixture into 6 circles per tray. You can also shape them into rough circles using a butter knife.
- Bake one tray at a time for about 9-10 minutes, until the edges are starting to brown.
- As soon as you remove the tray out of the oven, use a butter knife to push the edges in a little, just to tidy up the shape. Allow the snaps to go cold to crisp up fully.
- If using chocolate, melt broken up chocolate in a water bath over low heat. Once melted, use a pastry brush to brush a layer of chocolate over the back of each cookie. Allow the chocolate to fully set before enjoying or storing in an air-tight container.
NUTRITIONAL INFO
*per per cookie (without chocolate)