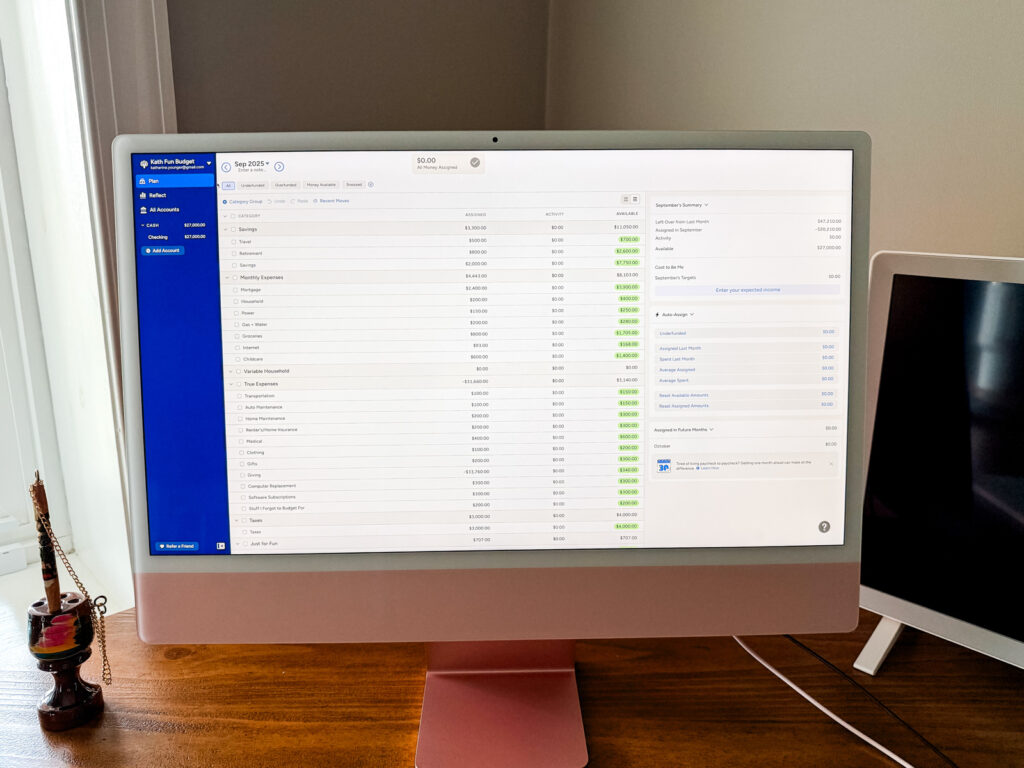
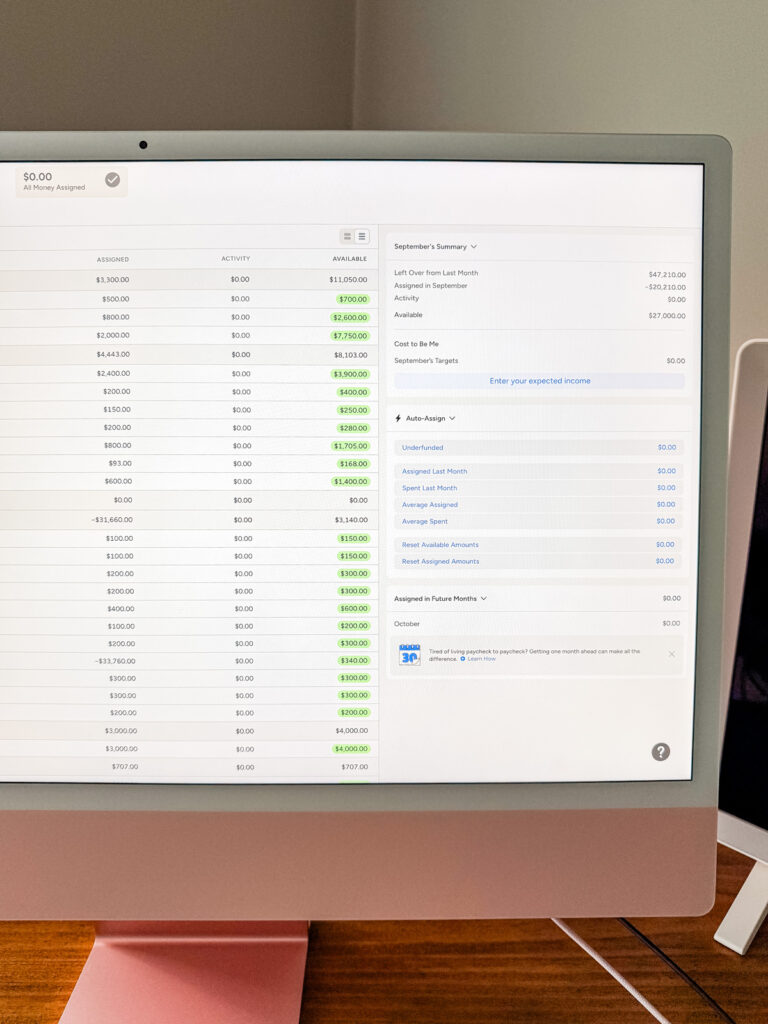
If you’ve been curious about dipping your toes into YNAB or you’ve tried before and it didn’t stick, this guide will walk you through how to start using YNAB.
If you’ve been around here for a while, you know I love talking about systems that make life easier — meal planning, organizing the pantry, and yes… budgeting! One tool that has really transformed the way I think about money is YNAB (You Need A Budget). I’ve been using it since 2016 and it has been LIFE changing! I’m so addicted to tinkering, studying, analyzing, and gazing at my budget. I’m always trying to see if there are more efficient ways to save and spend.
I’ve also helped coach a handful of people with their YNAB budgets! While the app isn’t hard to use, there is a bit of a learning curve when wrapping your brain around how it all fits together. Having someone teach you hands on is the ideal way to learn.
Listen to me on the YNAB Budget Nerds Podcast!
Why YNAB Works
Unlike traditional budgets that feel restrictive, YNAB is all about giving every single dollar a job. Instead of guessing what you might spend in the future, YNAB works with the money you already have in your accounts right now. It’s also incredibly easy to move money between categories. So if you overspend on food (me every month!) you can use your shopping money to cover that overage with two clicks.
The OTHER amazing thing about it is that you can save for your “lumpy” expenses like those things you might pay quarterly, annually or infrequently. For example, putting $100 into a Christmas category each month means you have the cash you need every Black Friday for your holiday shopping. Or that car insurance bill you pay once a year – save a little each month and you magically have the full amount ready when the bill comes in the mail. Your budget will be DIALED IN!

How To Start Using YNAB
Step 1: Sign Up and Connect Your Accounts
- Head over to YNAB’s website and start your free 30-day trial (no credit card required). After that it’s $108 a year.
- Connect the checking, savings, and credit card accounts that you use regularly. I tend not to add investments or larger savings to keep my budget simple. You can still account for that money sent to a good place without actually seeing the balances. I focus mostly on checking and credit cards.
- Think of your Plan as your digital cash envelope system. Once you have connected all of your checking accounts, you’ll have a large pile of money in your Ready To Assign.
Step 2: Assign Money To Credit Cards
If you have credit cards (which most people do) and you pay them off monthly, you’ll want to assign the amount of dollars you think your bill will be to the credit card payments area. So if you have $10,000 in Ready to Assign and $2,000 currently on your credit card, move the $2,000 to your credit card, leaving the remaining $8,000 in Ready to Assign for your spending and bills categories.
Step 3: Assign Money To Savings
If you added any savings accounts to your YNAB, you might also want to move that money to a saving category. The goal here to leave only the money you need from the month ahead in your Ready to Assign.
Step 4: Customize Categories (And Use Emojis!)
Once you’ve moved the credit card, saving, and any other reserved funds aside, you should have a pile of money to assign to categories. Before you get to the fun part, go through YNAB’s default categories and customize them to your life!
If you have a pet, create pet expenses. If you have kids, create kid ones. If your cell phone is paid for through work, delete that category. Try to think of EVERYTHING you spend on both in the month and throughout the year and create categories for them. Try to balance good tracking without creating so many that it’s impossible to find anything.
Use emojis for the categories to make them more fun and easy to spot in your list!
Finally, group categories in a way that makes sense to you. You could do Monthly, Annual, Spending. Or Wants + Needs. Or Bills, Lifestyle, Household, Kids, etc.
See all of my categories in this post: My Budget Categories
Step 5: Consider Adding Targets
Targets are found in the sidebar when you click on a single category. The purpose of a target is to tell your plan how much you need for this category each month. As Ben and Ernie said in their recent Budget Nerds podcast, if you think of YNAB as a digital envelope system, what you assign to the category is the money you put in the envelope. The target is the amount of money you want to start each month with in the envelope!
For example, $500 a month for dining out or $97 each month for your gym membership that get auto-debited. You don’t have to use targets, but they will help you remember how much each bill is or your target spending on each category that you decide. They also make budgeting SO fast because you can just click “underfunded” in the future and all your targets will autofill!
Step 6: Give Every Dollar A Job!
Now is the most fun part of all! Using the pile of money in Ready to Assign, start divvying out all the dollars you have into your categories. You might have to reference your checking or credit card accounts to see what you usually spend on things. If you don’t know, just ballpark and guess! You can always move money between categories if you need to.
Step 7: Get Fully Funded on the First
Hopefully you’ll get to the end and still have a little left over, but if you don’t, that means you’ll need to build up that buffer so you can be fully funded on the first. YNAB encourages you to live off last month’s income so you don’t have to worry about timing your bills. This also creates a mini emergency fund of one month of expenses buffer in your checking account. As I mentioned above, you might have to move some money in from savings to do this or you might have to work to save a little each month until you’re a month ahead. This is the big key to stop living paycheck to paycheck. Eventually, this will allow you to spend this month with last month’s money, which is when budgeting really starts to feel calm and empowering.
Step 8: Don’t Forget Savings Categories
In YNAB, you treat savings almost like an expense. If you have a recurring 401k transfer, just make that look like an expense and when it debits, it leaves that category. If you are planning a trip a year from now, figure out how much you think you’ll need and try to set aside a little each month until you get there.
Step 9: Track Spending as You Go
YNAB makes it easy to see what’s left in each category in real time. You can:
- Enter purchases on the mobile app right at checkout.
- Or let your bank connection import transactions for you to categorize later.
It’s really important to check in on your budget as often as possible! Every day is ideal, but don’t wait longer than every week or your transactions will pile up into a mess! It’s so easy to check the app every morning and categorize and approve transactions. Make it a part of your morning routine. Over time, you’ll start to see patterns, spend more intentionally, and feel less stressed about money.

Give YNAB a try!
Starting a budget can feel overwhelming, but YNAB makes it surprisingly approachable. Think of it less like a strict diet and more like meal planning — it gives you structure, freedom, and room for the things you love.
Put any questions you have in the comments!
More YNAB Posts:

