

This tried and tested Italian pizza dough recipe has authentic results every time! These are my pro tips for perfect texture, flavor, and that signature chewy-crispy crust.

Want to make Italian-style pizza in the comfort of your own home? I’ve found there’s really nothing quite like the joy of homemade pizza dough. After over a decade of perfecting this Italian pizza dough recipe through trips to Italy and conversations with master pizza makers, I can say: this is the closest you’ll get to authentic Neapolitan pizza at home!
It’s the style of pizza dough you’ll find in Naples: supple, chewy, crispy on the outside and doughy on the inside. Bake it up on a pizza stone to perfection and it will taste almost like you’re noshing on a wood-fired pizza straight from Italy!
Pro tips for next-level dough
After years of research, Alex and I consider ourselves homemade pizza experts! We’ve been to Italy several times to study the pizza, and spent time chatting with some of America’s best Italian-style pizza chefs on our podcast (like Chris Bianco of Pizzeria Bianco and Caleb Schiff of Pizzicletta). Here’s what I’ve learned about what makes the best Italian pizza dough recipe:
- Use Tipo 00 flour. Tipo 00 flour is the type of Italian flour that Neapolitan pizza restaurants use. It makes a beautiful, supple and fluffy dough that’s a notch above regular all purpose flour. You can find it at your local grocery or online.
- Refrigerate the dough 2 to 3 days before baking (optional). Both of our pizza dough masters told us the same thing. For next level Italian pizza dough, place the dough in a sealed container and refrigerate it for 2 to 3 days. This naturally ferments the dough and brings a nutty, complex flavor to the dough. This is optional, but it has incredible results.
Guide to perfect Italian pizza dough
Making this dough is straightforward, but I’ve learned a few critical techniques that make all the difference.
Essential equipment
While you don’t need specialized equipment, these tools make the process significantly easier:
- Food scale: Weighing ingredients is crucial for consistent results; here’s the food scale I use.
- Stand mixer with dough hook: Not required, but it saves your hands during the 8-minute knead.
- Pizza peel: Essential for transferring dough to your pizza stone. I recommend this conveyor pizza peel.
- Pizza stone: This is what creates that authentic crispy-chewy texture.
I recommend this pizza stone guide if you’re shopping for one—it covers everything I’ve learned about choosing and caring for pizza stones.
The mixing and kneading process
Once I combine the ingredients, I stir just until a shaggy dough forms. Then, I most often knead using a stand mixer since it’s easy and hands off: you’ll just knead for 8 minutes. If you don’t have one, you can also knead by hand.
The dough should feel pillowy and smooth when properly kneaded. If it’s still sticky, add flour one tablespoon at a time. If it’s too stiff, add water one teaspoon at a time.
Mastering the art of pizza dough stretching
The trickiest part of Italian pizza dough is the stretching process! Here are a few tips I’ve learned from Alex (the true master) to ensure a perfect stretch:
Room temperature matters
Cold dough is impossible to stretch properly. I always let my refrigerated dough come to room temperature for 30-45 minutes before attempting to shape it. This relaxes the gluten and makes stretching much more manageable.
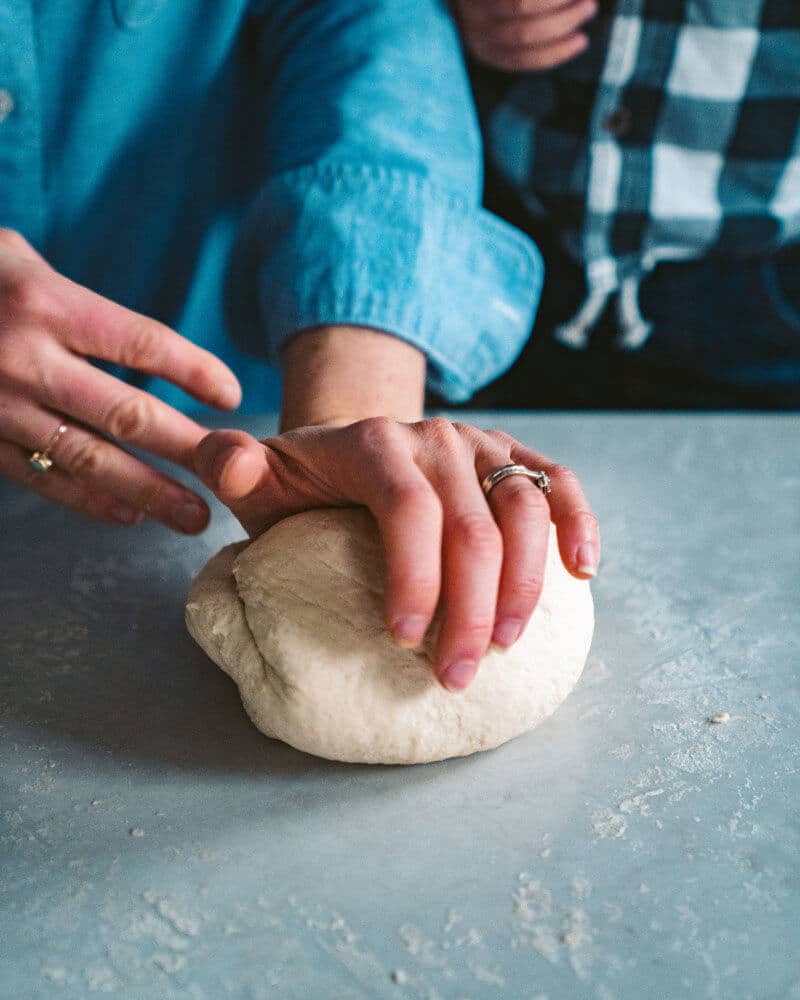
A gentle approach
I start by gently pressing the dough into a circle on a lightly floured surface, flipping it several times. Once I have about an 8-inch circle, I pick up the dough and drape it over my knuckles, rotating it slowly and letting gravity do most of the work.
The key is never forcing the dough. If it starts resisting, I put it down and let it rest for a few minutes. To watch Alex stretch the dough, check out my detailed post on how to stretch pizza dough—it includes video demonstrations.
Creating the perfect baking environment
Even with perfect dough, your oven setup determines the final result. I’ve learned that home ovens require specific techniques to mimic the high-heat environment of traditional wood-fired pizza ovens.
Pizza stone essentials
I preheat my pizza stone at 500°F for at least 45 minutes before baking. This ensures the stone is thoroughly heated and will create that immediate sear on the bottom of the pizza.
Adding cornmeal or semolina flour on the pizza peel before you add the dough prevents sticking and makes the transfer smooth.
Baking time and temperature
At 500°F, most pizzas bake in 5-7 minutes. Look for a golden, slightly charred crust and cheese that’s bubbly with light brown spots. The high heat creates those characteristic charred spots that mark authentic Neapolitan-style pizza.

Serving ideas and pizza toppings
You probably already have some toppings in mind for your pizza! But here are a few topping ideas I love, both classic and more unique:
Classic Italian Combinations
Other Favorites
- Pesto Pizza: Homemade basil pesto with cherry tomatoes and burrata
- Truffle Pizza: White sauce base with wild mushrooms and truffle oil
- Arugula Pizza: Post-bake addition of fresh arugula and paper-thin prosciutto
For more inspiration, check out my collection of 35 pizza recipes that work perfectly with this dough.

Dietary notes
This Italian pizza dough recipe is vegetarian, vegan, and plant-based.
Italian Pizza Dough Recipe

This tried and tested Italian pizza dough recipe has authentic results every time! These are my pro tips for perfect texture, flavor, and that signature chewy-crispy crust.
- Prep Time: 1 hour
- Cook Time: 0 minutes
- Total Time: 1 hour
- Yield: 3 medium pizzas (about 11 inches in diameter) 1x
- Category: Essentials
- Method: Baked
- Cuisine: Italian
- Diet: Vegetarian
- 500 grams* Tipo 00 or all-purpose flour (3 ⅓ cups)
- 8 grams instant or active dry yeast (2 teaspoons)
- 7 grams kosher salt (1 teaspoon)
- 338 grams warm water (1 ¼ cups + 3 tablespoons)
- 13 grams olive oil (1 tablespoon)
- Combine the flour, salt, and yeast in a bowl or the bowl of your stand mixer. Stir to combine. Add the water and olive oil and stir until a raggy dough forms. Turn the dough out onto a floured surface.
- Knead the dough by pushing with the base of your palm, then reforming it into a ball. Continue kneading for 8 minutes until the dough feels pillowy and has a smooth, stretchy exterior. If the dough is very sticky, add a small amount of flour while kneading. Alternatively: attach the dough hook to a stand mixer and start the mixer on medium-low speed, then allow the mixer to knead for 8 minutes.
- After the kneading is finished, divide the dough into 3 equal pieces. Using floured hands, gently shape each half into a boule (ball shape) by folding the dough under itself. Set each boule on a floured surface and dab the dough with a bit of olive oil to keep it moist. Cover all boules with a damp towel and allow them to rise until doubled in size, about 45 minutes to 1 hour.
- The dough can be used immediately. However for the BEST flavor, transfer the dough to separate sealed containers, large enough for the dough to double in size again, and store in the refrigerator for 2 to 3 days. (We always do this. But if you think ahead, it makes for a noticeably nutty, unique flavor that truly is the best homemade pizza dough you’ve ever had!) You can also freeze pizza dough you don’t plan to use the day of.
- **If you’re using the dough after refrigerating: The day of serving, remove the dough from the containers, place it on a lightly floured surface covered with a towel, and allow it to come to room temperature before stretching, 30 to 45 minutes.
- When the oven is ready, dust a pizza peel with cornmeal or semolina flour. (If you don’t have a pizza peel, you can use a rimless baking sheet or the back of a rimmed baking sheet. But a pizza peel is well worth the investment!)
- Stretch the dough into a circle; see How to Stretch Pizza Dough or follow these instructions: To stretch the dough, place it on the pizza peel or a lightly floured surface and gently press it into a circle, flipping several times and adding a pinch of flour if it is too sticky. Once you have about an 8-inch circle, pick up the dough and gently drape it over the knuckles on both of your hands. Slowly rotate it around, allowing gravity to stretch it into a circle about 11 inches in diameter. Do not overwork or fold the dough. If the dough starts to resist stretching, put it down and allow it to rest for a few minutes, at which point it will stretch more easily.
- We bake our pizzas at 500F and use a pizza peel to transfer it to a preheated pizza stone in the oven: the bake time is around 5 to 7 minutes. See our pizza recipe posts for baking instructions.
Notes
*Using a food scale will ensure you have consistent results every time! We use this one.