

So you’ve made my famous strawberry crisp, and maybe these incredible blueberry pie bars. But what if I told you this is the VERY FIRST cobbler recipe on Ambitious Kitchen? I know, I’m surprised, too.
I’ve been obsessed with all things berry this summer because, well, ’tis the season! This mixed berry cobbler is topped with tender lemon-pistachio biscuits (omg yes) and is one of those desserts that perfectly encapsulates all of those beautiful summer vibes. I originally made this recipes using only blueberries, but why stop at one berry when you can have them all?
Make it for Father’s Day, Fourth of July, your next BBQ, or even for breakfast. Any way you do it, it’s guaranteed to be a new favorite.

The difference between a crisp and a cobbler
Like I said, this is the very first cobbler recipe I’ve posted on Ambitious Kitchen! I DO have many delicious crisp and crumble recipes, and the two often get confused. Here’s the scoop:
- A crisp (or crumble) gets topped with a streusel mixture, which is often made with flour, butter, sugar, oats, and sometimes nuts.
- A cobbler gets topped with dough or batter, such as biscuit dough or even cake batter.

Ingredients in this mixed berry cobbler
Gather up all of the beautiful berries you can find (maybe they’re even in your garden!) plus simple baking staples and have yourself a cobbler party. Here’s everything you’ll need:
- Berries: feel free to use any mix of blueberries, blackberries, raspberries, and/or strawberries. You really can’t go wrong!
- Maple syrup: we’re sweetening the berry filling with a little pure maple syrup.
- Cornstarch: you’ll also need cornstarch or arrowroot starch to thicken the filling.
- Vanilla: we’re using vanilla extract in both the filling and the biscuit dough. Learn how to make your own vanilla here!
- Pistachios: half of the base of the biscuits is made with finely ground pistachios and OMG they add such a wonderful, unique flavor to the biscuits.
- Flour: the other half of the biscuit base is all-purpose flour.
- Sugar: you’ll need a little granulated sugar to sweeten the biscuits.
- Butter, milk & yogurt: the key to adding moisture to the biscuits? Salted butter, any milk you’d like, and plain whole-milk yogurt.
- Baking staples: don’t forget the baking powder and salt in the biscuit dough.
- Extra flavor: I like to add lemon zest and either almond extract or lemon extract to the biscuit dough because the pistachio-lemon combo is out-of-this-world delicious.

Can I make it gluten-free or dairy-free?
Yes! This mixed berry cobbler can easily be made both gluten-free and dairy-free. Here’s how:
- To make gluten-free: simply swap the all-purpose flour for a 1:1 gluten-free all-purpose flour (I like King Arthur Baking Company).
- To make dairy-free: use a dairy free yogurt (I like siggi’s plant based cups), dairy free butter (I like the Miyoko’s brand) and dairy free milk.

Tips for using frozen berries
Do you have a big bag of frozen mixed berries lurking in your freezer? Use them in this berry cobbler recipe by thawing them, draining off the liquid, and then making the filling as directed.

How to make the perfect berry cobbler
- Mix the filling. Start by stirring together the berry filling ingredients in a prepared pan, then set it aside.
- Prep the biscuit dough. Pulse the pistachios in a food processor until they resemble sand, then add the flour, sugar, lemon, baking powder, and salt, and pulse again. Add VERY cold butter cubes and pulse once more until the mixture looks like small pea clumps.
- Finish the dough. Whisk together the wet ingredients for the biscuit dough, then fold in the dry ingredients until just combined.
- Assemble the cobbler. Use your hands, a large spoon, ¼ cup measuring cup or a large cookie scoop to scoop the dough and carefully drop it onto the berry filling. Pat them down or smooth them out so that they’re about ¾-inch thick.
- Bake, cool & serve. Brush the biscuit dough with milk, then bake the cobbler until the biscuits are golden and the filling is bubbling. Let it cool, then serve it up with vanilla bean ice cream!

Storing & freezing tips
- In the fridge: store any leftover berry cobbler in an airtight container in the fridge. Simply warm it up a bit in the microwave or enjoy cold straight from the fridge.
- In the freezer: assemble the cobbler but do not bake it. Cover it well with aluminum foil and transfer it to the freezer for up to 3 months. Bake the frozen berry cobbler at 350 degrees for about an hour or until it’s golden and bubbly.

Tools you’ll need
Get all of my kitchen essentials here!
More berry desserts you’ll love
Get all of my dessert recipes here, and my berry recipes here!
I hope you love this berry cobbler recipe! If you make it be sure to leave a comment and a rating so I know how you liked it. Enjoy, xo!
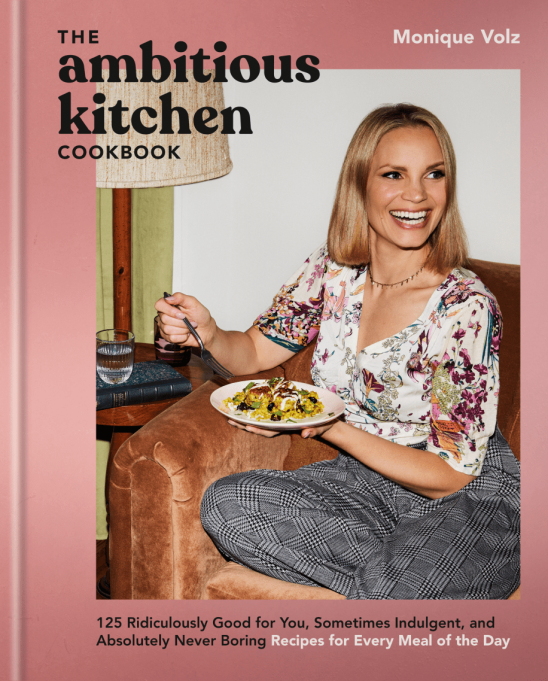
The
Ambitious Kitchen
Cookbook
125 Ridiculously Good For You, Sometimes Indulgent, and Absolutely Never Boring Recipes for Every Meal of the Day
The Best Berry Cobbler with Lemon-Pistachio Biscuits

Incredible mixed berry cobbler topped with fluffy, perfectly sweet lemon-pistachio biscuits. This berry cobbler recipe is easy to make for the ultimate summer dessert to share with loved ones! Serve with your favorite vanilla bean ice cream on at your next BBQ or party.
Ingredients
- For the filling:
- 2 ½ pounds mixed berries (combination of blueberries, blackberries, strawberries or raspberries!)
- ¼ cup pure maple syrup (or granulated sugar)
- 2 tablespoons cornstarch (or arrowroot starch)
- 1 teaspoon vanilla extract
- For the biscuits:
- 1 cup (112g) roasted and salted shelled pistachios
- 1 ¾ cups (210g) all-purpose flour
- ⅓ cup (66g) granulated sugar
- Zest from 1 lemon
- 1 tablespoon baking powder
- ¼ teaspoon kosher salt
- 6 tablespoons (85 grams) VERY COLD salted butter, cut into cubes
- ¾ cup (169 grams) plain whole-milk yogurt
- ¼ cup (60 grams) milk of choice, plus extra for brushing tops
- 1 teaspoon vanilla extract
- ½ teaspoon almond extract (or sub lemon extract)
Instructions
-
Preheat the oven to 350 degrees F. Grease a 7×11 inch pan or 10-inch oven-safe skillet with nonstick cooking spray.
-
Make the filling: Add the mixed berries, maple syrup (or sugar), cornstarch and vanilla to the prepared pan and stir until well combined. Set aside.
-
Prepare the biscuit dough: To the bowl of a food processor, add the pistachios and pulse for 15 seconds or so until the pistachios are fine and resemble a sand texture. (Do not pulse too long or it will become a paste.) Next, add in the flour, sugar, lemon zest, baking powder and salt. Pulse for 6 to 8 times to combine the dry ingredients. Next add the butter cubes and pulse 10 to 15 times until the butter is incorporated and the mixture resembles small pea clumps. Set aside.
-
Mix the wet and dry ingredients: In a large bowl, whisk the yogurt, milk, lemon zest, vanilla, and almond extract together until well combined and smooth. Add the dry ingredients to the wet ingredients and stir with a wooden spoon until the mixture comes together into a moist, somewhat sticky dough. Do not overmix or the dough will become tough.
-
Add the topping: Now what you do next is up to you! A few options: OPTION 1. Drop large spoonfuls (or just use your hands to grab large pieces) of the biscuit dough over the mixed berries, smoothing the dough slightly so it is about ¾ inch thick. You do not need to cover all of the fruit, a few open spaces are fine. OR OPTION 2. You can use a ¼ cup measuring cup or a large cookie scoop to grab the biscuit dough and drop it on top of the berries. You don’t want the biscuits too thick, so I still like to pat them down before adding them on top of the berries so they are about ¾-inch thick or so.
-
Bake: Brush the biscuit dough with a little milk, then bake for 45 minutes to 1 hour until the biscuits are nice and golden brown and the filling is bubbling. Allow the cobbler to cool for at least 10 minutes before serving in bowls with a scoop of vanilla bean ice cream.
Recipe Notes
To make dairy-free: Use a dairy free yogurt (I like siggi’s plant based cups), dairy free butter (I like the Myoko’s brand) and dairy free milk.
Recipe by: Monique Volz // Ambitious Kitchen | Photography by: Eat Love Eats