

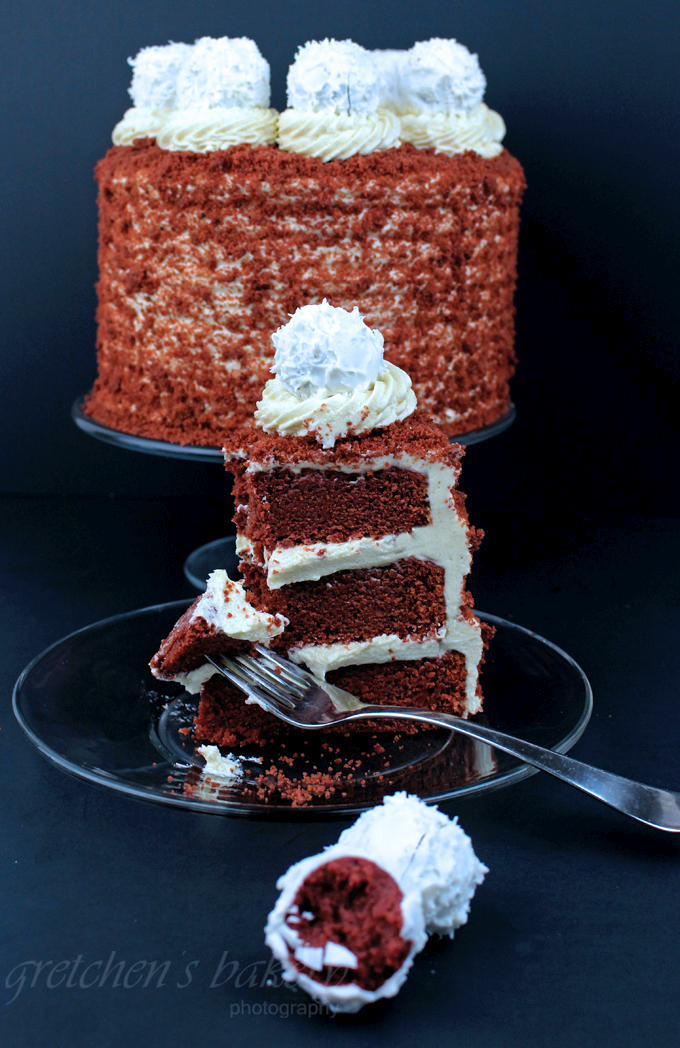
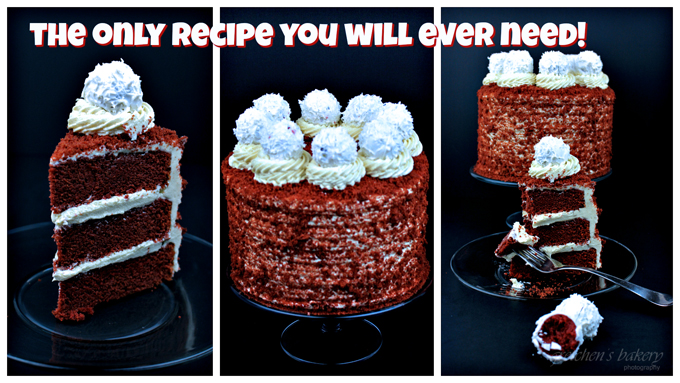
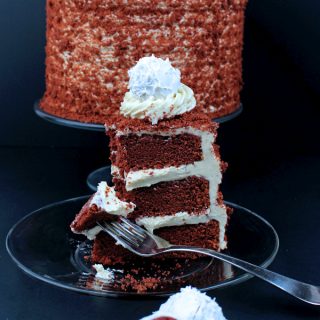
Finally a no dye red velvet cake that is actually red!
I am literally obsessed with how this came out!
The original Red Velvet Cake is the ultimate in baking science!
Since it was derived from a chocolate cake and never had red dye to begin with!
Over the years we started adding tons of red dye to the cake better for a thrilling red that would make Dracula cringe.
Due to the reaction from the cocoa powder with the baking soda, the cake took on a slight red color upon baking.
Somehow we have developed this insatiable need to have the most red of reds for this classic cake.
But who the heck wants to dump in a bunch of red food dye?

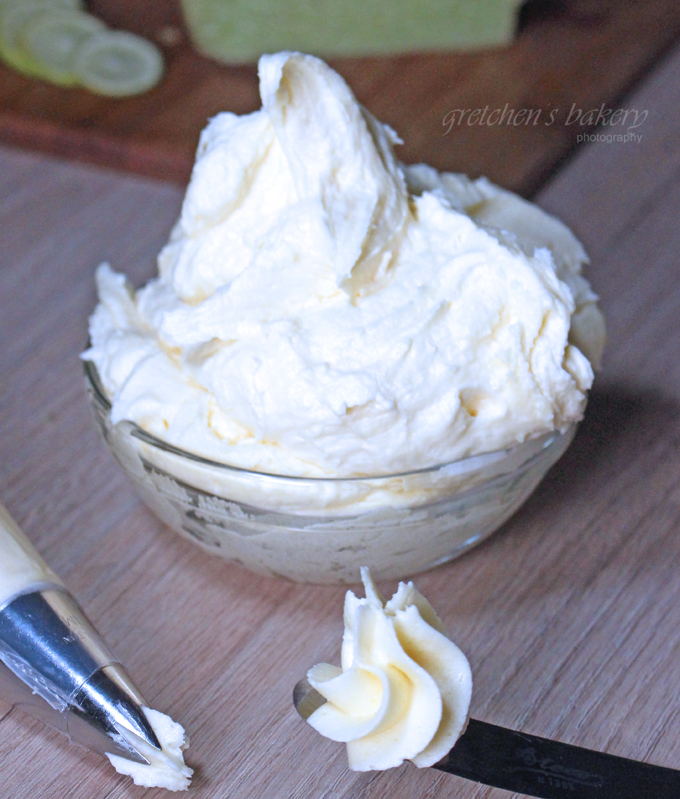
Ermine buttercream is the traditional icing used on a red velvet cake, not the Cream Cheese Icing many of us are familiar with,
Although I have a fabulous cream cheese icing that requires no refrigeration or that pesky vegan cream cheese!
Notes for Success:
Using Dutched Process Cocoa powder will adversely affect this recipe!
Read more about Why Dutched Process Cocoa is NOT always the best option!
The cake recipe is for 3-7″ layers but you could easily divide the batter between 2-8″ cake pans instead
Will also make about 15 cupcakes, just fill the liners 3/4 of the way full for a nice dome
Ermine buttercream can be quite fragile so be careful not to add the custard too fast and make sure it is very cold
Also I would recommend to ice your cakes or cupcakes immediately after making the buttercream
Be careful on the measuring of this recipe a heavy hand on the flour will cause this cake to be more like bread texture! A scale is recommended!
You can use 2Tbs flax meal reconstituted with 6Tbs warm plant milk from the recipe if you prefer not to buy a proprietary blend dry egg replacer
By changing the leavener from baking soda to baking powder I was able to get the color right
So be sure you are using baking POWDER not SODA or you will get some weird shade of pinkish gray instead of this vibrant red!
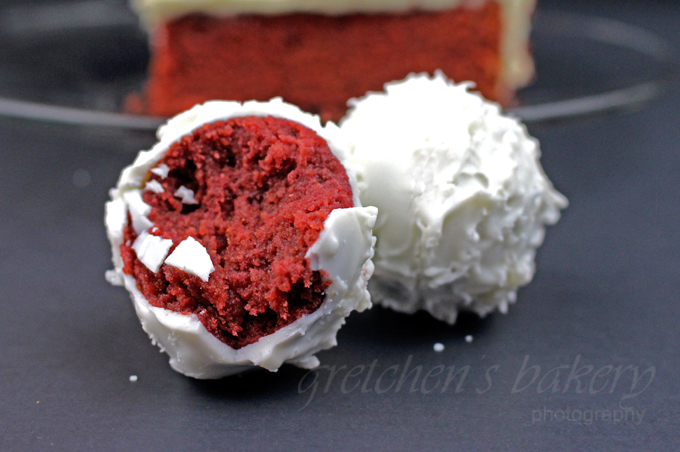
With the trimmings from the cake layers add a touch of buttercream and mash it all together in a bowl!
Roll them in white chocolate and YUMM!
CLICK HERE for a closer look at how to make cake balls
WATCH THE FULL YOUTUBE VIDEO TUTORIAL FOR HOW TO MAKE THIS CAKE!
No Dye! Red Velvet Cake
Ingredients
For the Cake:
- 3½ cup All Purpose Flour 3½ cups 437g
- 9 Tbs Beet Root Powder 9 Tablespoons 72g
- 1 Tbs Baking Powder 1 Tablespoon 10g
- 1 teaspoon Salt 1 teaspoon 6g
- 4 Tbs Cocoa Powder * natural NOT Dutched Process 24g
- 1 Tbs Egg Replacer *I am using Bob’s Red Mill
- 2 cups Granulated Sugar 400g
- ¾ cup Vegetable Oil 177ml
- 2 cups Plant Milk 473ml
- 2 teaspoon Vanilla Extract 10ml
For the Ermine Buttercream:
- 2 cups Granulated Sugar 400g
- 14 Tbs All Purpose Flour 110g
- 2 cup Plant Milk 473ml
- 2 cups Vegan Butter 454g
- 2 teaspoon Vanilla Extract 2 teaspoons 10ml
- Salt pinch
Instructions
-
For the cake batter, combine the sugar, salt, vanilla extract, oil & milk in a large mixing bowl & whisk smooth.
-
Sift the flour, beet root powder, cocoa powder, baking powder & the dry egg replacer together then add it to the liquids in the mixing bowl.
-
Whisk smooth then divide the batter evenly between your greased & parchment lined cake pans
-
Bake immediately in a preheated 350°F oven for approximately 25-30 minutes or when a toothpick inserted into the center comes out clean, or better yet when they are springy to the touch when you gently press the centers
-
Cool cakes in the pan until you can safely touch them with your fingers then flip onto a cooling rack to cool the rest of the way
-
Meanwhile to prepare your ermine buttercream, combine the flour, salt & sugar together in a medium heavy bottom sauce pot over medium – high heat.
-
Whisk together & let the flour “toast” for about 2 minutes whisking to prevent burning on the bottom.
-
Add the room temperature plant milk whisking constantly to smooth
-
Bring the custard to a boil whisking constantly
-
Once it starts to bubble gently, remove it from the heat add the vanilla extract then pour into onto a large plate or sheet pan & cover it directly on the surface with plastic wrap or parchment paper to prevent a “skin”
-
Cool in the refrigerator while you whip the vegan butter to fluffy.
-
Add the cooled (be careful this is not the slightest bit hot or you will have a melted butter!) custard to the whipped buttercream 1 heaping tablespoon at a time, whipping on medium the entire time until it is all incorporated.
-
Ice cake as shown in the video.
Notes
Storage This cake will stay fresh at room temperature for up to 2 days, for longer storage refrigerate for up to 1 week. This buttercream it does not hold up very well in hot temperatures!
T