


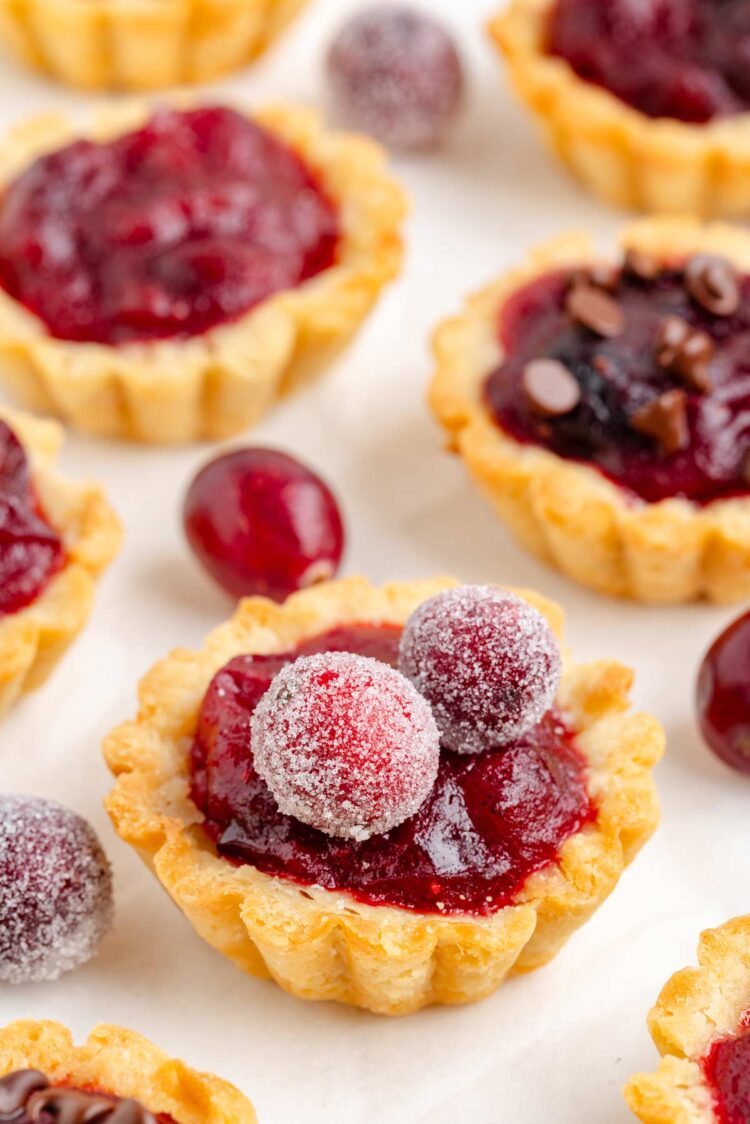
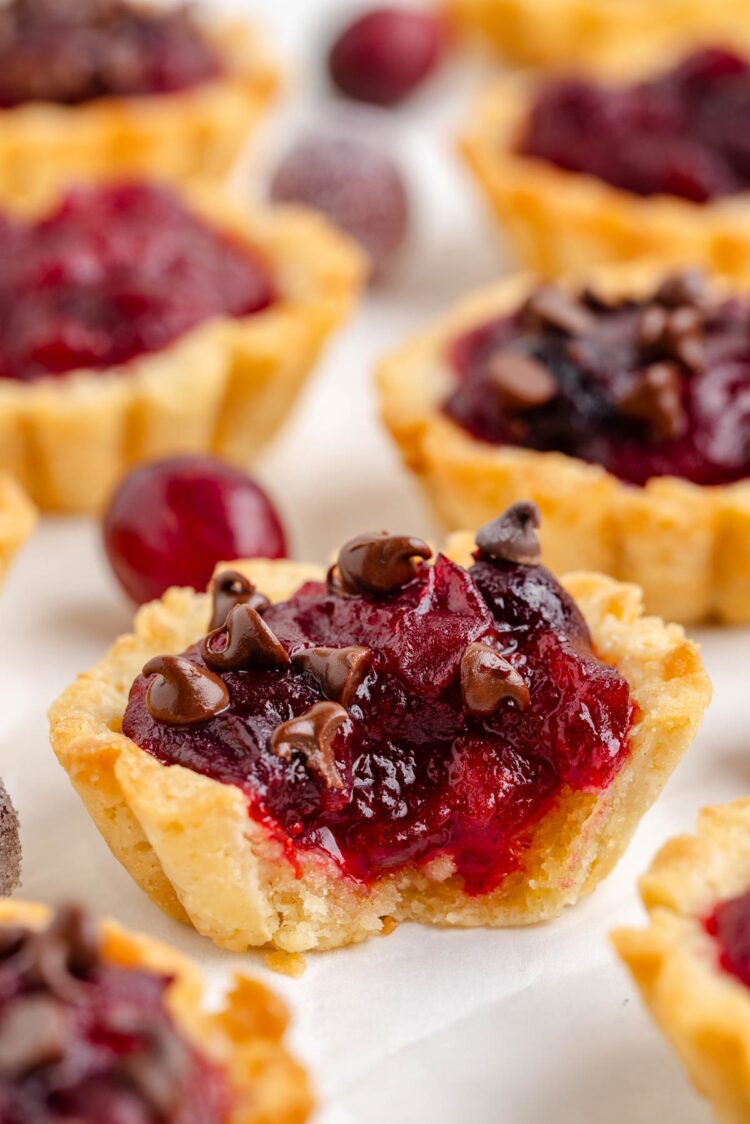
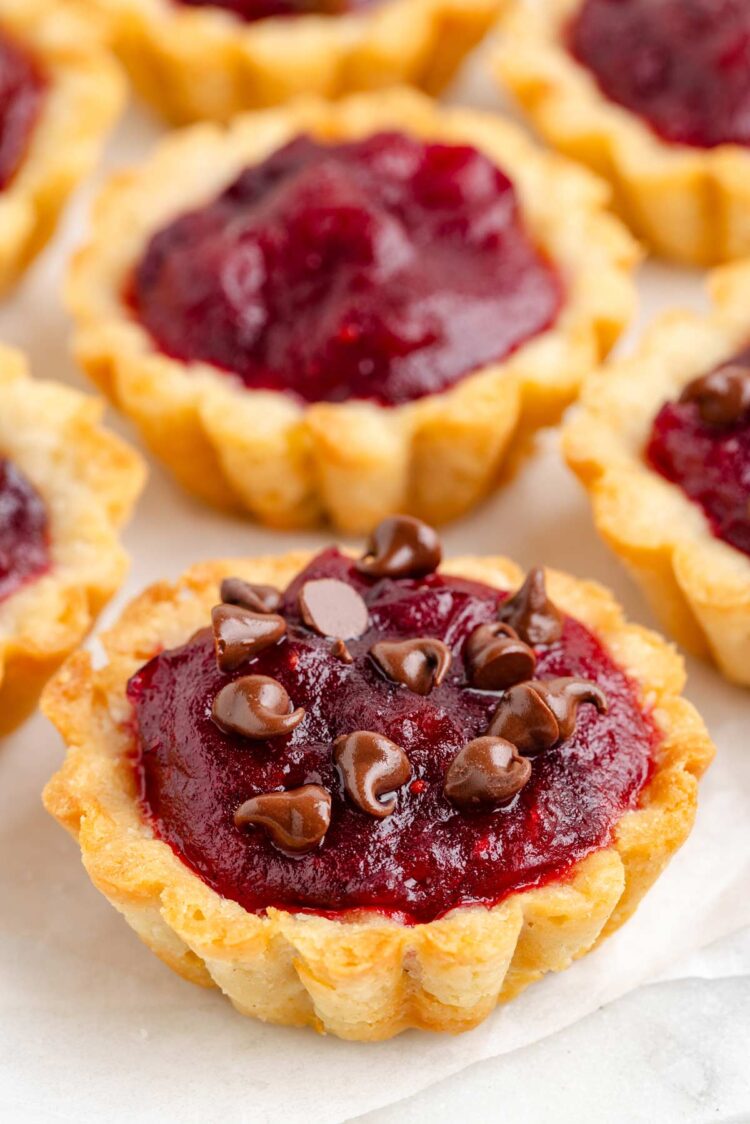
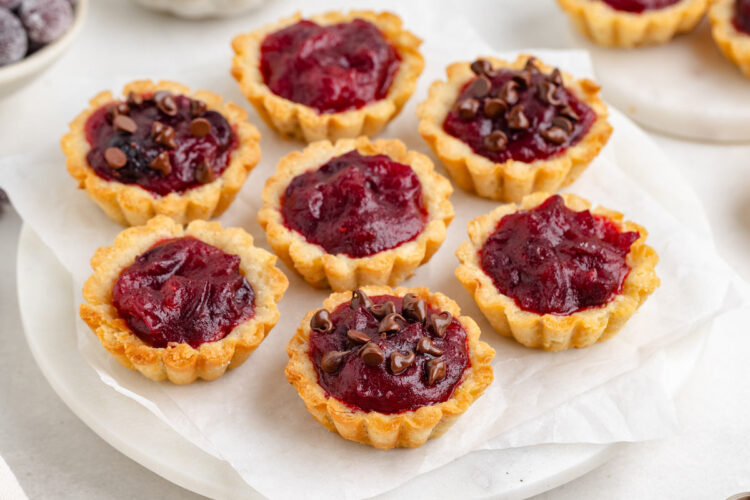
These cranberry tartlets have crisp, buttery pastry shells filled with homemade cranberry orange preserves. The sweet-tart filling is packed with juicy pieces of cranberry, plenty of orange flavor and a hint of cinnamon.
They make great individual desserts for Thanksgiving or Christmas. You can prepare the pastry shells and preserves in advance, so there’s very little to do on the day you serve them.
The crust is the same one I use for my Chocolate Tartlets. It’s buttery, slightly sweet and can be made with regular or gluten-free flour.
Ingredients
Please scroll down for the full recipe. These are just notes on select ingredients.

- Flour – you can use all-purpose flour or King Arthur Flour Gluten-Free Measure for Measure Flour. I’ve used both with this crust recipe, and they work equally well.
- Unsalted butter – use cold butter cut into small cubes. This helps keep the pastry tender and makes it easier to work the butter into the flour without warming it too much.
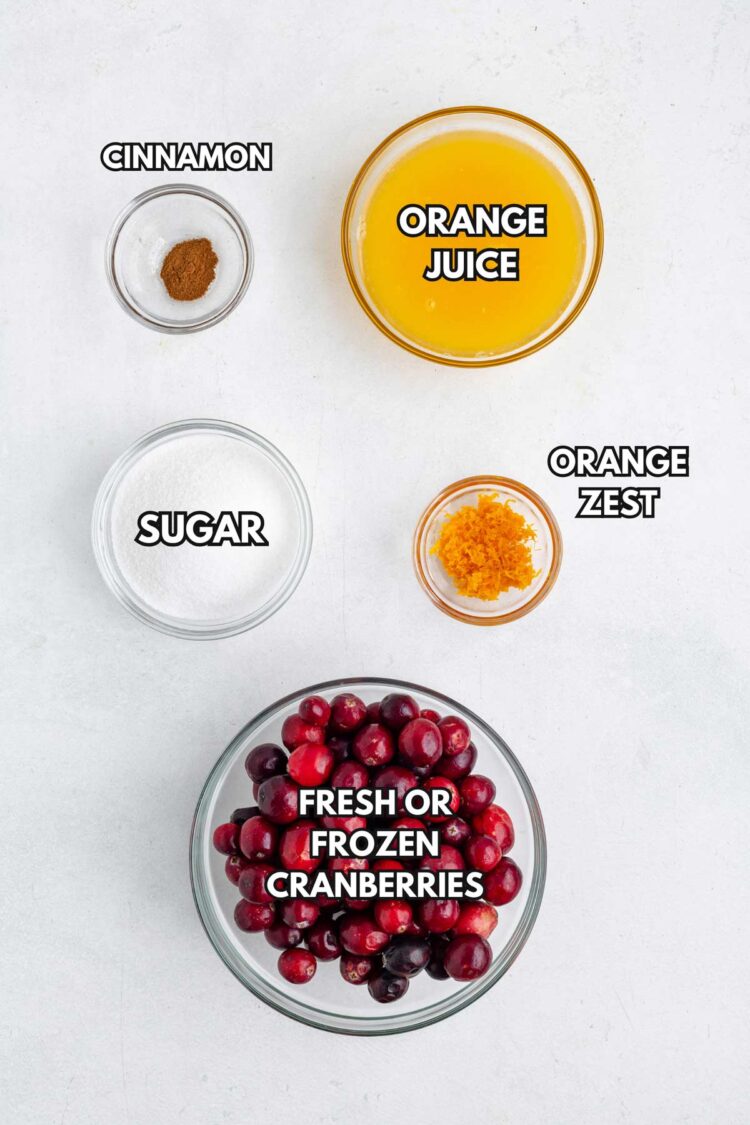
- Cranberries – fresh or frozen cranberries both work. There’s no need to thaw frozen cranberries before cooking them.
- Orange juice and zest – these give the preserves their orange flavor, which pairs especially well with the tart cranberries. Don’t reduce the juice, as it’s needed to cook the berries properly.
- Mini chocolate chips – these are optional, but a few on top add a little chocolate flavor without overpowering the cranberry filling.
The filling uses half a batch of my Cranberry Preserves recipe. You can follow the smaller quantities in the recipe below or make the full preserves recipe and save the rest for another use.
How to Make Them
There are three main parts to this recipe: preparing the pastry shells, making the cranberry preserves and baking the filled tartlets.
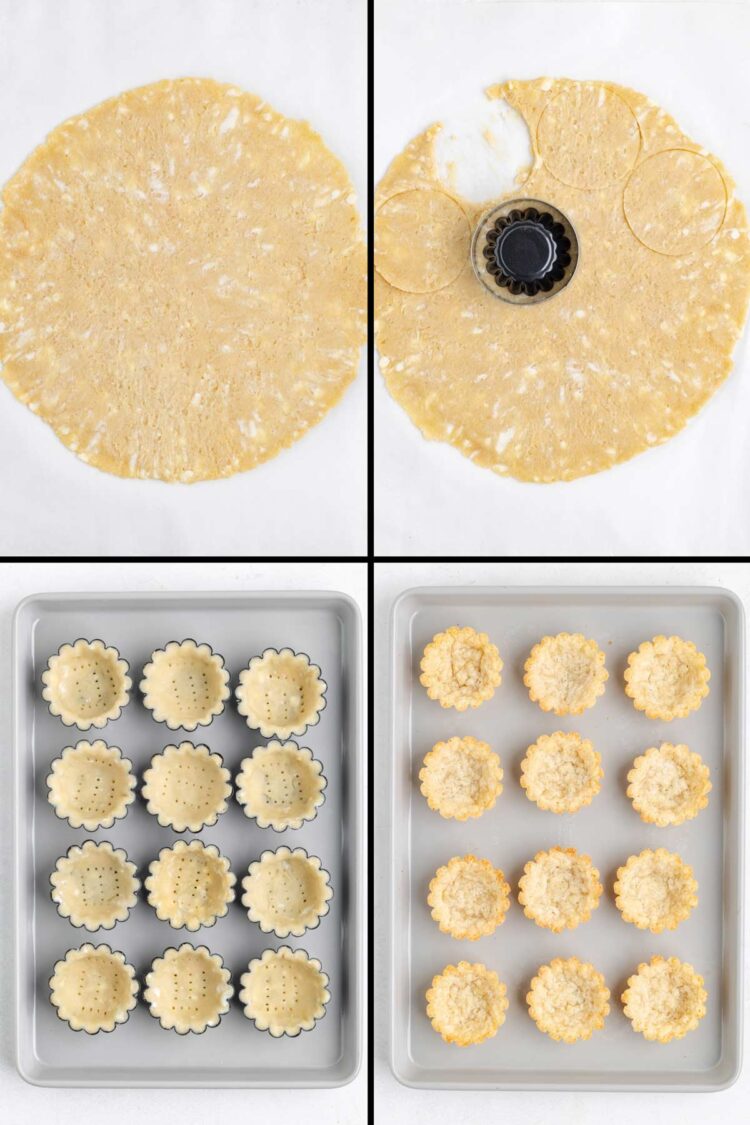
- Prepare the dough – mix the flour, sugar and salt, then cut in the cold butter. Add the egg yolk, vanilla and milk, bring the dough together and refrigerate it for 1 hour.
- Shape the tartlet shells – roll the chilled dough between sheets of parchment paper to about 1/8 inch (3–4 mm) thick. Cut out circles slightly larger than the tart pans, press them into the greased pans and prick the bottoms with a fork. Freeze for 20–30 minutes.
- Bake the shells – bake on a preheated baking sheet at 375°F (190°C) for 14–17 minutes, until the sides are nicely browned and the bottoms have some color. Let them cool for 15–20 minutes before removing them from the pans while they’re still a little warm.
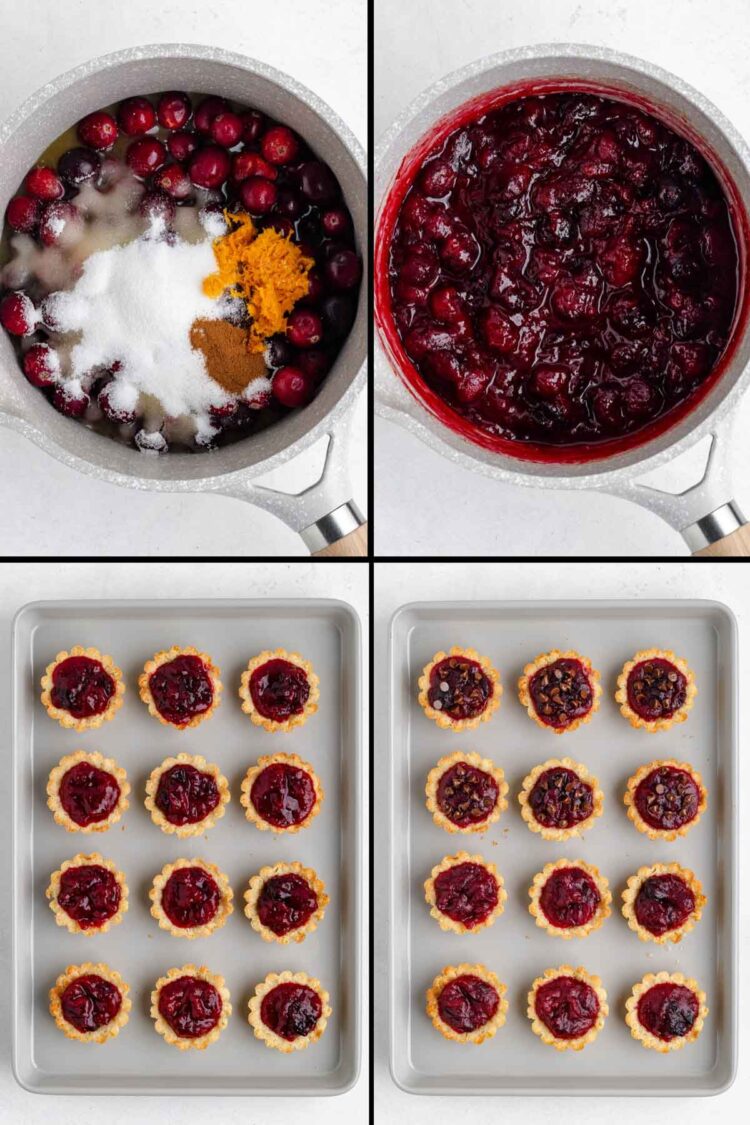
- Make the preserves – simmer the cranberries, sugar, orange juice, zest and cinnamon for about 10–15 minutes. Most of the cranberries should have popped, and the mixture should have thickened slightly. Let the preserves cool for 20–30 minutes, during which they’ll thicken further.
- Fill and bake – spoon a scant tablespoon (about 17.5 grams) of cooled preserves into each cooled shell. Bake at 350°F (175°C) for another 10 minutes, then let the tartlets cool. Add a few mini chocolate chips, if desired.
- Cut the circles to fit your pans – I found that circles only about 1/4 inch (6 mm) wider than the widest part of my tart pans were plenty big enough. I still needed to trim some dough away! Test one circle before cutting the rest rather than assuming you need a much larger cutter.
- Keep the dough cold – if it gets too soft while you’re rolling and cutting it, put it in the freezer for a few minutes. The circles will also be easier to peel off the parchment paper.
- Press out any air pockets – pay particular attention to the bottom edges where the sides meet the base of the pan. Press the dough firmly into the fluted edges and trim away the excess.
- Don’t overcook the preserves – they’ll continue to thicken as they cool, so there’s no need to cook them until they’re very thick in the saucepan.
- Use cooled preserves – the preserves should be thick enough to spoon neatly into the cooled shells. You can even use them straight from the refrigerator if you’ve made them in advance.
Troubleshooting
- The pastry shrinks while baking – avoid stretching the dough as you press it into the pans, as it can shrink back during baking. Freezing the shaped shells for 20–30 minutes before baking also helps them hold their shape.
- The crusts stick to the pans – make sure the pans are well greased, even if they’re non-stick. Let the baked crusts cool for about 15–20 minutes, then gently turn the pans over while the crusts are still slightly warm. They should release easily.
- The preserves are too runny – let them cool completely before deciding they’re too thin. If they’re still runny, return them to the saucepan and simmer briefly, then let them cool again.
Make Ahead & Storage
You can prepare the pastry shells and cranberry preserves separately, so they’re ready to assemble when you need them.
- Pastry dough – make the dough up to 3 days ahead and keep it tightly wrapped in the refrigerator. You can also freeze it for up to 3 months and thaw it overnight in the refrigerator.
- Baked tartlet shells – store the completely cooled shells in an airtight container at room temperature for up to 2 days.
- Cranberry preserves – make them up to 3 days ahead and keep them refrigerated in an airtight container. There’s no need to reheat them before filling the shells.
- Assembled tartlets – these are best the day they’re filled and baked, when the pastry is at its crispest. Refrigerate leftovers in an airtight container for up to 3 days, keeping in mind that the crusts will gradually soften.
For the best texture, I recommend filling and baking the tartlets on the day you plan to serve them. With the shells and preserves already prepared, the final baking step takes just 10 minutes.
I hope you’ll enjoy these cranberry tartlets! Thanks for reading. 🙂
Looking for more Thanksgiving dessert ideas? Here are a few of my favorites!
- Pecan Pie Cookies – soft, chewy cookies with a gooey pecan pie filling. A fun alternative to traditional pecan pie for Thanksgiving!
- No-Bake Pumpkin Cheesecake Pie – a creamy, layered pumpkin cheesecake with a graham cracker crust. It freezes beautifully, making it a great make-ahead Thanksgiving dessert.
- Gluten-Free Pumpkin Pie – a classic Thanksgiving dessert with a creamy, spiced filling and buttery, flaky crust. Choose between an easy version and a slightly more involved method for an extra-crisp crust.
- Sweet Potato Cake – an incredibly moist, warmly spiced cake topped with cream cheese frosting. Great for feeding a crowd!
- Cheesecake Pecan Pie Bars – rich, creamy cheesecake bars with a gooey caramel pecan topping. One of my favorite desserts!
- Swedish Apple Pie – an easy, crustless apple pie that’s also my most-requested Thanksgiving dessert.
Cranberry Tartlets
Servings 18
These cranberry tartlets feature crisp, buttery homemade pastry shells filled with sweet-tart cranberry orange preserves. They’re a festive little holiday dessert and can be made with regular or gluten-free flour.
Prevent your screen from going dark
Make the crust:
-
In a medium bowl, whisk together the flour, sugar and salt.
1 1/4 cups (150 grams) flour, 1/4 cup (50 grams) granulated sugar, 1/2 teaspoon salt
-
Cut in the cold butter until the mixture resembles coarse breadcrumbs.
8 tablespoons (113 grams) unsalted butter
-
In a small bowl, whisk together the egg yolk, vanilla and 1 1/2 tablespoons of milk. Stir into the dry ingredients.
1 large egg yolk, 1 teaspoon vanilla extract, 1 1/2 tablespoons milk
-
Use your hands to bring the dough together. It shouldn’t be crumbly, as you’ll need to roll it out. If necessary, add more milk, 1 teaspoon at a time. Don’t add too much, as excess milk can make the baked crusts soft.
-
Form the dough into a disc, wrap it in plastic wrap and refrigerate for 1 hour. You can make the preserves while the dough chills.
-
Grease eighteen 2.6-inch (6.5 cm) fluted non-stick mini tart pans. If you have only 12 pans, you can work in two batches.
-
Roll out the dough between 2 sheets of parchment paper to about 1/8 inch (3–4 mm) thick.
-
Cut circles about 1/4 inch (6 mm) wider than the widest part of the tart pans. I used the bottom of a glass, but a cookie cutter will give you cleaner edges. Test one circle before cutting the rest, as you may need a slightly different size for your pans.
-
If the dough becomes too soft or difficult to remove from the parchment, put it in the freezer for a few minutes.
-
Place a circle of dough over a greased tart pan and press it firmly into place. Press around the bottom edges to remove any air pockets, then press the dough into the fluted sides and trim away the excess.
-
Prick the bottom several times with a fork, going almost, but not completely, through the dough. Repeat with the remaining pans.
-
Freeze the prepared tart shells for 20–30 minutes.
-
Toward the end of the freezing time, preheat the oven to 375°F (190°C). Place a baking sheet large enough to hold the tart pans in the lower third of the oven while it preheats.
-
Place the frozen tart pans directly onto the hot baking sheet and bake for 14–17 minutes, rotating the baking sheet halfway through if needed, until the sides are nicely browned and the bottoms have browned slightly.
-
Remove the baking sheet from the oven and place the tart pans on a wire rack. Let cool for about 15–20 minutes.
-
While the crusts are still slightly warm, carefully turn each pan upside down and let the crust fall into your hand. They should release easily. Let the crusts cool completely.
-
If you’re working with only 12 pans, allow the pans to cool before reusing them for the remaining dough, then repeat the shaping, freezing and baking steps.
Make the cranberry preserves:
-
In a medium saucepan over medium heat, combine the cranberries, sugar, orange juice, orange zest and cinnamon.
6 ounces (170 grams) fresh or frozen cranberries, 6 tablespoons (89 ml) granulated sugar, 1/2 cup (118 ml) orange juice, 1/2 tablespoon finely grated orange zest, 1/4 teaspoon ground cinnamon
-
Cook for about 10–15 minutes, stirring occasionally, until most of the cranberries have popped and the mixture has thickened slightly. Don’t overcook, as the preserves will continue to thicken as they cool.
-
Remove from the heat and let cool for 20–30 minutes. To speed things up, transfer to a heat-safe container and refrigerate, stirring occasionally. The preserves can also be made up to 3 days in advance and kept refrigerated.
Fill and bake:
-
Preheat the oven to 350°F (175°C).
-
Spoon a scant tablespoon (about 17 grams) of cooled cranberry preserves into each cooled tartlet shell. Place the filled shells directly on a baking sheet.
-
Bake for 10 minutes.
-
Remove from the oven and let cool on a wire rack.
-
If desired, sprinkle a few mini chocolate chips over the tartlets once they’ve cooled slightly. If using sugared cranberries, only add them just before serving.
-
These tartlets are best served the day they’re filled and baked. Store leftovers in an airtight container in the refrigerator for up to 3 days.
- You can use all-purpose flour in this recipe, or for a gluten-free option, substitute it with King Arthur Flour Gluten-free Measure for Measure Flour – they work equally well.
- Crust adapted from King Arthur Flour.
- The nutrition information provided is calculated as a courtesy and is only an estimate. I am not a licensed nutritionist or dietitian. For the most accurate nutritional data, consult a professional or use your preferred calculator.
Calories: 207kcalCarbohydrates: 15gProtein: 2gFat: 15gSaturated Fat: 9gPolyunsaturated Fat: 1gMonounsaturated Fat: 4gTrans Fat: 0.3gCholesterol: 40mgSodium: 87mgPotassium: 95mgFiber: 1gSugar: 8gVitamin A: 366IUVitamin C: 0.1mgCalcium: 20mgIron: 1mgNet Carbs: 14

