


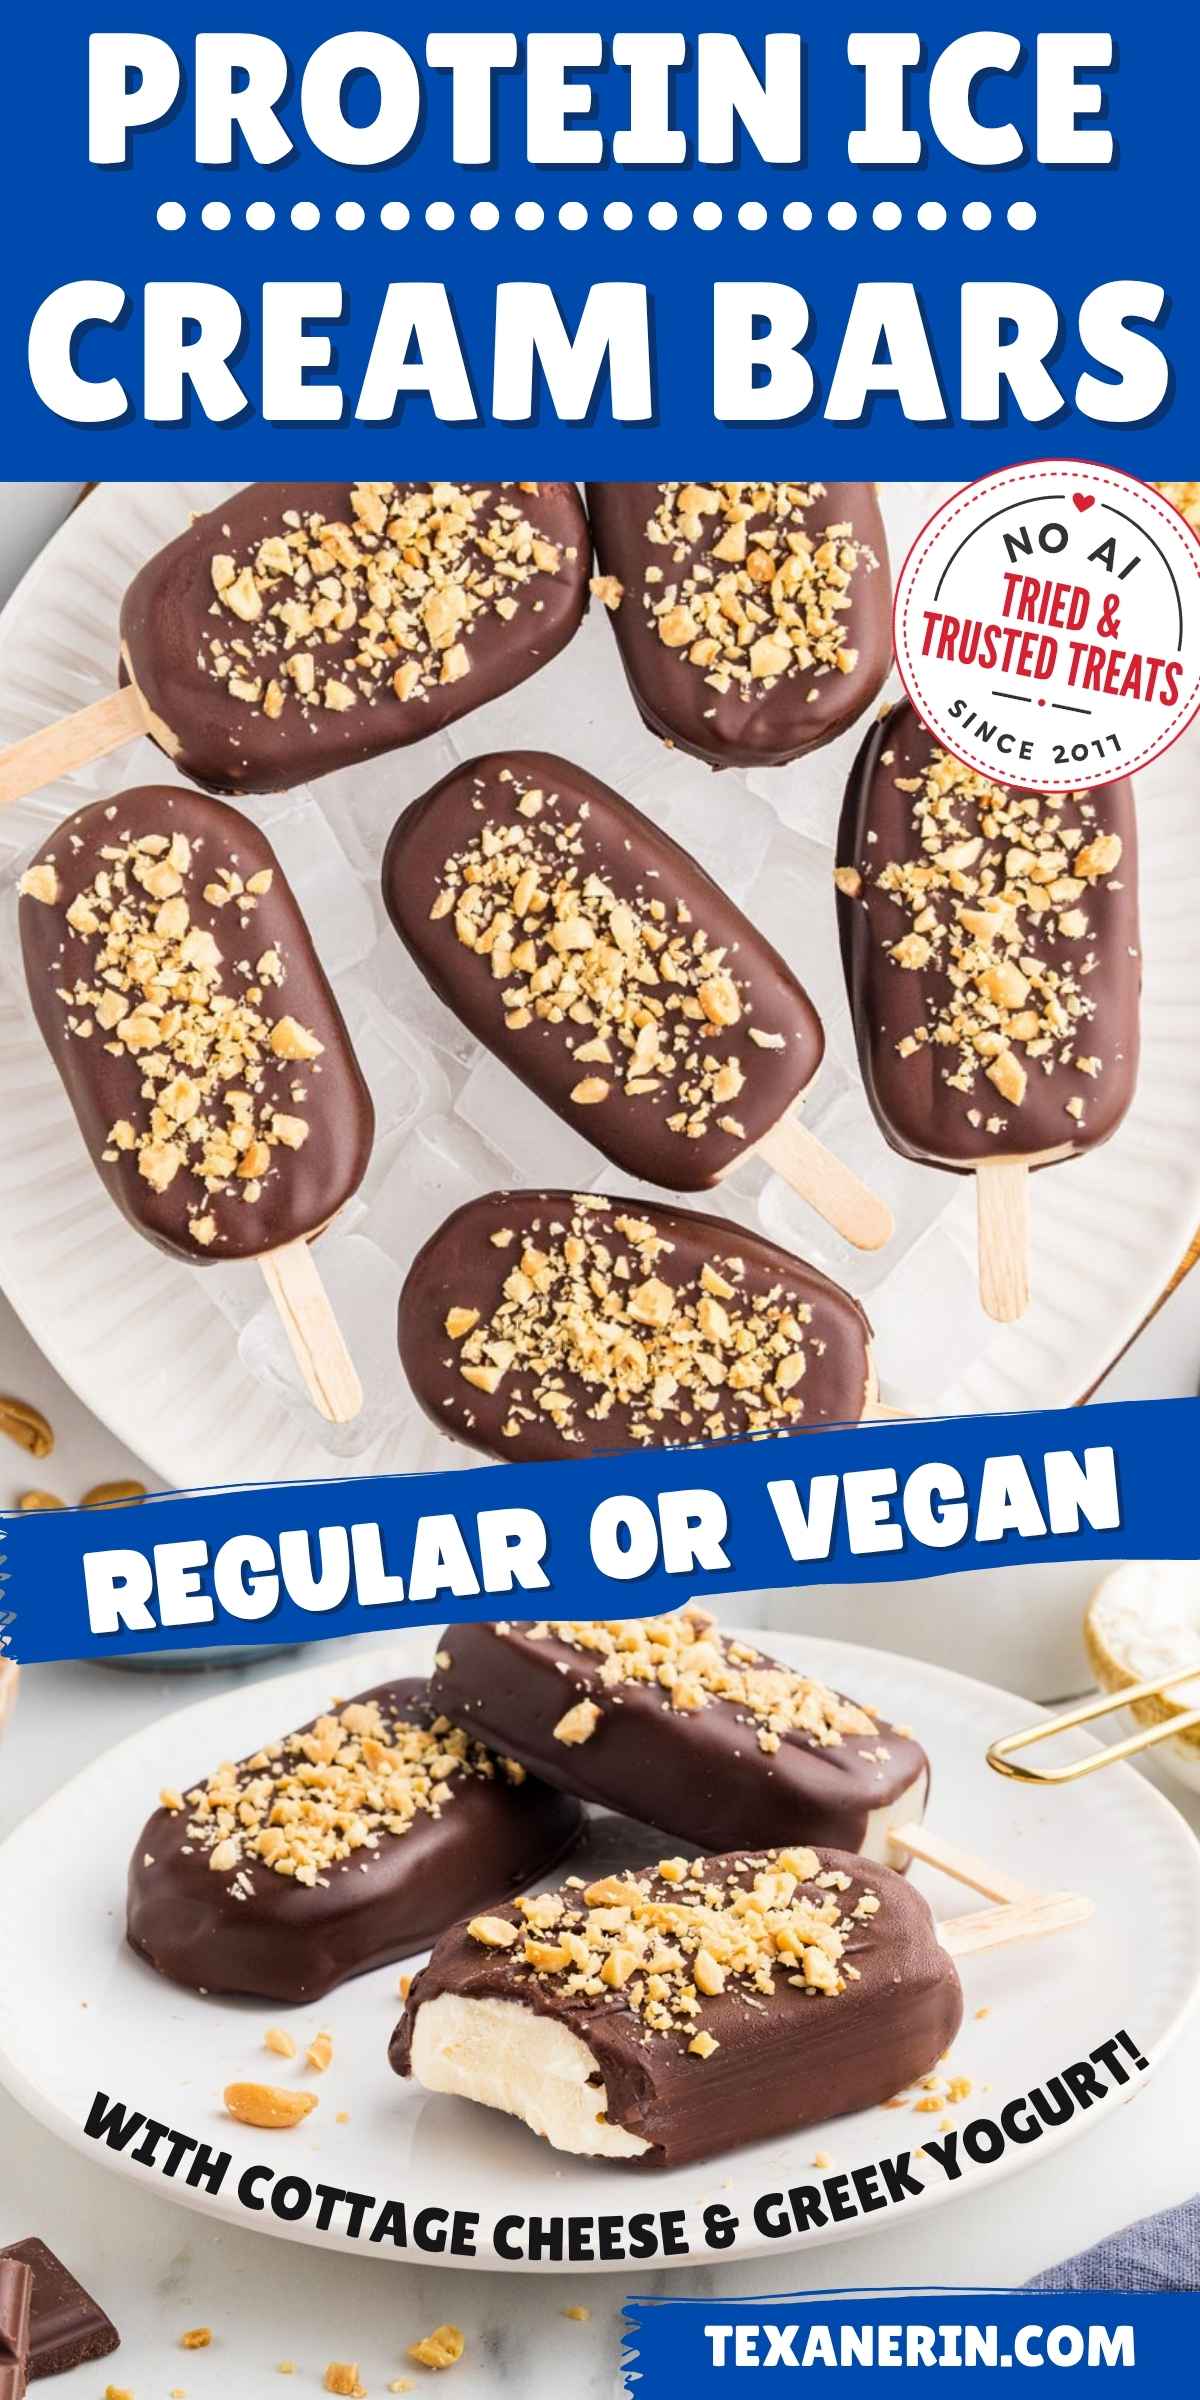
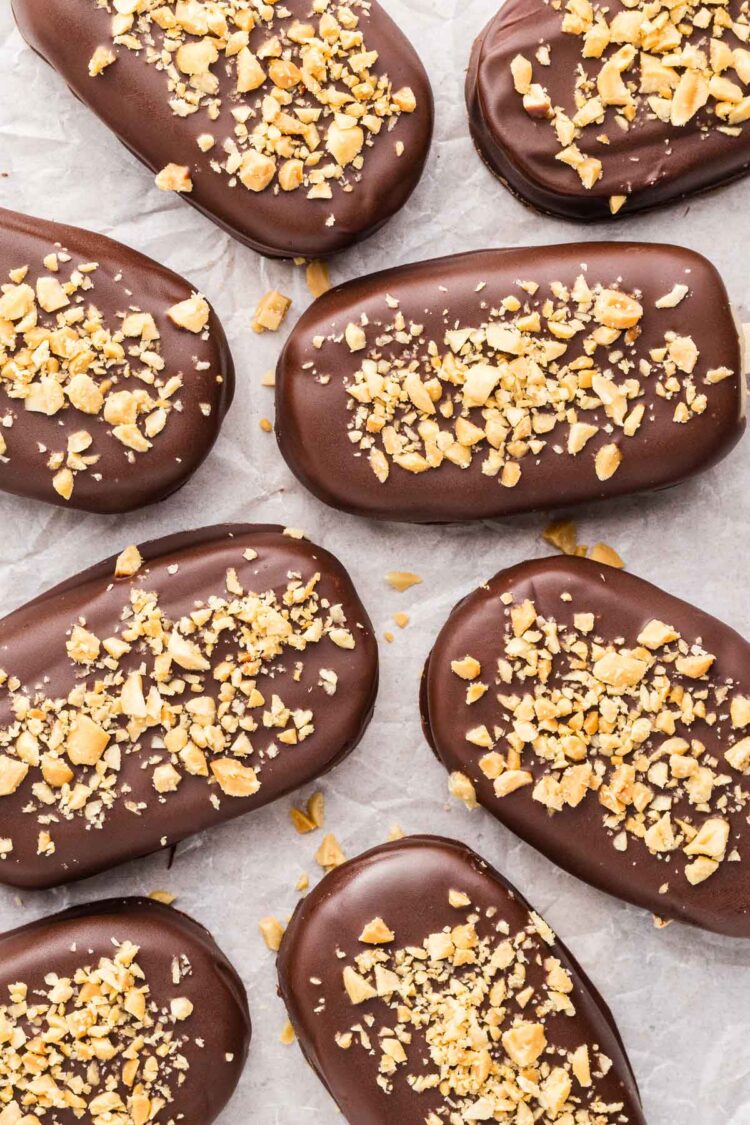
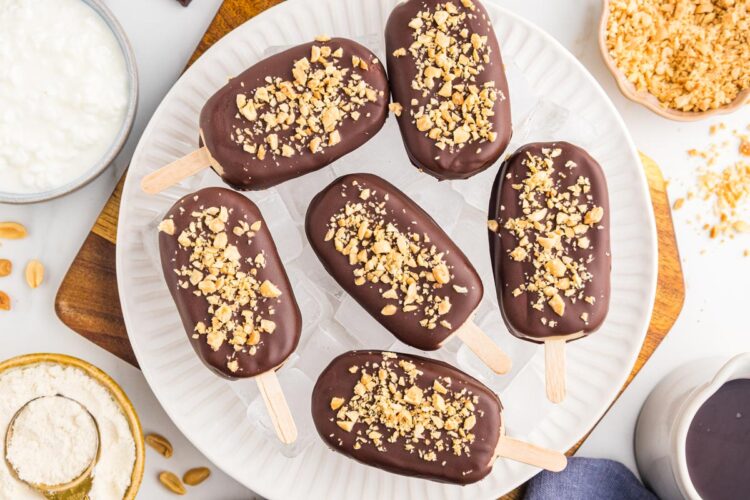
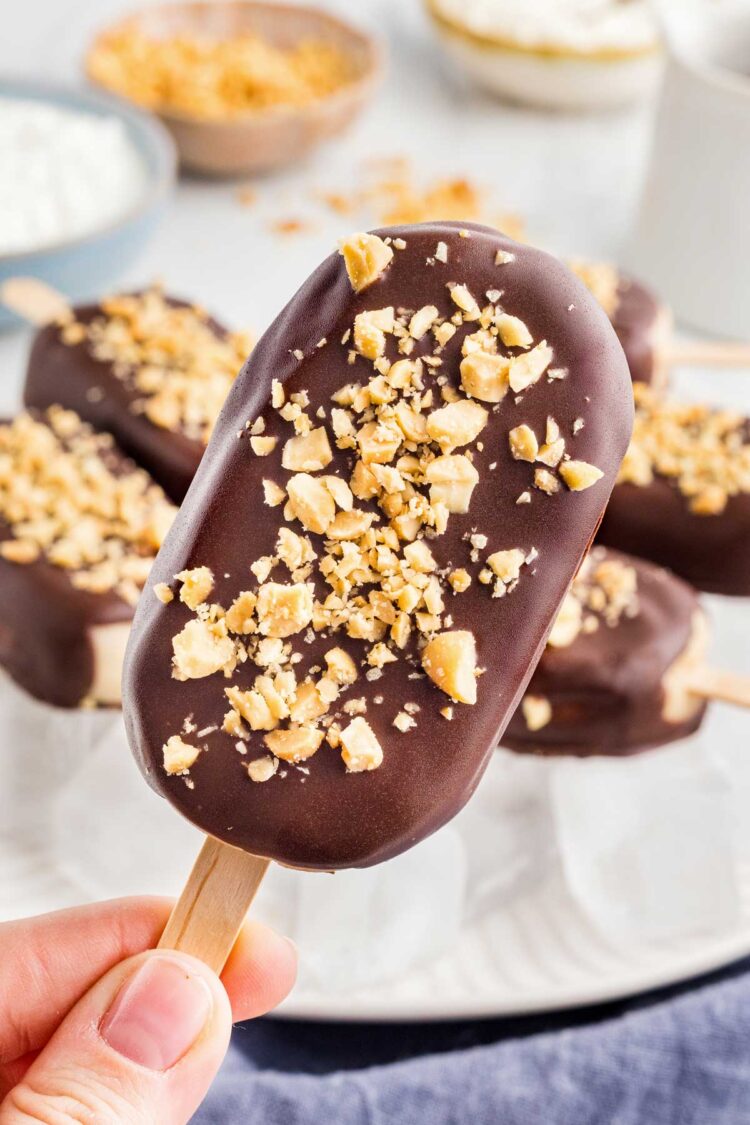
These protein ice cream bars have a vanilla filling coated in chocolate and topped with salted peanuts. The filling is made with cottage cheese, Greek yogurt and vanilla protein powder, but once it’s blended, there’s no visible cottage cheese texture or noticeable cottage cheese flavor (according to multiple testers!). I’ve also tested a vegan version.
No ice cream maker is needed, and making individual bars means you can keep them in the freezer and take out only as many as you need.
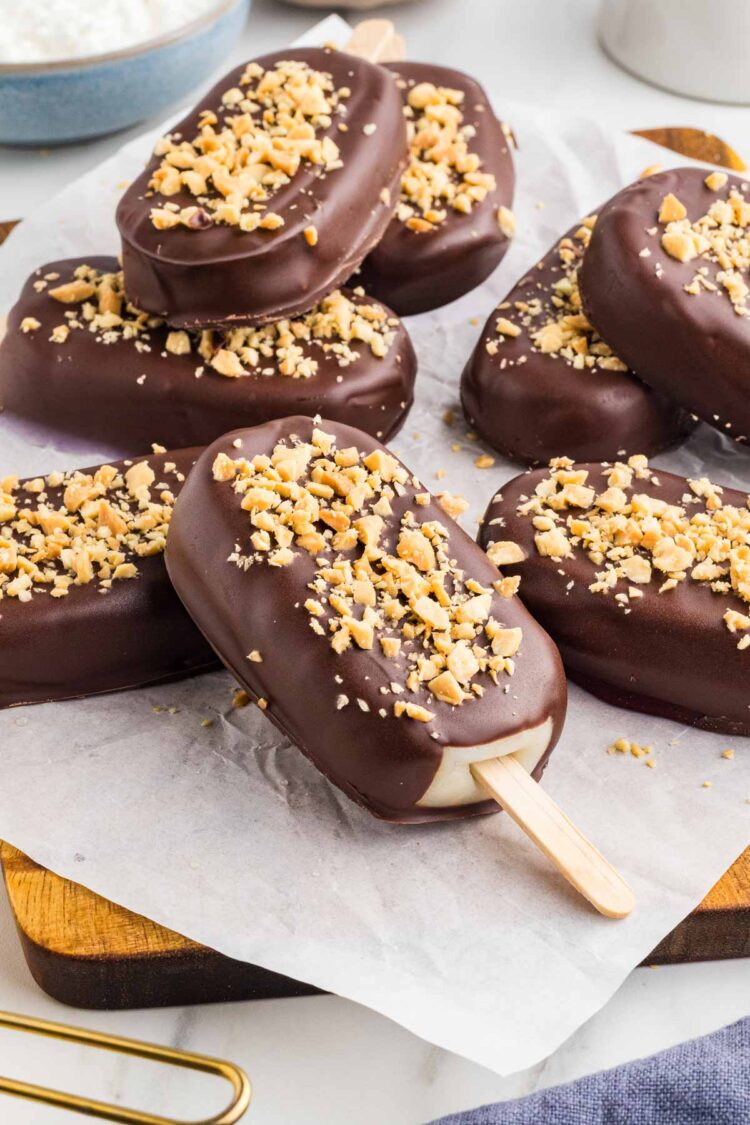
One tester said they taste much more like homemade chocolate-covered ice cream bars than a typical protein snack. And I agree!
But like I’ve said before, if your protein powder tastes like trash, so will your high-protein desserts. So make sure to use a decent one.
You can also adjust the texture depending on how long you leave them out. After 10-15 minutes at room temperature, the center becomes creamy and easy to bite. After only a few minutes, it stays firmer and a little icier. I like them both ways.
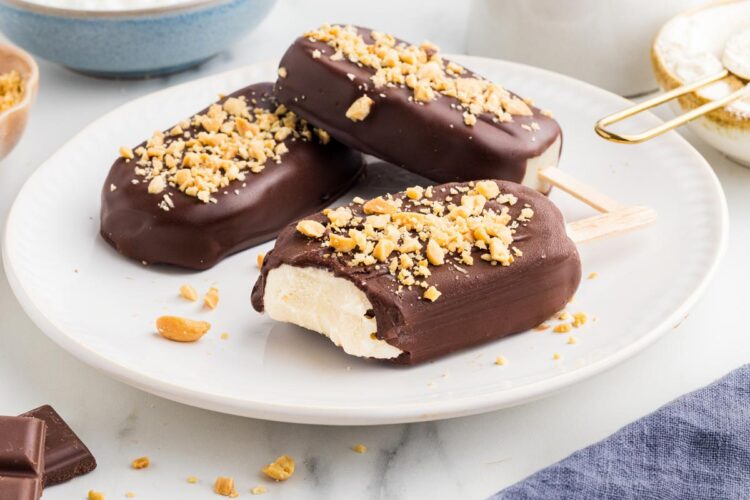
The vegan version uses thick Greek-style coconut yogurt, peanut butter and plant-based protein powder. Because it isn’t a simple ingredient swap, I included the complete vegan recipe below the first recipe card.
For a richer peanut butter version made with Greek yogurt and no protein powder, try my Greek Yogurt Ice Cream Bars.
Ingredients
Please scroll down for the full recipe. These are just notes on select ingredients.
- Cottage cheese – use full-fat cottage cheese for the creamiest filling.
- Greek yogurt – use full-fat plain Greek yogurt rather than regular yogurt. Its thicker texture helps keep the filling creamy without requiring too much protein powder. I’ve also made these with coconut Greek yogurt with great results.
- Vanilla protein powder – use a standard vanilla protein powder that you know blends smoothly in protein shakes or puddings. Powders made almost entirely from whey, collagen, rice, pea or another isolated protein source, without ingredients that improve the texture, may produce grainy bars. I tested these with Orgain Vanilla Ketogenic Collagen Protein Powder with MCT Oil, which now appears to be discontinued or out of stock, and Dr. Murray’s 3-Seed Vanilla Protein Powder. Both versions came out great! If using Dr. Murray’s, your bars will be slightly darker than the ones shown in the photos.
- Chocolate – semi-sweet chocolate balances the sweet vanilla filling. The recipe intentionally makes a little more coating than you’ll use on the bars, because having extra chocolate in the bowl makes the last few much easier to coat smoothly. I stir some peanuts into any leftover chocolate to make a cluster or two.
- Peanuts – salted roasted peanuts tasted much better than unsalted raw peanuts. Their crunch is especially nice once the filling begins to soften.
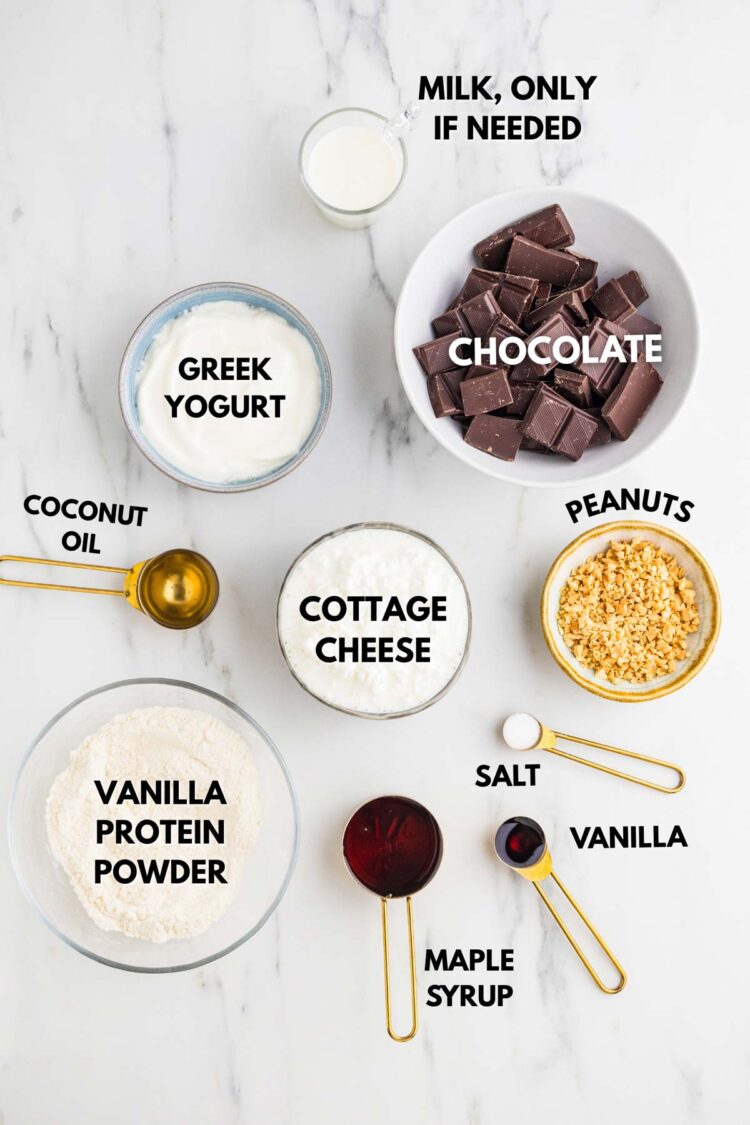
For the vegan version, the ingredients are different. The main ingredients are vegan Greek-style coconut yogurt, maple syrup, peanut butter and vegan vanilla protein powder.
How to Make Protein Ice Cream Bars
Here’s a quick overview. Detailed instructions are included in the recipe card below.
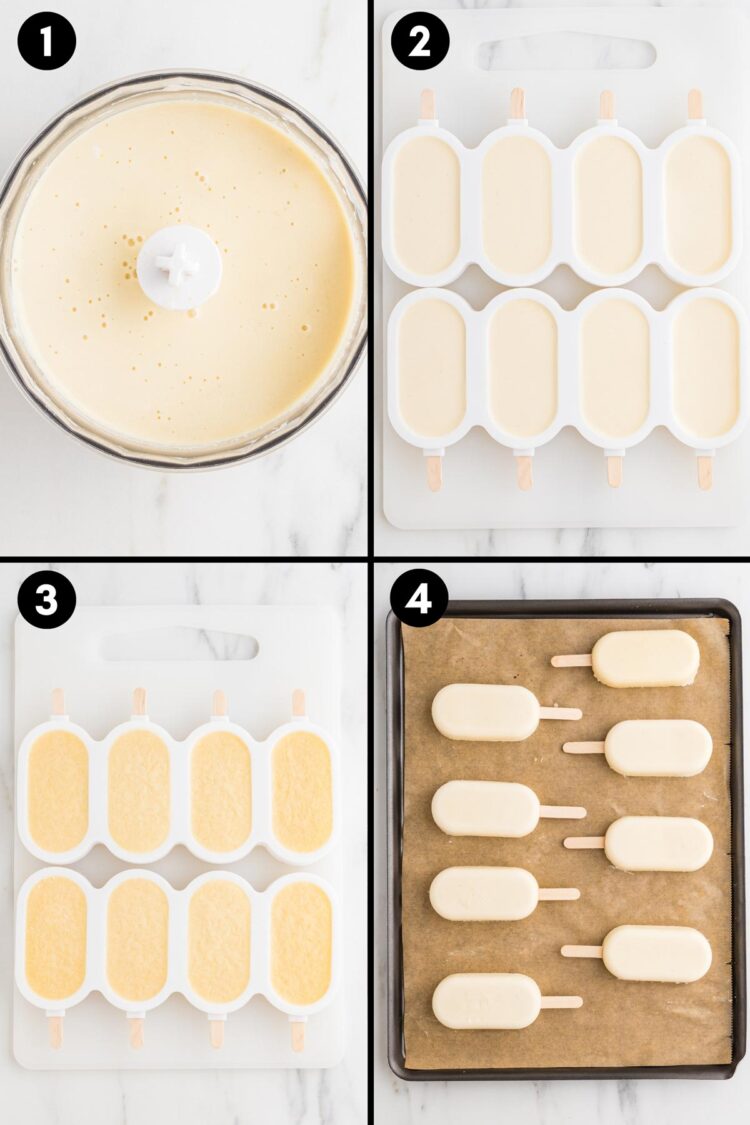
- Blend the cottage cheese, Greek yogurt, maple syrup or honey, protein powder, vanilla and salt until completely smooth. Check the consistency and add milk only if the filling is too thick to pour.
- Divide the filling among eight silicone mold cavities, tap out any air pockets and insert the sticks.
- Freeze for at least seven hours or overnight.
- Unmold the bars and return them to the freezer for 15-20 minutes. This makes the exposed surfaces especially cold and dry so the chocolate adheres more easily.
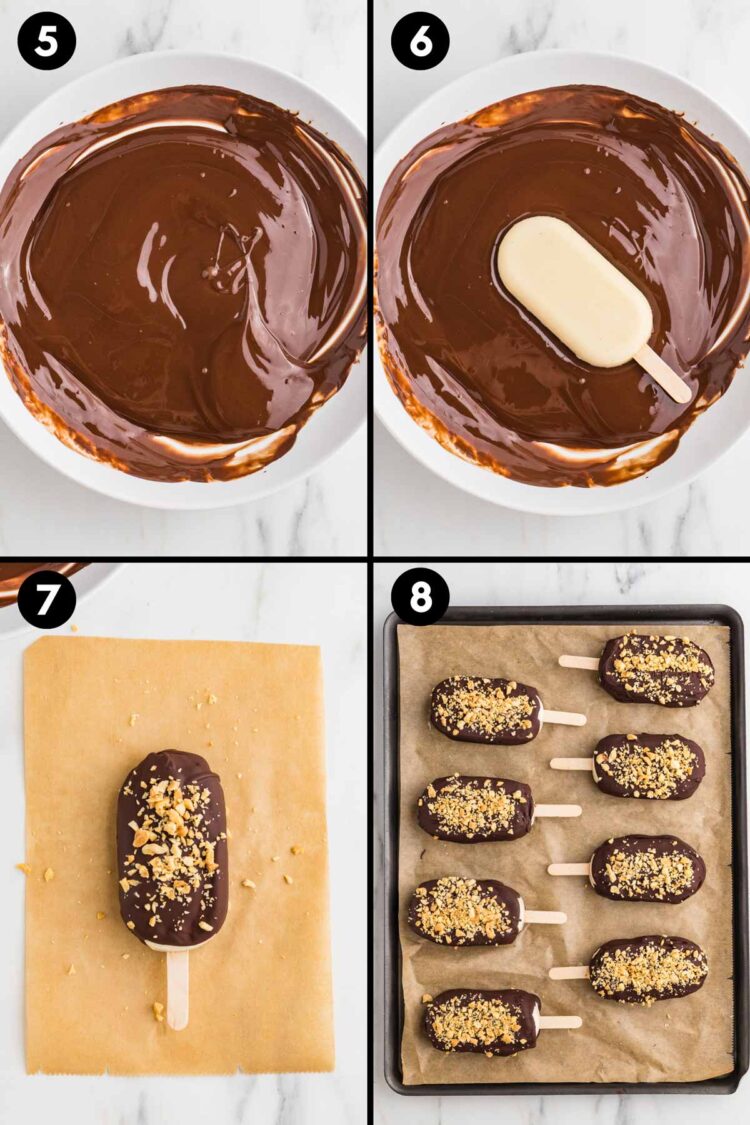
- Melt the chocolate and coconut oil.
- Dip or spoon the chocolate coating over one bar at a time.
- Immediately add the chopped peanuts.
- Freeze until the coating is firm, then let the bars soften to your preferred texture before eating.
- Blend until completely smooth – stop and scrape down the blender or food processor as needed. Continue blending until no cottage cheese curds remain and the filling looks glossy and uniform.
- Check the consistency before adding milk – if the filling is already thick but pourable, divide it among the molds right away. The filling should resemble thick, pourable pudding. It should flow into the molds without needing to be spooned in, but adding too much milk can make the frozen bars icier. If it’s too thick, add milk 1 teaspoon at a time, blending well after each addition. Give it a few minutes between additions so you don’t accidentally thin it too much.
- Freeze them completely – one test batch was still soft in the center after five hours, and a bar broke during unmolding (even using a silicone mold). Allow at least seven hours or freeze the mold overnight. I’ve also made these with a hard plastic mold and had no issue unmolding them after seven hours.
How to Get a Smooth Chocolate Coating
Keep all but one bar in the freezer while you work. This ensures that they don’t start to melt while you’re dipping the others.
I usually dip mine because I’m making them for my family and don’t mind if the coating isn’t perfectly smooth. For a neater finish, spoon the chocolate over each bar instead. This also helps keep softened filling out of the bowl.
Hold one bar over the bowl and coat the back and sides first. Cover the front last, let the excess drip off and immediately sprinkle the peanuts over that side. The coating freezes quickly, so the peanuts need to be added before you move on to the next bar.
Troubleshooting
- The filling is grainy – the protein powder is the most likely cause. Use one that blends smoothly, and blend the filling thoroughly. Letting the finished bar soften longer may make the graininess less noticeable, but it won’t completely correct an unsuitable protein powder.
- The filling is too thick – let it rest first, stir or blend it again and then add milk just 1 teaspoon at a time. It should flow slowly into the molds but shouldn’t be thin.
- A bar breaks during unmolding – the center isn’t completely frozen. Return the mold to the freezer for another hour or two before trying again.
- The chocolate won’t stick – the surface may be damp or starting to soften. Freeze the unmolded bars uncovered for another 15-20 minutes and remove only one at a time for coating.
- The coating becomes cloudy or lumpy – some filling may have melted into the chocolate. Spoon the coating over the bars rather than repeatedly dipping them into the bowl.
- The bars are too hard to bite – allow them to soften at room temperature. The exact amount of time depends on your freezer and the texture you prefer.
Serving and Storage
For the creamiest, most ice cream-like texture, let the bars sit at room temperature for 10-15 minutes. The filling softens quickly once it begins to thaw.
You can also eat them after only a few minutes at room temperature if you prefer a firmer, slightly icier texture that feels a little lighter. They’re too hard to bite comfortably straight from the freezer, but you can eat them slowly like a popsicle until they begin to soften.
Once the chocolate is completely firm, transfer the bars to an airtight freezer container. Place parchment paper between layers to protect the coating and store them in the freezer for up to one month for the best texture.
Vegan option
You could just use vegan cottage cheese, Greek yogurt, milk and chocolate in the recipe, but I don’t know if everyone has access to vegan cottage cheese. So I came up with a totally different vegan version.
The vegan version is a genuinely different recipe, and it’d be way too confusing to list it together in one recipe card, so scroll down just below the first recipe card to find the vegan recipe.
The changes are:
- Coconut yogurt replaces both cottage cheese and Greek yogurt. I used “Greek style” coconut yogurt. It’s just a tiny bit thicker than the other coconut yogurts I’ve tried. You can use regular vegan yogurt if you don’t mind the bars being lighter and less rich. If you want the bars to have more protein, you could try a thick high-protein soy yogurt or plant-based skyr-style yogurt. Depending on the product, this may add around 2-3 grams of protein per bar. I haven’t tested this substitution, so the texture may differ and the bars will likely be less rich than the coconut yogurt version.
- Added peanut butter or sunflower seed butter to contribute some more richness and structure. This will make the bars a little more beige than what you see in the photos.
- Maple syrup is your only sweetener choice.
- For vegan protein powder, I used Dr. Murray’s 3-Seed Vanilla Protein Powder.
Protein Ice Cream Bars
Servings 8
These protein ice cream bars have a smooth vanilla filling made with cottage cheese, Greek yogurt and protein powder, plus a chocolate shell and salted roasted peanuts. No ice cream maker needed.
Prevent your screen from going dark
Make the bars:
-
Place an eight-cavity silicone popsicle mold on a small tray or cutting board so it can be transferred to the freezer without bending.
-
Add the cottage cheese, Greek yogurt, maple syrup or honey, protein powder, vanilla and salt to a high-powered blender or food processor. Blend until completely smooth, stopping to scrape down the sides as needed. Continue blending until no cottage cheese curds remain and the filling looks glossy and uniform.
1 1/2 cups (345 grams) full-fat cottage cheese, 1/2 cup (120 grams) full-fat Greek yogurt, 1/4 cup (80 grams) maple syrup or honey, 1/3 cup (35-40 grams) vanilla protein powder, 1 tablespoon vanilla extract, 1/4 teaspoon salt
-
Check the consistency. It should be thick and creamy but pourable, similar to thick pudding. If it is too thick to flow easily into the molds, blend in milk 1 teaspoon at a time. Avoid adding more than necessary.
1-3 teaspoons milk, only if needed
-
Divide the filling evenly among the eight cavities, using approximately 74–75 grams per cavity. Tap the tray firmly against the counter several times to release air pockets, then insert and straighten the popsicle sticks.
-
Freeze for at least 7 hours or overnight. The bars should feel completely solid before you attempt to unmold them.
-
If using a silicone mold, gently remove the bars without warming it. If using a hard plastic mold, you’ll likely need to run warm water around the outside for a few seconds, just until the bars loosen enough to release. Place them on a parchment-lined tray and return them to the freezer for 15–20 minutes.
Prepare the coating:
-
Place the chocolate and 1 tablespoon of coconut oil in a shallow microwave-safe bowl. Microwave in short intervals, stirring thoroughly after each interval, until smooth. Add up to 1 addi8tional teaspoon of coconut oil if the coating is too thick to spoon easily.
1 3/4 cups (298 grams) semi-sweet chocolate, 1 tablespoon (14 grams) refined coconut oil
-
Let the coating cool slightly. It should remain fluid but shouldn’t be hot.
-
Keep all but one bar in the freezer. Hold the bar over the bowl and spoon chocolate over the back and sides. Coat the front last, then let the excess chocolate drip back into the bowl. You don’t need to coat the small area around the stick.
-
Immediately sprinkle the chopped peanuts over the front before the chocolate sets. Return the coated bar to the parchment-lined tray in the freezer and repeat with the remaining bars, working with one at a time.
3-4 tablespoons finely chopped roasted peanuts
-
Freeze the coated bars for at least 20 minutes or until the chocolate is completely firm. Store the finished bars in an airtight freezer container for up to one month.
-
Let the bars sit at room temperature for 10–15 minutes for the creamiest texture. For a firmer, slightly icier texture, let them soften for only a few minutes.
- This recipe was tested in a silicone mold with eight cavities measuring approximately 9 × 5 centimeters and holding about 95 grams each (but I only use about 72 grams per bar). A differently sized mold may change the yield and freezing time.
- Protein powders differ in weight, sweetness and texture. One-third cup weighed between 35 and 40 grams with my different brands.
- Use a standard flavored vanilla protein powder that blends smoothly. A minimally processed powder made almost entirely from whey produced a grainy filling and is not recommended.
- The nutrition information provided is calculated as a courtesy and is only an estimate. I am not a licensed nutritionist or dietitian. For the most accurate nutritional data, consult a professional or use your preferred calculator.
Calories: 353kcalCarbohydrates: 30.4gProtein: 11.9gFat: 20.3gSaturated Fat: 11gPolyunsaturated Fat: 1.2gMonounsaturated Fat: 5.7gTrans Fat: 0.03gCholesterol: 18.8mgSodium: 218.4mgPotassium: 347.1mgFiber: 3.4gSugar: 22gVitamin A: 74.8IUCalcium: 108.6mgIron: 2.6mgNet Carbs: 27
Vegan Protein Ice Cream Bars
Servings 8
These vegan protein ice cream bars have a creamy vanilla filling made with Greek-style coconut yogurt, cashew butter and plant-based protein powder, plus a crisp chocolate shell and salted peanuts. No ice cream maker needed.
Prevent your screen from going dark
Make the bars:
-
Place an eight-cavity silicone popsicle mold on a small tray or cutting board so it can be transferred to the freezer without bending.
-
Add the vegan Greek yogurt, maple syrup, peanut or sunflower seed butter, vegan protein powder, vanilla and salt to a high-powered blender or food processor. Blend until completely smooth, stopping to scrape down the sides as needed. Continue blending until the filling looks glossy and uniform.
1/4 cup (80 grams) maple syrup, 1/3 cup (80 grams) natural peanut butter, 1/3 cup (35-40 grams) vegan vanilla plant-based protein powder, 1 tablespoon vanilla extract, 1/4 teaspoon salt, 2 cups (480 grams) thick vegan Greek-style coconut yogurt
-
Check the consistency. It should be thick and creamy but pourable, similar to thick pudding. If it is too thick to flow easily into the molds, blend in milk 1 teaspoon at a time. Avoid adding more than necessary.
1-3 teaspoons plant-based milk
-
Divide the filling evenly among the eight cavities, using approximately 74–75 grams per cavity. Tap the tray firmly against the counter several times to release air pockets, then insert and straighten the popsicle sticks.
-
Freeze for at least 7 hours or overnight. The bars should feel completely solid before you attempt to unmold them.
-
If using a silicone mold, gently remove the bars without warming it. If using a hard plastic mold, you’ll likely need to run warm water around the outside for a few seconds, just until the bars loosen enough to release. Place them on a parchment-lined tray and return them to the freezer for 15–20 minutes.
Prepare the coating and dip:
-
Place the chocolate and 1 tablespoon of coconut oil in a shallow microwave-safe bowl. Microwave in short intervals, stirring thoroughly after each interval, until smooth. Add up to 1 addi8tional teaspoon of coconut oil if the coating is too thick to spoon easily.
1 tablespoon (14 grams) refined coconut oil, 1 3/4 cups (298 grams) vegan semi-sweet chocolate chips or chopped chocolate
-
Let the coating cool slightly. It should remain fluid but shouldn’t be hot.
-
Keep all but one bar in the freezer. Hold the bar over the bowl and spoon chocolate over the back and sides. Coat the front last, then let the excess chocolate drip back into the bowl. You don’t need to coat the small area around the stick.
-
Immediately sprinkle the chopped peanuts or sunflower seeds over the front before the chocolate sets. Return the coated bar to the parchment-lined tray in the freezer and repeat with the remaining bars, working with one at a time.
3-4 tablespoons finely chopped roasted peanuts
-
Freeze the coated bars for at least 20 minutes or until the chocolate is completely firm. Store the finished bars in an airtight freezer container for up to one month.
-
Let the bars sit at room temperature for 10–15 minutes for the creamiest texture. For a firmer, slightly icier texture, let them soften for only a few minutes.
- This recipe was tested in a silicone mold with eight cavities measuring approximately 9 × 5 centimeters and holding about 95 grams each (but I only use about 72 grams per bar). A differently sized mold may change the yield and freezing time.
- Instead of thick vegan Greek-style coconut yogurt, you could use regular vegan yogurt if you don’t mind them being lighter and less rich (I’ve tried this). If you want the bars to have more protein, you can use high-protein soy yogurt or plant-based skyr-style yogurt. That’d add about 3 extra grams of protein per bar. I have not tried this, though, and the bars are likely to be less rich.
- Protein powders differ in weight, sweetness and texture. One-third cup weighed between 35 and 40 grams with my different brands.
- If you’re vegan, gluten-free or nut-free, make sure you’re using a compliant protein powder.
- Use a standard flavored vanilla protein powder that blends smoothly. A minimally processed powder made almost entirely from whey produced a grainy filling and is not recommended.
- The nutrition information provided is calculated as a courtesy and is only an estimate. I am not a licensed nutritionist or dietitian. For the most accurate nutritional data, consult a professional or use your preferred calculator.
Calories: 383.8kcalCarbohydrates: 41.7gProtein: 7.8gFat: 21.7gSaturated Fat: 10.1gPolyunsaturated Fat: 2gMonounsaturated Fat: 3.7gCholesterol: 9.2mgSodium: 95.7mgPotassium: 243.9mgFiber: 1.1gSugar: 33.1gVitamin C: 7.5mgCalcium: 146.6mgIron: 0.3mgNet Carbs: 41

