

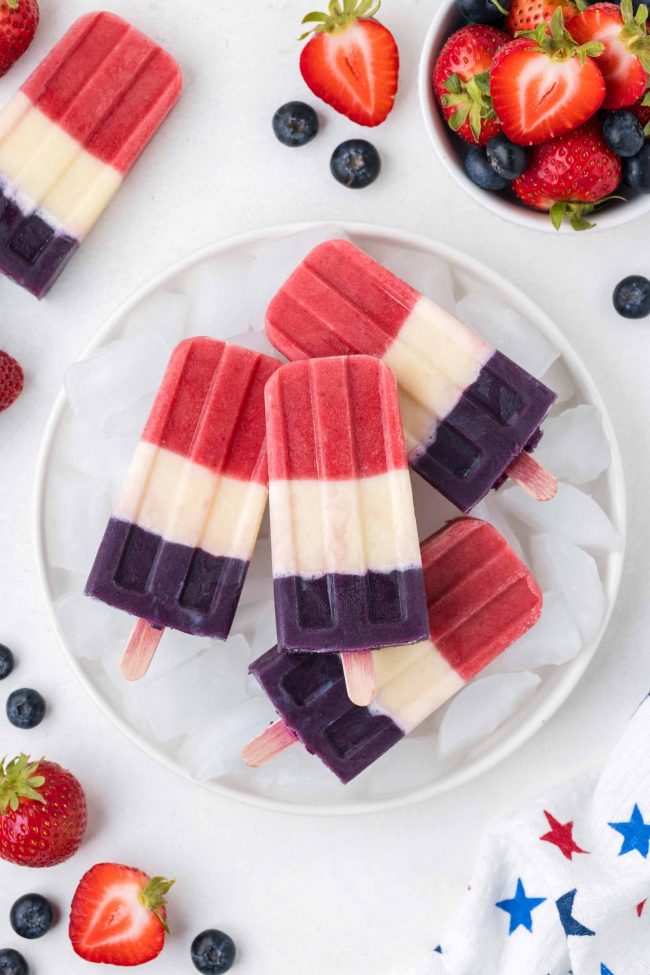
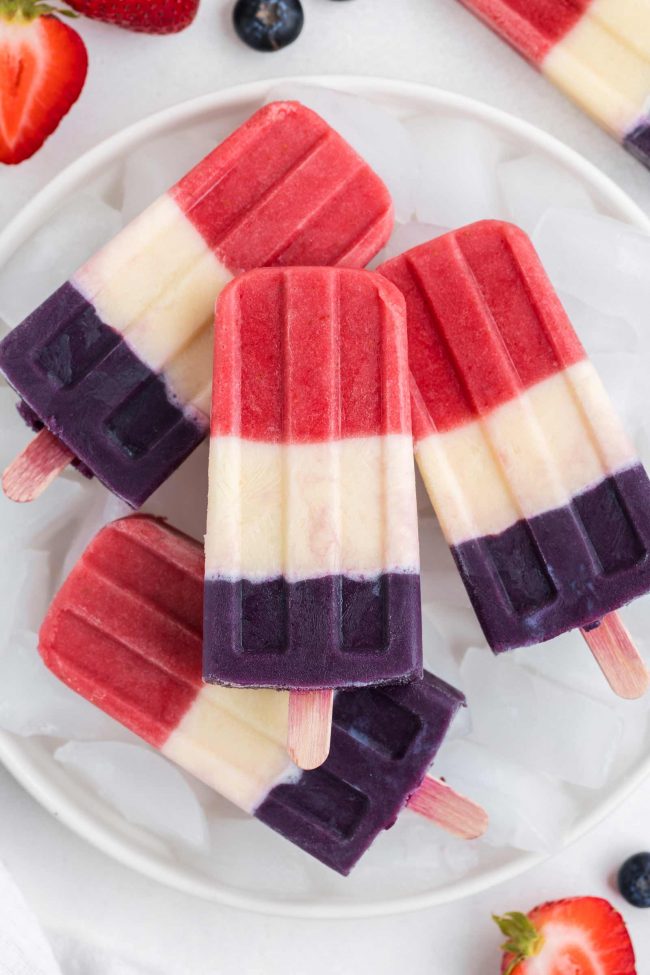
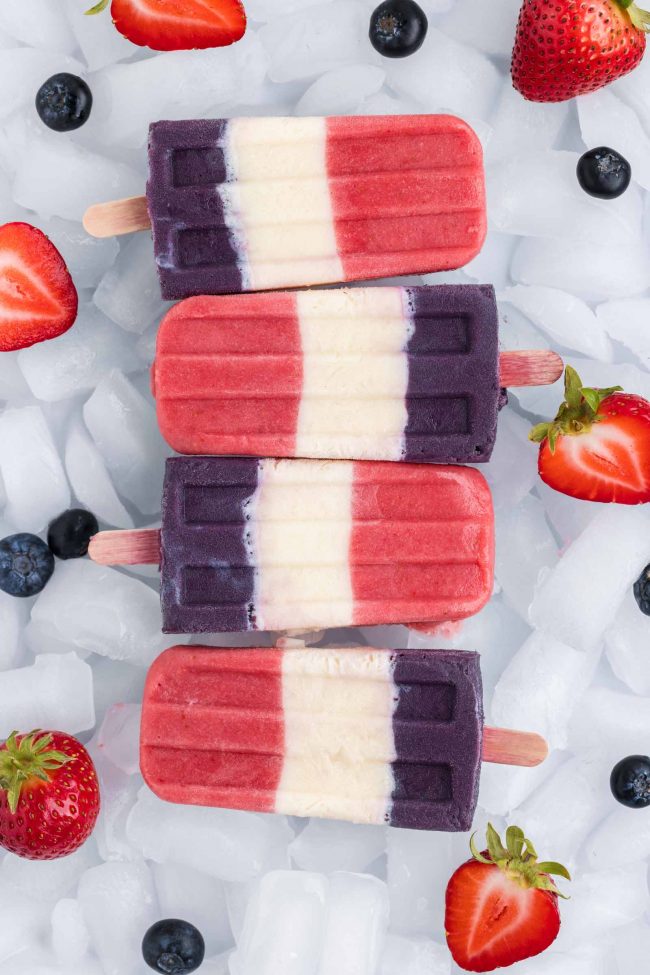
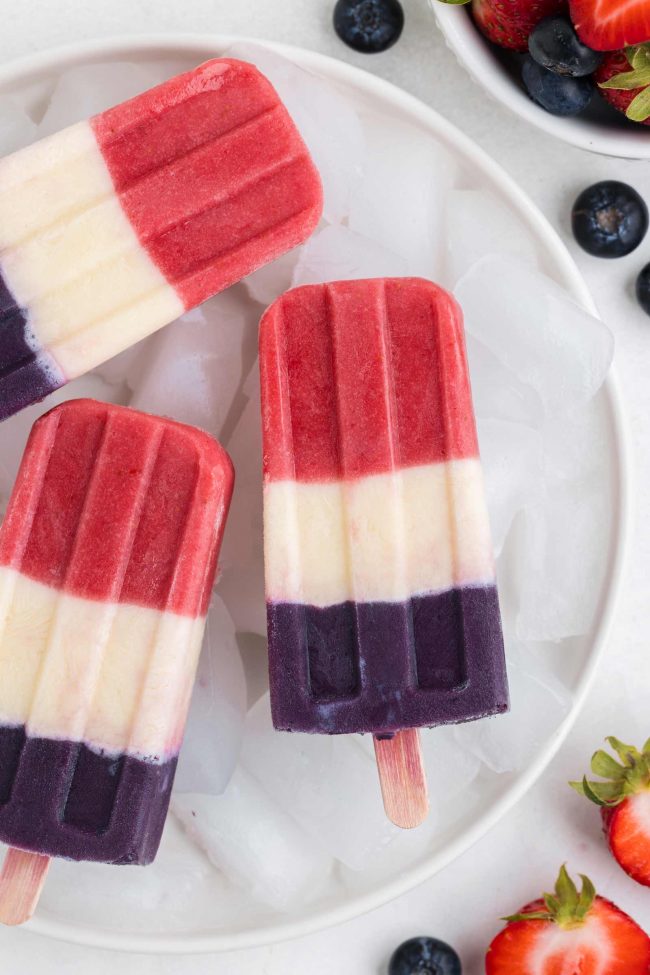
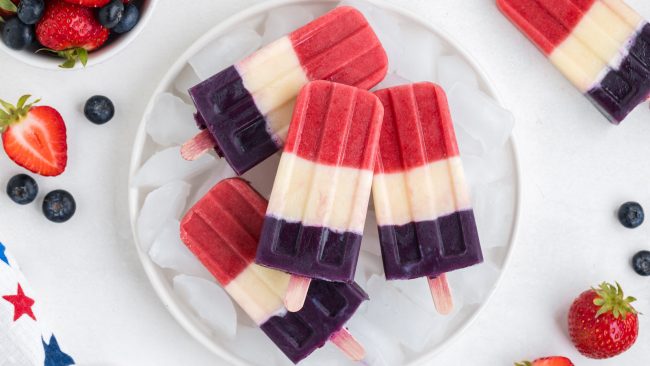
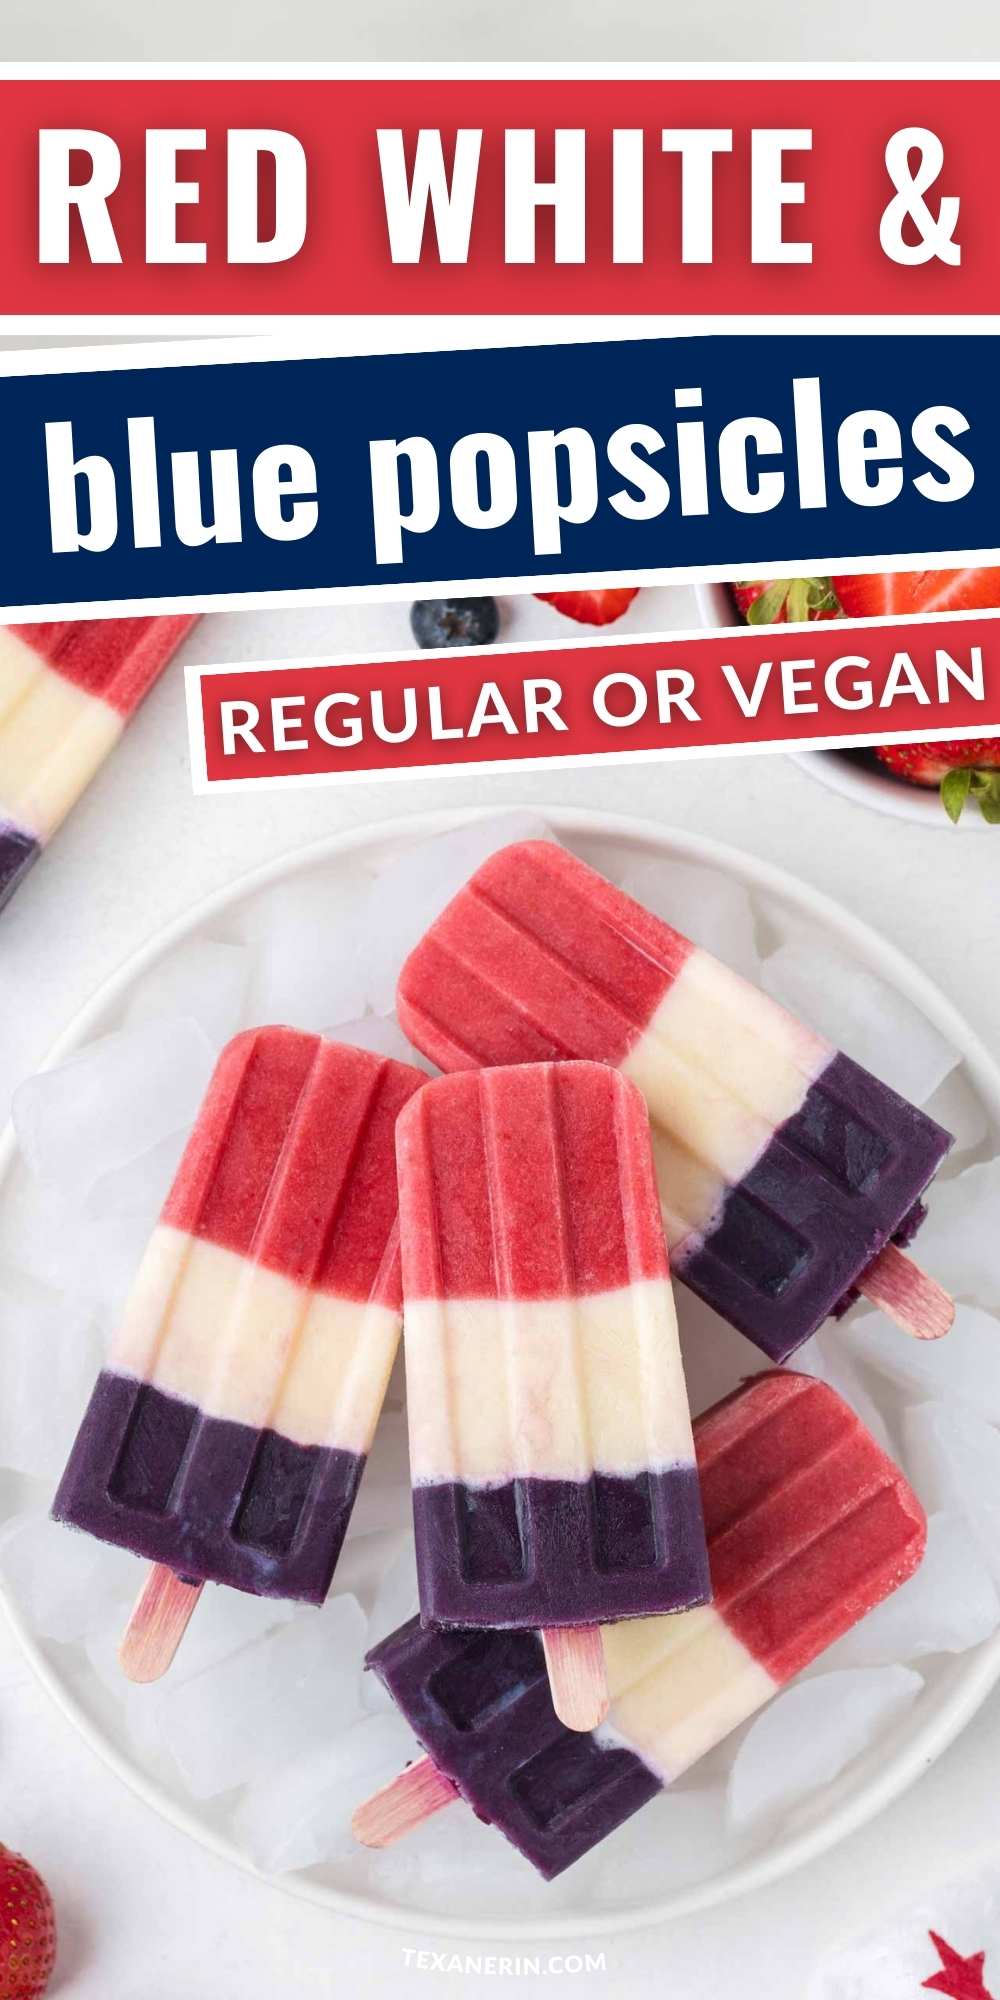
These red, white and blue popsicles only use a few ingredients, are naturally sweetened and can easily be made dairy-free, vegan and paleo.
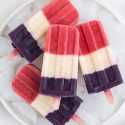
Celebrate the vibrant colors of summer with these refreshing and patriotic red, white and blue popsicles! Perfect for your next Fourth of July celebration, these popsicles are made with wholesome ingredients like yogurt, maple syrup, blueberries, and strawberries.
Not only are they a feast for the eyes, but they’re also a healthier alternative to store-bought popsicles, which are sometimes packed with natural flavors and nutrients.
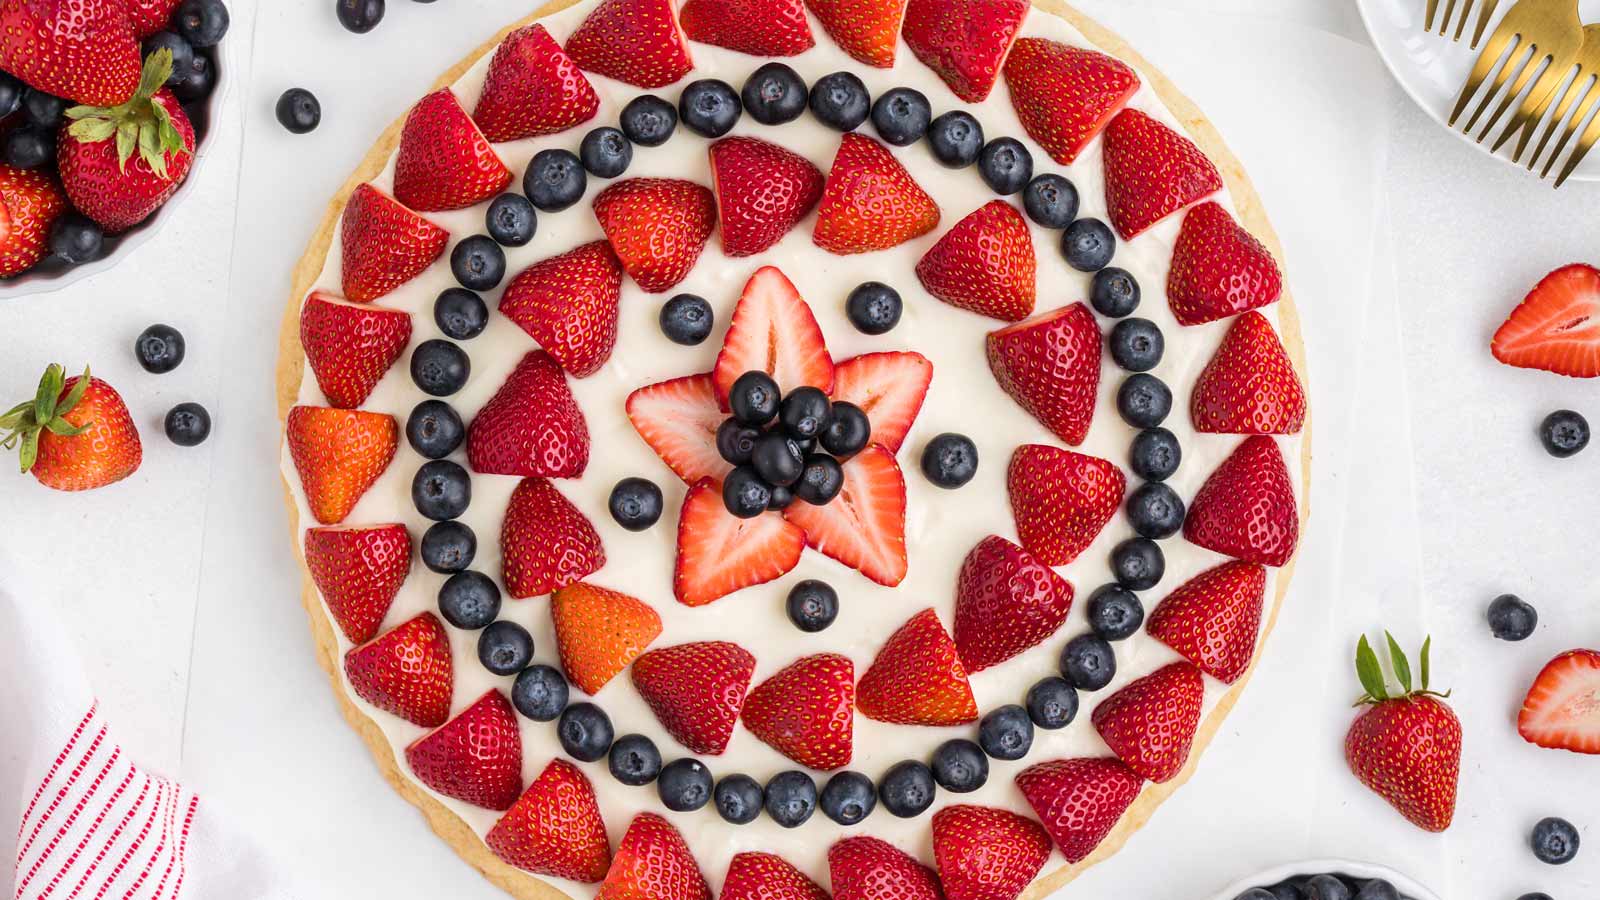
Before I get into these popsicles, you might want to go check out this July 4th Fruit Pizza I posted over on Easy Wholesome! You can use all-purpose or gluten-free flour in it.
It’s our go-to summer dessert and perfect for Memorial Day next week. The crust is like a huge, chewy sugar cookie and the topping is a lightened-up cream cheese frosting.
Ingredients
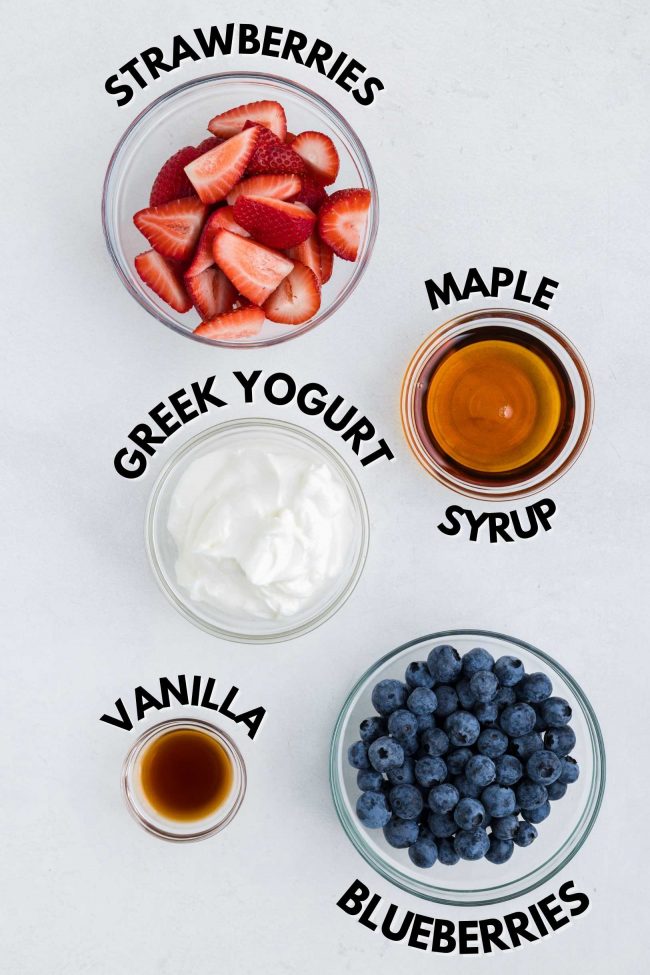
You just need basic ingredients to make these popsicles.
- Strawberries – I used defrosted frozen strawberries. They should be properly defrosted. If you use partially defrosted strawberries, it’s hard to pour the mixture into the popsicle mold. It just comes out in a big clump and makes a mess. You can also use fresh strawberries.
- Blueberries – same as above. You could also use blackberries if you don’t mind the seeds in your popsicles. The color would also be much darker.
- Greek yogurt or coconut milk yogurt – more on this below.
- Maple syrup or another sweetener – I read some people saying sweetener is optional in popsicles. Maybe that works with fresh, super-sweet strawberries, but I wouldn’t have wanted to eat these popsicles without the sweetener. If you’re making these for very young kids who haven’t had sugar yet, then I’m sure they’d be happy with them. For the rest of us, I think a bit of sweetener is essential.
- Vanilla extract – you can omit this if you need to, but I like the flavor that it adds.
How to make them
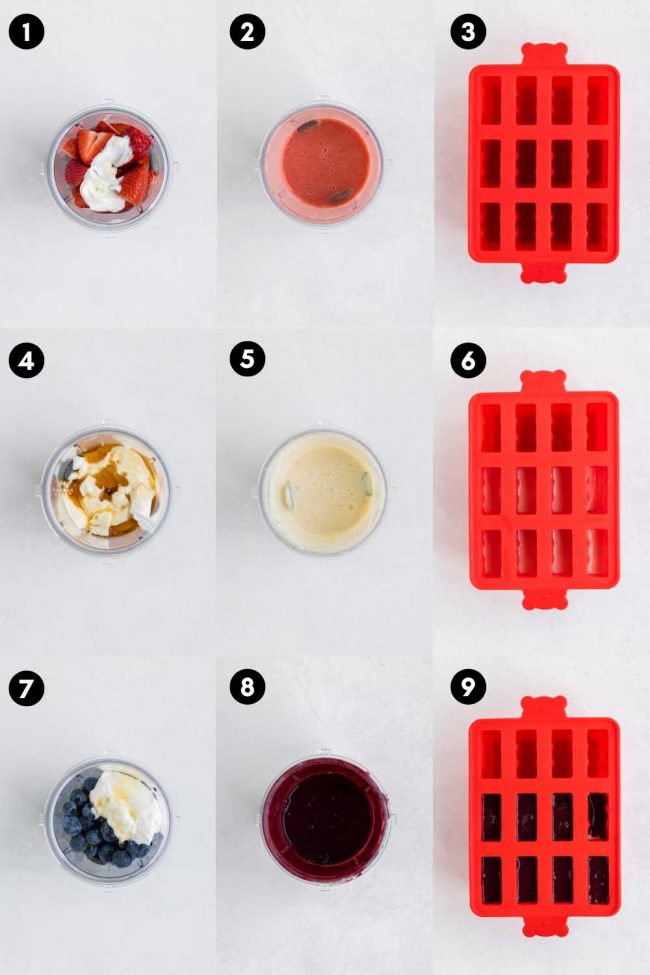
For the red and blue layers, you use a blender to puree the berries with yogurt, maple syrup, and vanilla. Make the red layer first, freeze for an hour, and then make the white layer.
The white layer has the same ingredients as the other layers – minus the fruit.
I didn’t have any issues with each layer not setting, but my photographer had issues with the white layer not freezing firm enough before adding the blueberry layer.
We’re not quite sure why. If you look at other red white and blue popsicle recipes, most of them call for 20-30 minutes of freezing time for the bottom 2 layers. One recipe said 45-60 minutes. This last batch you see here in the photos was after 2 1/2 hours of freezing the white layer.
She even bought a new popsicle mold to see if the silicone mold was the issue. It wasn’t. She also tried different brands of yogurt.
But that didn’t seem to make a big difference, either.
So it remains a mystery. She made them 3 times and I couldn’t ask her to do it a fourth time. And there’s no point in me testing them again because mine came out perfect the 2 times I made them when freezing the bottom 2 layers for 40 minutes each.
So you should just check on them. You don’t want any of the layers to freeze solid because then you won’t be able to get in the popsicle sticks.
The very first time I made them, I didn’t freeze the layers individually, and the result wasn’t pretty. I think the 3 distinct layers are part of the fun of these popsicles, so I recommend doing it properly and freezing the layers individually.
So after your white layer is ready, make the blue layer, put on the popsicle mold cover, add popsicle sticks and freeze 8+ hours.
I only needed 5 hours, but I’m saying 8 or more to be on the safe side.
Greek yogurt type
I’ve made these frozen treats with 8% Greek yogurt and a few different types of coconut milk yogurt which were around the same fat percentage.
The coconut yogurt ones didn’t taste coconutty at all which was a nice surprise. Different brands may yield different results, though.
I tried Trader Joe’s cashew yogurt during my trip in the US, and while I haven’t tested it in these popsicles, I think it’d be great!
You can omit the yogurt if you want, but then you might want to reduce the sweetener.
If you use sweetened yogurt, you can probably omit the sweetener. I would omit, mix it up, taste and add sweetener, if needed.
Sweetener type
You can use whatever you’d like! And in whatever amount you’d like.
I don’t recommend something like coconut sugar because that flavor doesn’t go well with berries.
And if you use honey, know that you’ll probably be able to taste it, which isn’t a bad thing! But a light maple syrup is definitely more neutral.
How to umold popsicles
Run warm water around the sides of the mold. See if you can pull them out. If you can’t, run more water around the sides.
You can also fill a bowl that’s big enough for your mold with hot water and dip the mold for 5 seconds, and then attempt to get the popsicles out. If it’s stubborn and feels a little stuck, drop it back into the water for another 5 seconds, and repeat this process until the popsicles come out.
Silicone molds are flexible, and you can peel them away pretty easily. So give it a try before using warm water.
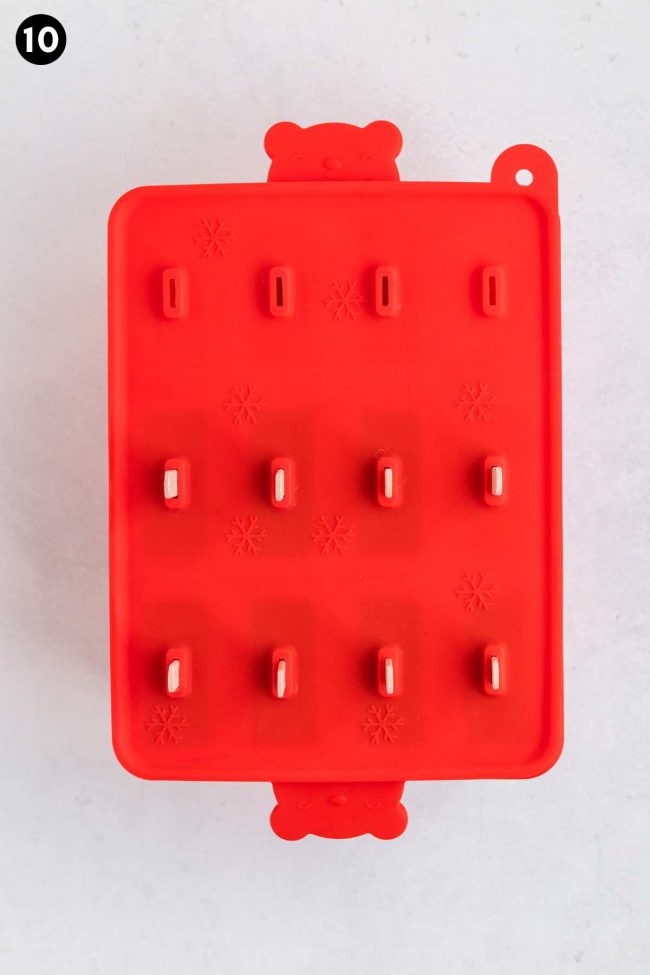
Popsicle mold capacity
I used 25 grams per color per popsicle. My photographer bought the same mold as me for her second and third batches, this Norpro Frozen Ice Pop Maker, and this is what it looked like when she used 25 grams.
It was a bit too much. So then she used a little less for the other popsicles.
Amazon says that mold makes 10 3oz / 90ml popsicles, about 3. 5″ x 2″ x 1″ in size. I bought mine 13 years ago, so maybe mine was slightly larger? I’m not sure.
I recommend pouring 22 grams of the strawberry mixture into 1 popsicle cavity. Does it look good? Or does it look quite a bit less than 1/3? Then add more.
What to use instead of molds
If you don’t have a popsicle mold, you can use wax-coated paper cups. Follow the directions below, eyeballing about how much of each color to add.
When they’re frozen, you can submerge them in a bowl of hot water to easily slide them from the cups.
How to store
You can individually wrap the popsicles in plastic wrap to keep them from freezing together, and then place them in a freezer bag or airtight container.
They’ll stay good for quite a while, but the longer they’re in the freezer, the higher the chance of freezer burn. If that happens, I just run cold water over the popsicle. Then it looks like a fresh popsicle!
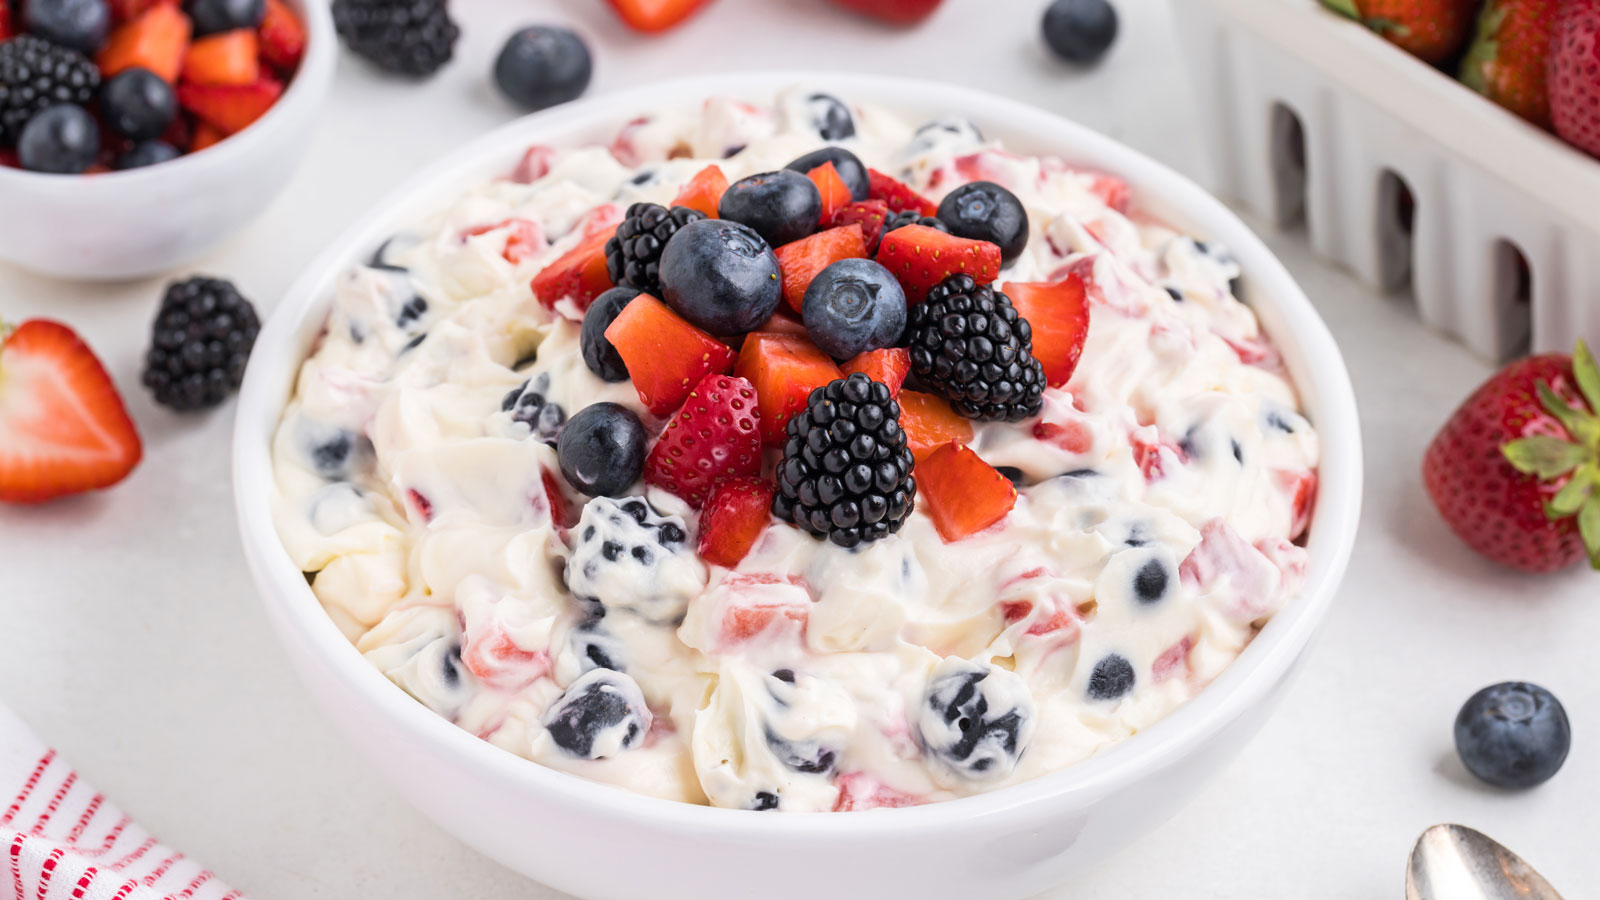
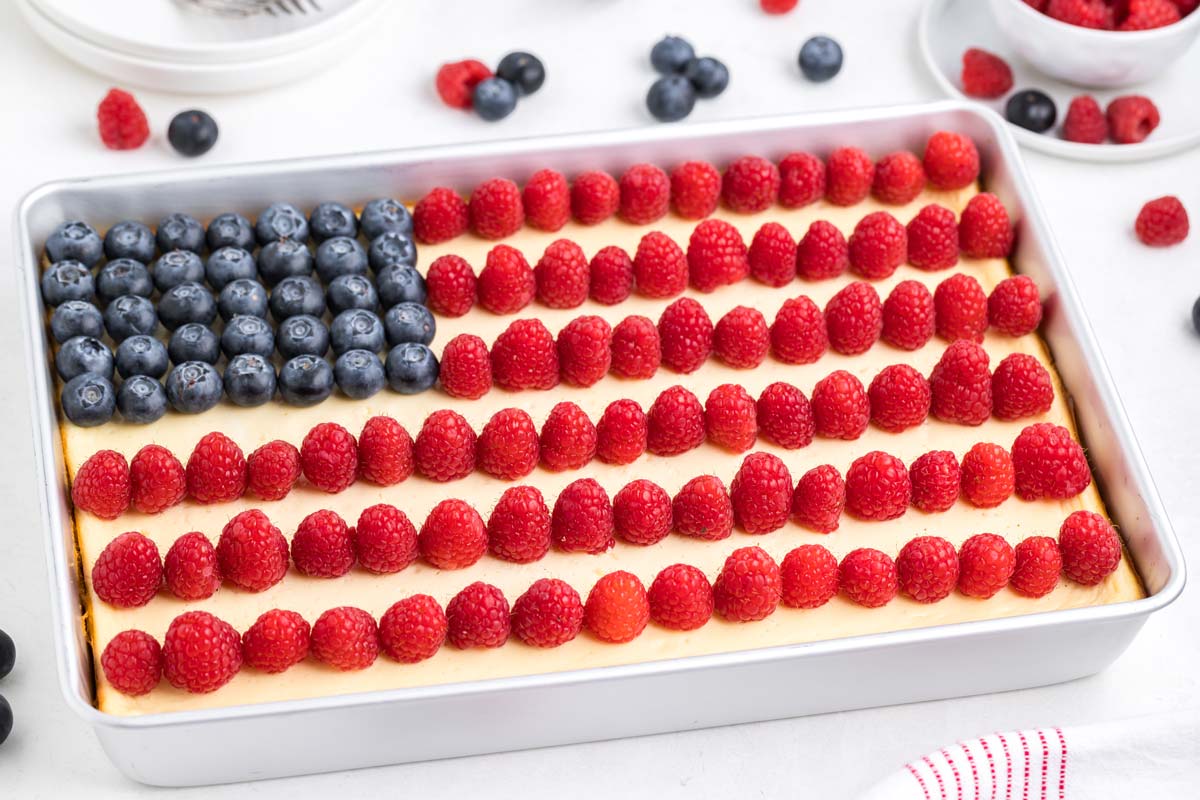
Other July 4th desserts
This Red White and Blue Cheesecake Salad is PERFECT for people who don’t have time or don’t want to fuss around with freezing individual popsicle layers or with decorating!
Although I have to say that the bars below are also good for people who don’t like decorating. You do have to place the berries in lines, but I’m pretty ungifted with decorating things, and even I can do it. 😉
The cheesecake salad recipe is naturally gluten-free, and there’s also a keto option that’s surprisingly tasty. This is coming from someone who doesn’t like keto sweeteners!
These Red White and Blue Bars are cheesecake bars with a graham cracker crust. They can be made with regular, whole wheat graham crackers or gluten-free graham crackers.
I hope you’ll enjoy these popsicles if you try them! If you make them, I’d love to hear your thoughts below in the comments. Thank you!
❀
- Prep Time:
- Cook Time:
- Ready in:
- Yield: 8 popsicles
Ingredients
- 1 cup (170 grams) strawberries
- 1 tablespoon (14 grams) plain Greek yogurt or coconut milk yogurt for paleo/vegan
- 2 tablespoons (40 grams) maple syrup
- 1/2 teaspoon vanilla extract
- 2/3 cup (160 grams) Greek or coconut milk yogurt
- 3 tablespoons (60 grams) maple syrup
- 1/2 teaspoon vanilla extract
- 1 cup (146 grams) blueberries
- 3 tablespoons (42 grams) Greek or coconut milk yogurt
- 1 tablespoon (20 grams) maple syrup
- 1/2 teaspoon vanilla extract
Strawberry layer:
White layer:
Blueberry layer:
Directions
- Use a blender to blend everything for strawberry layer. Pour 22 grams (4 tsp), straight from the blender, into 1 popsicle mold cavity. Does it look about 1/3 of a popsicle? If so, use 22 grams for all the other layers. Does it look quite a bit less than 1/3? Then add more than 22 grams. I used 25 grams (a bit more than 1.5 tbsp) per popsicle, but my photographer couldn’t fit in the same amount.
- Freeze for 40-60 minutes. Not so much longer because it shouldn’t freeze solid. The strawberry layer and the white layer shouldn’t be frozen solid before putting in the popsicle sticks, or else you won’t be able to get the sticks in after pouring in the blueberry layer. The strawberry layer should be hard enough that the top of the layer can withstand pouring the white layer over it. If you need more time, freeze longer.
- Do the same with the white layer. You can just mix the white layer ingredients together in a bowl or rinse out the blender jar and blend the white layer in there. If 40 minutes isn’t long enough for it to freeze (it was for me), then freeze longer. My photographer needed 2 1/2 hours (we’re not sure why – see post for more info).
- Blend the blueberry layer JUST before pouring into the molds. It gets weird and gelatinous if it sits while you wait for the white layer to freeze. Blend the blueberry layer and pour over the white layer.
- Put the top of the popsicle mold on, and stick the popsicle sticks through the slots.
- Freeze for 8 hours or until totally solid.
- If they don’t come out easily, you can pour warm water around the sides and bottom of the popsicle mold to help loosen them.
- You can individually wrap the popsicles in plastic wrap to keep them from freezing together, and then place them in a freezer bag or airtight container. They’ll stay good for quite a while, but the longer they’re in the freezer, the higher the chance of freezer burn. If that happens, I just run cold water over the popsicle. Then it looks like a fresh popsicle.
How to store:
Notes
- f I used defrosted frozen strawberries and blueberries. They should be properly defrosted. If you use partially defrosted berries, then it’ll be hard to pour the mixture into the popsicle cavities. It just comes out in a big clump, making it messy. You can also use fresh berries.
- If you’re paleo or vegan, make sure you use a compliant coconut milk yogurt. I tested these with coconut milk yogurt with great results, but think cashew milk yogurt would also be great.