

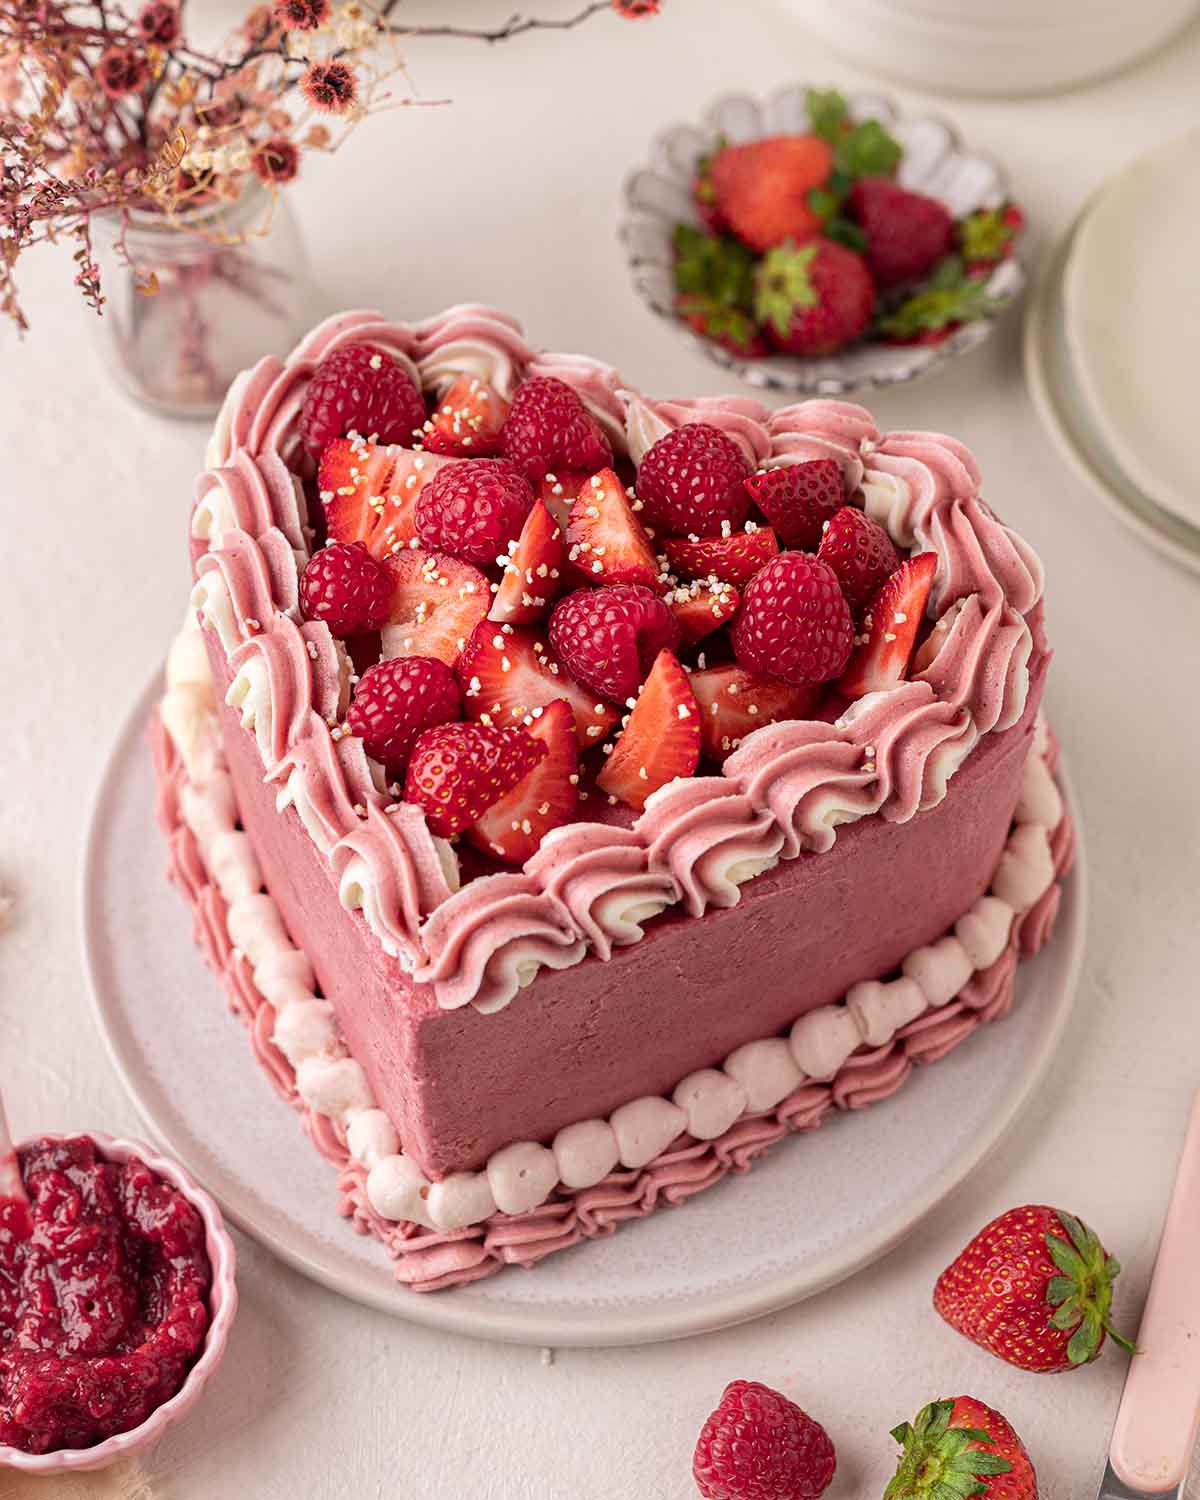
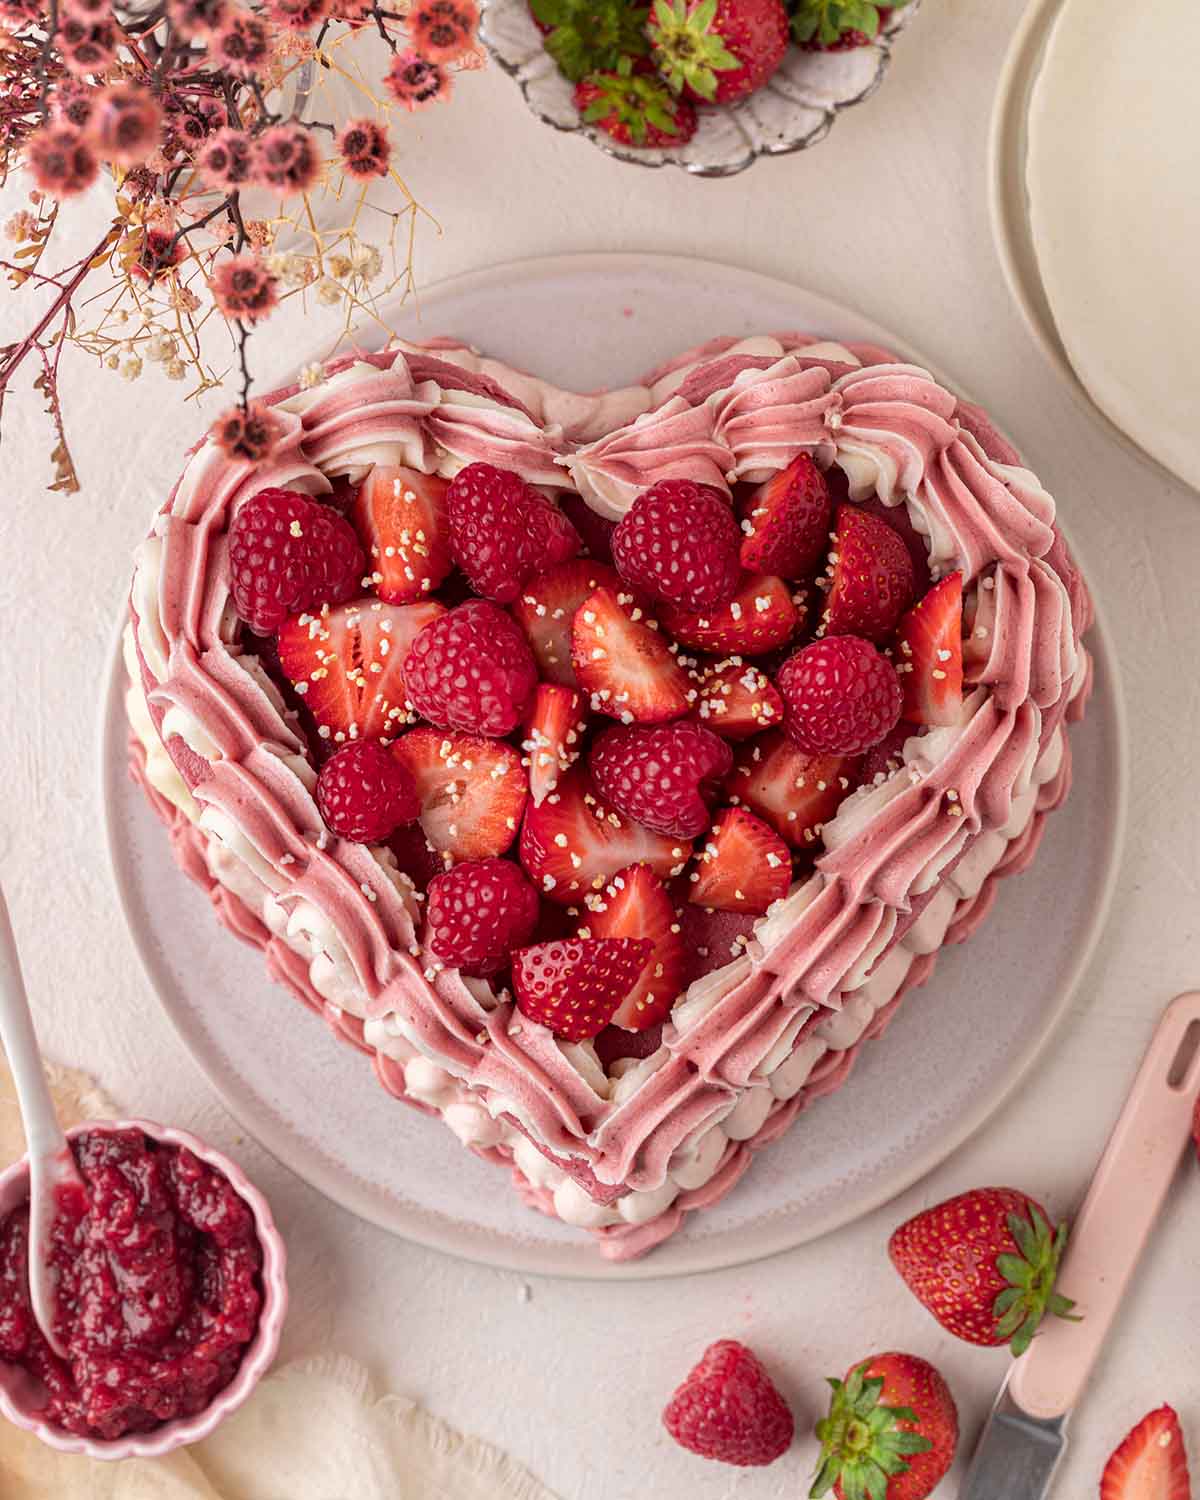
This tutorial shows how to make a heart-shaped cake using round cake pans (no special cake pan needed). The cake consists of vegan berry cake layers, jam filling and berry buttercream. And it’s perfect for Valentine’s Day, Mother’s Day or any special celebration.
Making the cake layers
First, you need to make the cake layers for your heart cake!
I used a simple one-bowl cake recipe, but you can use any recipe you want. Other complementary flavors include my vegan red velvet cake and vegan strawberry cake. Just scale down the recipes if you’d like a 6-inch cake!
The vegan berry cake bakes pretty flat, especially if you use cake strips. However, if your cakes dome in the oven, trim off the tops using a serrated knife.
The full list of ingredient quantities and instructions are in the gray recipe card at the bottom of this post.
How to make a heart-shaped cake
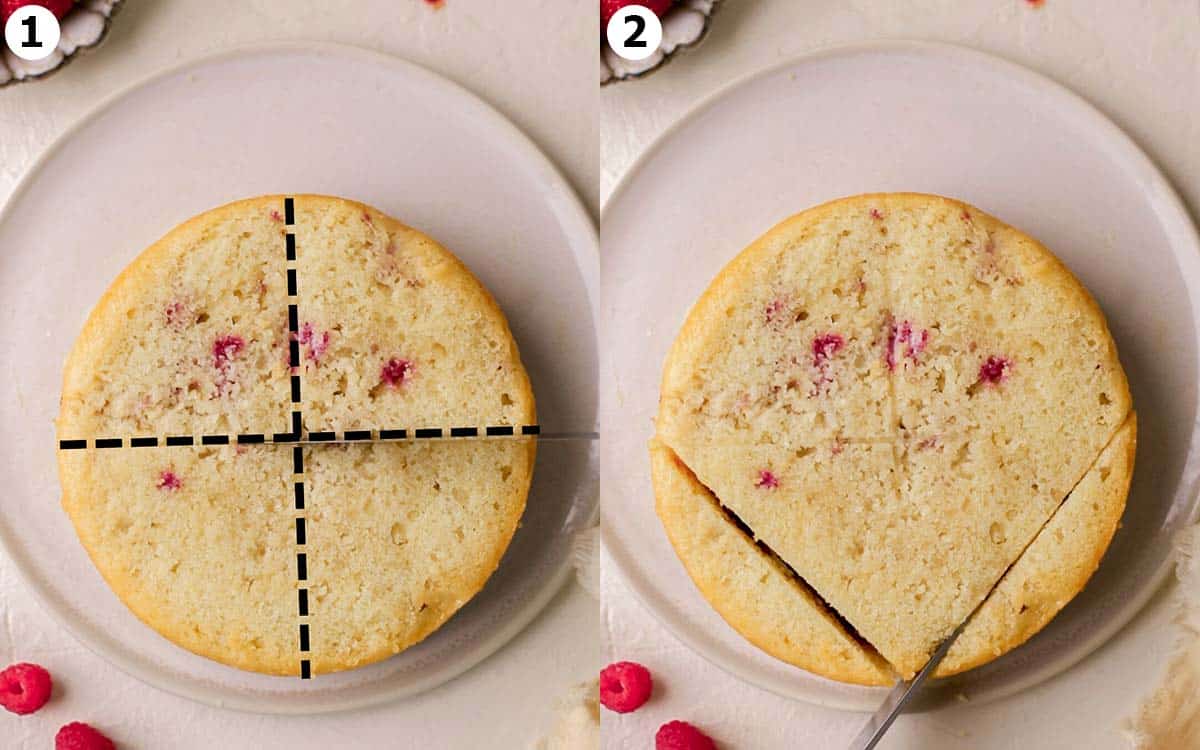
This method for making a heart cake is simple and saves you from guessing and eyeballing how to carve the shape of a heart.
Once your cakes have cooled, use the blunt side of a knife to gently score your two cakes into quarters (Image 1). Then use a sharp knife to cut from one ‘corner’ to the other, for half of the cake. This will create an angle in your cake, which will be the bottom of the heart shape (image 2).
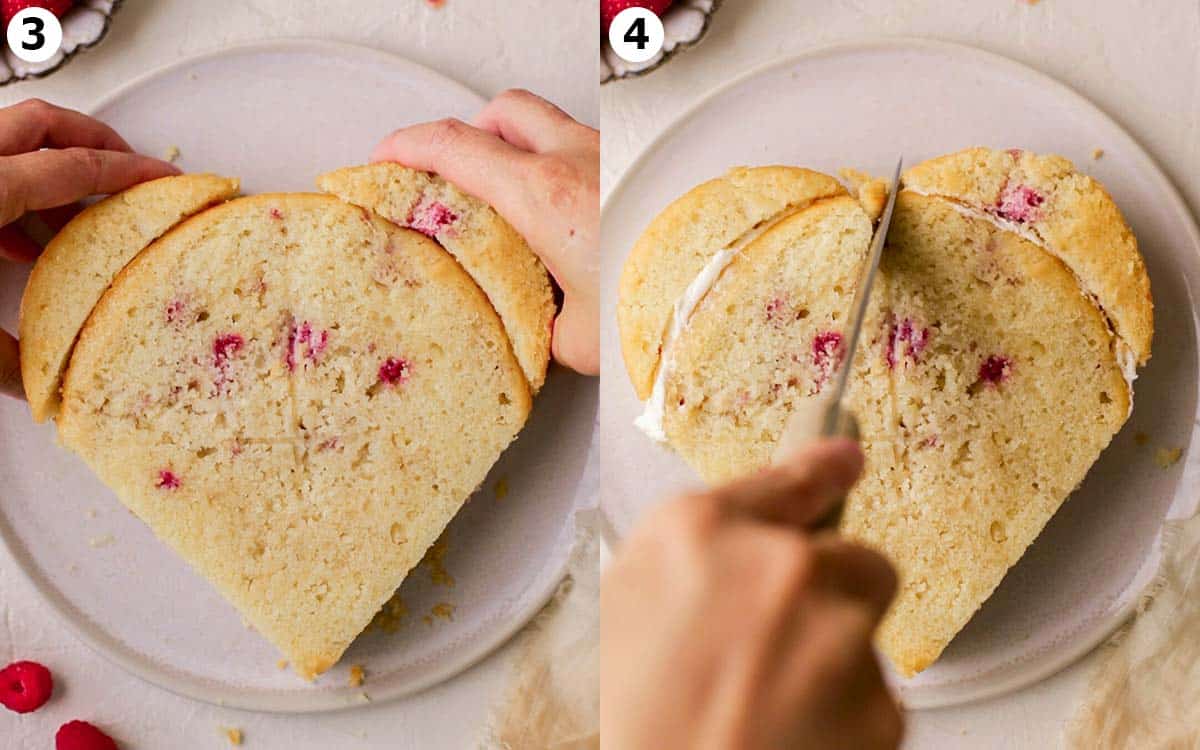
Then, place the two cake ‘segments’ on the other side of the cake, to form the rounded top half of the heart shape. The cake ‘segments’ will flex into shape but don’t worry if they crack a little. Use a little frosting to ‘glue’ the cake segments onto the cake, for just this layer (Image 3).
Then cut a little triangle at the top of the cake to make the heart shape clearer (Image 4).
Stacking the heart-shaped cake
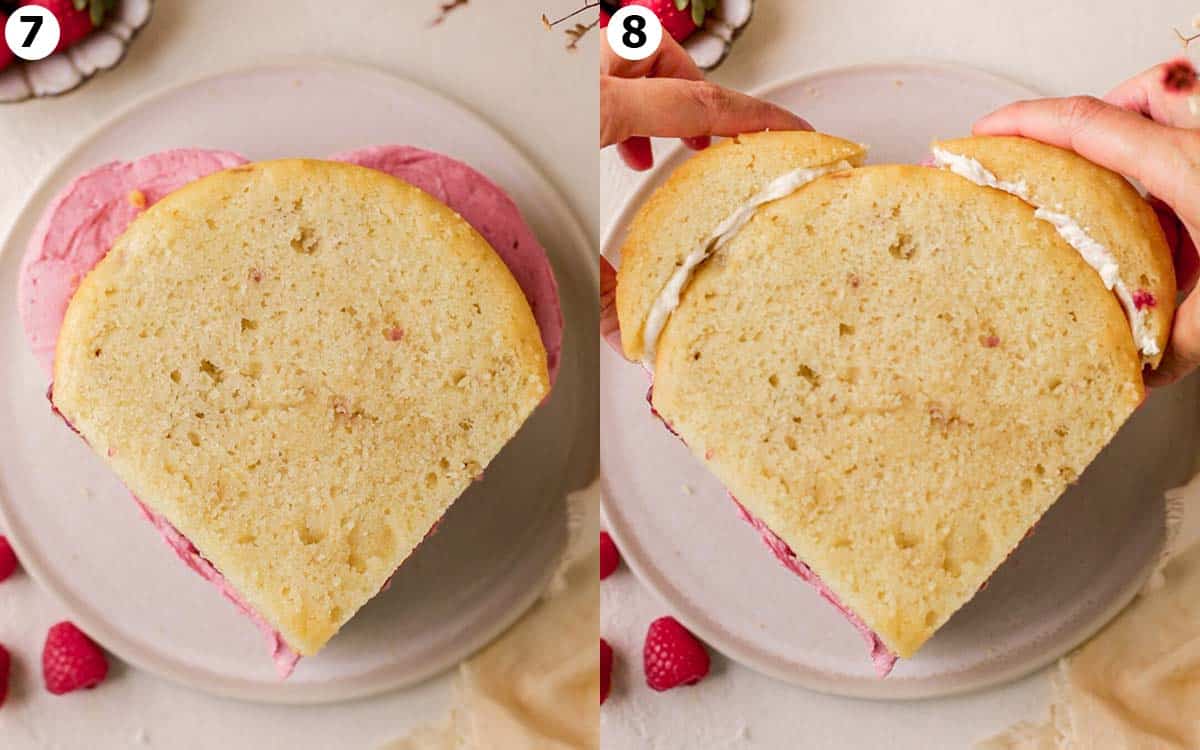
If you don’t want a jam filling, spread about ¾ cup of frosting on top of your bottom cake layer and sandwich it with the remaining cake.
If you’d like a jam filling, I recommend spreading a thin layer of frosting on the cake. This will prevent the cake from soaking in the jam!
Then pipe a dam of frosting around the border of the cake. This prevents the jam from squishing out of the cake when you layer it (Image 5). Finally, spoon the jam in the center and smooth it out (Image 6). Don’t overfill your cake with jam, otherwise the layers will slide around.

For the second cake layer, simply place the remaining cake on top. Then repeat the previous steps to make your heart shaped cake.
Decorating a heart cake
First, I recommend crumb-coating the cake, where you spread a thin layer of frosting on the top and sides of the cake. This traps the crumbs and raspberries in, so they don’t appear on the final frosting (Image 9).
The frosting sometimes doesn’t ‘stick’ to the raspberries on the surface of the cake so just do what you can. After you’ve crumb-coated your heart cake, chill it in the refrigerator for 20-30 minutes or freezer for 10 minutes or until the cake is dry to the touch. This is important if you’re making the cake on a warm day!
Finally, spread a thicker layer of frosting around your cake. And use a piping bag with a star nozzle to pipe a shell border or decorations on your cake, as desired.

Customizing the decorations
If you don’t want a jam filling, frost the cake as above, except for Image 6. Alternatively, you can stack the two round cake layers and cut the cake into a heart shape while it’s already layered.
For different colored frostings, make a simple vanilla frosting then divide it into separate bowls. Add your desired amount of food coloring (or natural fruit powder) into the separate bowls and mix until combined.
If you want to use natural fruit powders to color your frosting, keep in mind that it will darken in color over time especially if you store the heart cake in the fridge. Start with less powder and add more later, if needed. You can also flavor your frosting with strawberry puree (see my strawberry frosting recipe).
You can also decorate your cake with:
- Sprinkles
- Mini pink or red hearts using leftover frosting
- Whipped dairy-free cream (on top)
- Chocolate shavings or chocolate ganache

Making the cake in advance
The cake layers can be made up to 3-4 weeks in advance. Store the undecorated cakes in food wrap, in a small airtight container in the freezer. Allow the cakes to thaw at room temperature (they can still be cold to the touch), then decorate as needed. It’s easier to decorate cold cake layers!
Alternatively, make and decorate the heart cake a day in advance. Store the frosted cake in an airtight container at room temperature away from sunlight.
You can also make the frosting ahead of time. Store it in an airtight container in the freezer for up to 3 months or 1 week in the fridge. Let the frosting come to room temperature and mix a few times before using.

More romantic vegan dessert recipes
Or check out my roundup of the best vegan Valentine’s Day desserts.
Follow Rainbow Nourishments on Instagram, Facebook, TikTok and Pinterest, and subscribe via email to receive all of our latest recipes!
Heart Shaped Cake (vegan) + tutorial
This tutorial shows how to make a heart-shaped cake using round cake pans (no heart cake pan needed). The cake consists of soft vegan berry cake layers, jam filling and berry buttercream. And it’s perfect for Valentine’s Day, Mother’s Day or any special celebration.
Servings: 8
Ingredients
Quick Raspberry Jam (or use store-bought jam), optional
Pink Buttercream Frosting (note 2)
Prevent your screen from going dark
Instructions
To make the cake:
-
Preheat your oven to 180°C (355°F). Line 2 x 15cm (6-inch) round cake pans with parchment paper.
-
Add all the dry ingredients to a large bowl and whisk until there are no lumps. If desired, rub the sugar with the lemon zest for more lemon flavor and color. Add all the wet ingredients (except the raspberries) and whisk until just combined. Add the raspberries and gently fold through.
-
Divide the cake batter between your prepared pans. Make sure the raspberries are evenly distributed and haven’t clumped together. Firmly tap the cake pans on the kitchen bench to remove any big air bubbles.
-
Bake the cakes for 43-48 or until you can insert a toothpick in the middle and it comes out with no wet batter on it (a few moist crumbs are fine).
-
Allow the cakes to cool in their pans for 10 minutes then transfer them to a cooling rack to cool completely.
Make the quick jam (optional):
-
Add the raspberries, sugar and a dash of water to a small saucepan over medium heat. Cook for 5 minutes and mash the berries with the back of a fork.
-
In a small bowl, combine the cornstarch with a dash of water and mix. Add the cornstarch slurry to the raspberry mixture and cook until thickened. For a thicker jam, cook for longer, or for a runnier jam, add a dash of water. Set aside to cool completely.
Make the buttercream:
-
Add the butter to a large mixing bowl (if using an electric mixer) or the bowl of a stand mixer. Whip until light and fluffy.
-
Add the powdered sugar, berry powder or food color and vanilla to the bowl. Whip the mixture on low speed until combined. Increase the speed to high and beat until light and fluffy. Add a dash of milk for a softer frosting, or more color as desired. (note 3 about using natural food powders)
Assemble the heart cake:
-
If your cakes have any domes, trim them off with a serrated knife. Using the blunt side of a knife, gently score the surface of the 2 cakes into quarters. Then use a sharp knife to cut two ‘segments’ off each cake (refer to the images in the post). This will be the bottom of your heart cake.
-
Place the first cake layer on a serving plate or cake board. Use a little frosting to stick the two cake ‘segments’ to the other side of the cake to form the top of the heart. Trim the cake as needed.
-
If you want a jam filling, spread a little frosting on the surface of the cake layer. Pipe a ‘dam’ of frosting on the border of the cake and spoon the jam in the middle. If you don’t want a jam filling, top your cake layer with about ¾ cup of frosting.
-
Place the remaining cake layer on top of the first layer. Repeat the process with the cake ‘segments’ to form a heart shape and trim as needed. Crumb coat the heart cake by spreading a thin layer of frosting on the sides and top. Chill the cake in the fridge for at least 20 minutes or until the frosting is dry to the touch.
-
Add a thicker layer of frosting to the heart cake and smooth it with an offset spatula or cake scraper. Use a piping bag with a star or circular piping tip to decorate the rest of the heart cake. Just before serving, add fresh berries on top of the cake.
-
Store the frosted heart cake in an airtight container at room temperature for 1 day or in the fridge for up to 3 days. If it’s a hot day, store the fridge in the fridge. Let the cake come to room temperature before serving.
Notes
- For a different cake size, you can scale the recipe by tapping on the number next to ‘Servings’. For an 8-inch cake, scale up the recipe to 10 servings. For a 4-inch cake, scale down the recipe to 4 servings.
- Or you can use my strawberry frosting that’s flavored with whole strawberries. A cream cheese frosting will be too soft for this cake.
- If you’re using a natural powder such as raspberry, strawberry or beetroot powder in your frosting, they will darken over time especially when you refrigerate the cake. It’s best to start a little powder then add more as needed.
This post may contain affiliate links. As an Amazon Associate, I may earn a small commission from qualifying purchases at no additional cost to you.